

Welcome to the last post Jess from Elven Garden Quilts and I are doing in the Decipher Your Quilt series. The process of putting your quit blocks together to make a quilt is often quite easy but not always. Today we will both share different approaches that we use to build a quilt out of our blocks - remember to check out Jess's post here.
There are several ways to arrange blocks in a quilt. There are advantages and disadvantages to each approach and often the nature of your blocks has a lot to do with which choice is best for your quilt.
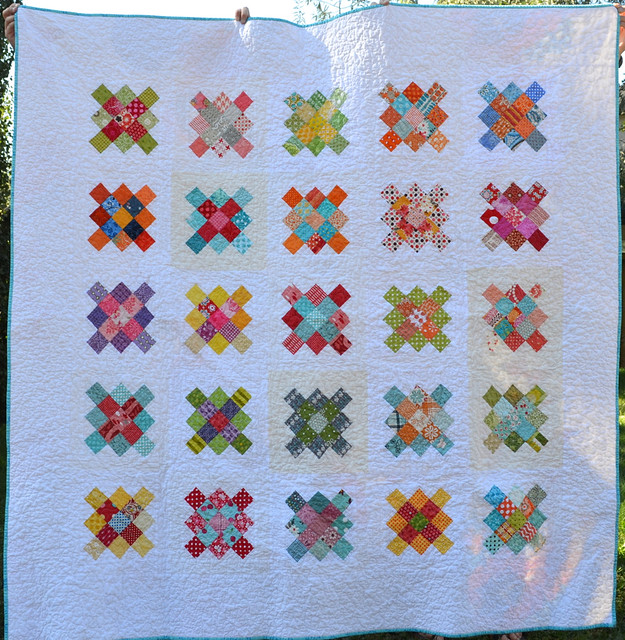
1. Lay the blocks out in a grid and sew them together.
- This is a very common approach to a quilt. It works well with blocks that are all the same size or where the blocks are sized so that they will fit easily together.
- For example, if we are putting together rows of 12" blocks, we can also put four 6" blocks in one of the spots for a 12" block. As 6" is half of 12" it is easy to fit the smaller blocks of this size into the grid.
- A simple grid often allows the secondary pattern created by the blocks to emerge.
2. Lay the blocks out in a staggered manner - like bricks are laid.
- At the uneven edges you can either cut the blocks in half or fill in the blank areas with a different block or a background piece.
- This approach works best if the blocks are all the same size or made so that the sizes are multiples or fractions of each other.
- Staggering the rows so that they are not on an even grid does allow you to also use blocks that have vastly different widths without difficulty.
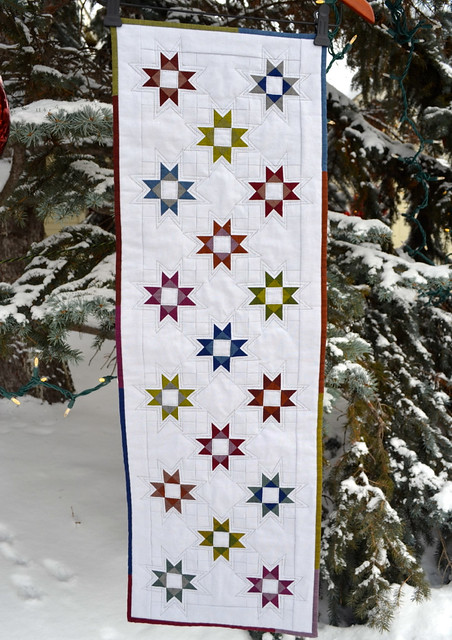
3. Add sashing between the blocks.
- The width of the sashing can be all the same sized or it can be different sizes in different rows or columns.
- Sashing is the greatest quilt math invention I think because it can solve many problems.
- It can create background between evenly sized blocks.
- It can save the day when your blocks, although intended to be the same size are not, especially if you cannot trim the blocks themselves as there are points or other design features that would be lost in the trimming.
- You can fit together blocks with small variations, or large differences using this sashing.
- Add a piece of sashing to each block with a background fabric and then trim the sashed blocks to the identical same size. Trimming the sashing will not impact on the points or other features of the actual block but when all the sashed blocks are trimmed, you can now place them in an easy grid.
- A note here about how big to make the sashed blocks.
- Keep in mind the size of the quilt you are hoping for. If you want, for example, a quilt that is 60" wide, you can make it 5 x 12" blocks wide or you can make it 4 x 15" blocks wide, so you could sash you 10" blocks up to 12" or 15" or your 12" blocks up to 15" or 20". 12, 15, or 20 are all easy factors of 60. Use the same approach for other sized quilts.
- If you cannot easily make the blocks fit your planned quilt size, plan them to finish in a smaller size and then add borders to the quilt to bring it up to your planned finished size.
- If you have a variety of sized blocks, measure your largest block and determine the minimum width of the sashing for it to get to an overall sashed block size you want. Add sufficient sashing to the remaining smaller blocks to reach that larger size.
- Regarding how wide to make the sashing, if you are sashing around all the edges of your block (which is not required but often is the plan):
- figure how much you need to add to your block - for example if you are adding 2" to your 10.5" unfinished block to make it 12" finished size, then you need to divide the total sashing required, in this example 2" by 2 so that you can sash all sides. In the example, you need 2" divided by 2 = 1" sashing on each side. Now don't forget to add your seam allowances too, so add 1/2" to that 1" sashing when you cut it.
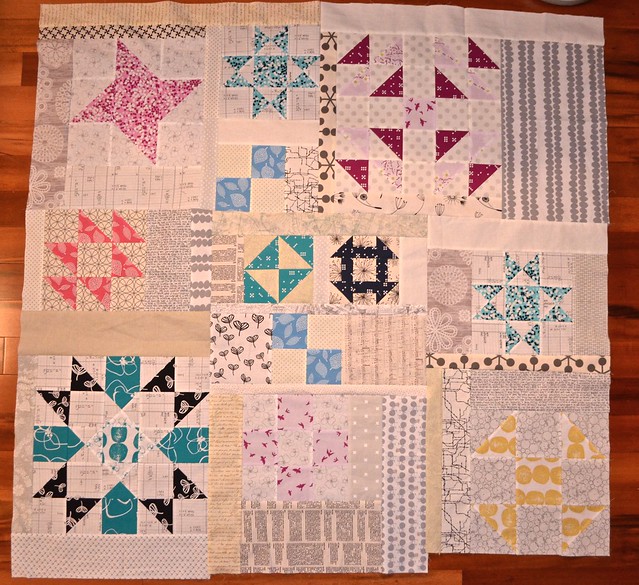
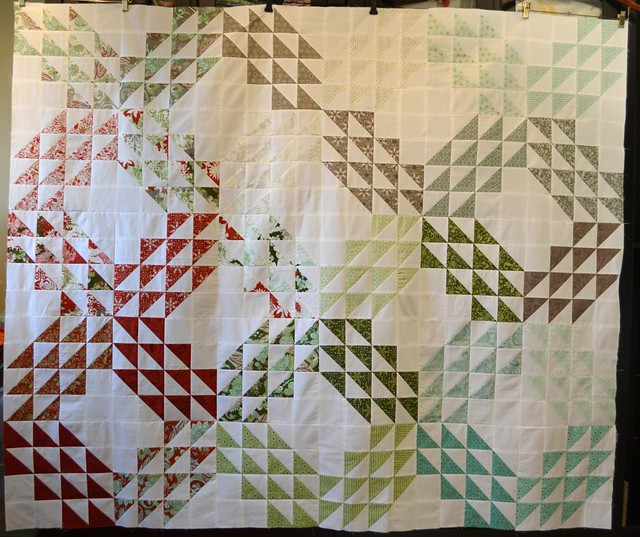
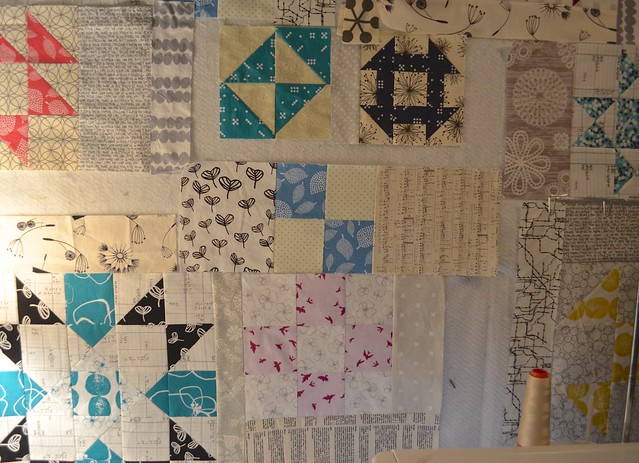
4. Lay the blocks out in a random manner and fill in the spaces.
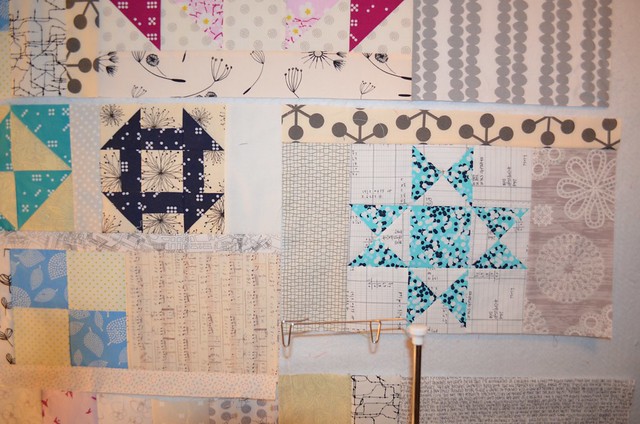
- This kind of random improv layout is beautiful and so fun to do. I decided it was the approach I would use to put together the various blocks I had made during the Decipher Your Quilt series.
- It is best to just do this, don't spend a lot of time analyzing each step. I'll show you my process, but your own approach can be whatever works for you.
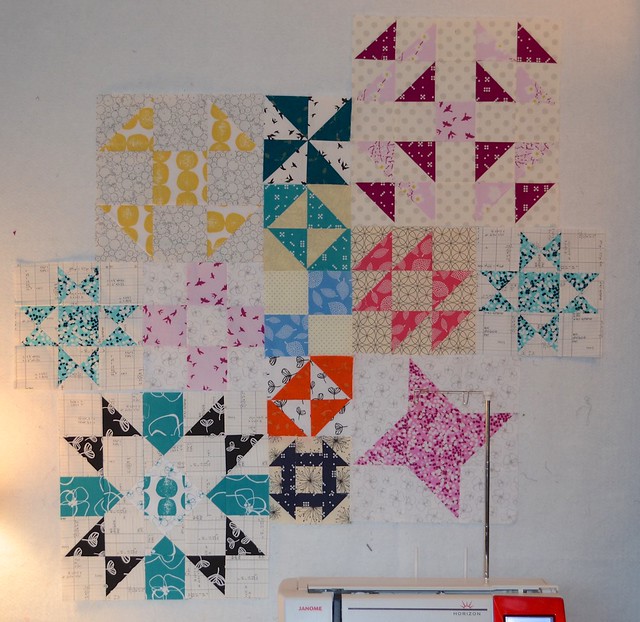
- Try different layouts of your blocks on your design wall or floor.
- Once you have a pleasing layout, get some scraps or pieces of your background fabric. It could be a single coloured solid or a bunch of different prints. I decided to use low volume prints.
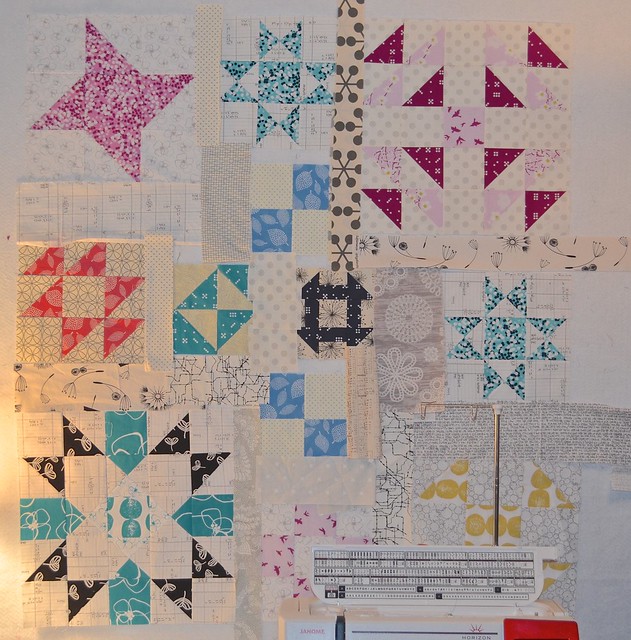
- I got started by just putting some scraps of the low volume prints into the design. As I needed to I added space between the blocks.
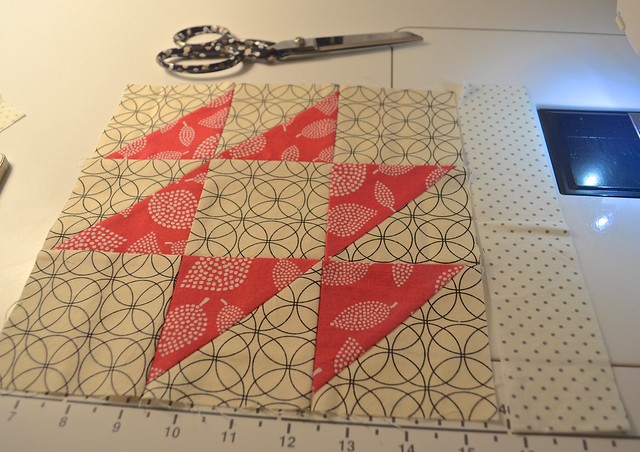
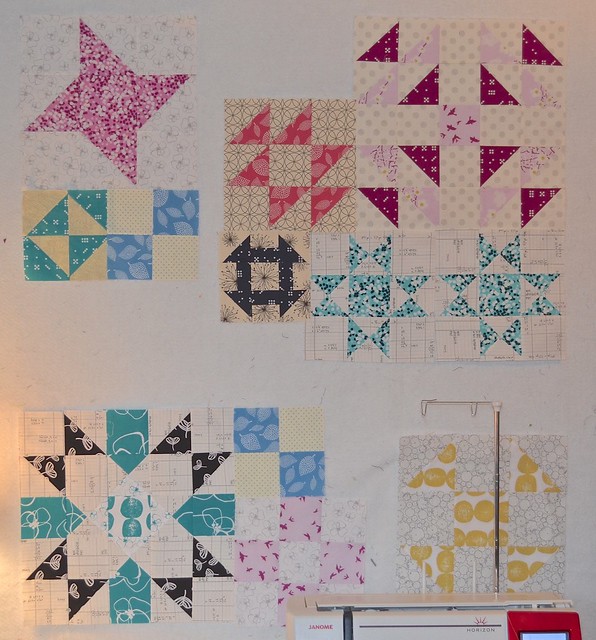
- Slowly, I started piecing bits of the background to the blocks and pressing and trimming them.
- As I went, I added more background.
- As I trimmed off background fabrics, I used the leftovers in the design.
- I am, by nature, a careful thinker. For this project, I made a rule that I could not spend more than a minute looking at where I placed a background piece and moving it if need be. Otherwise I would never get even one piece sewn in. I just trusted that it would work out.
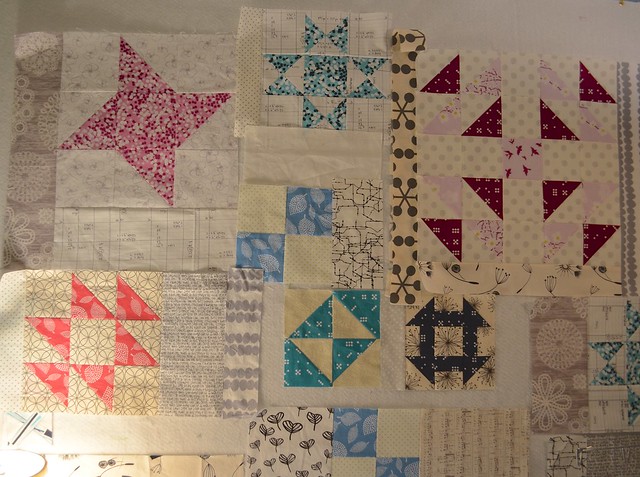
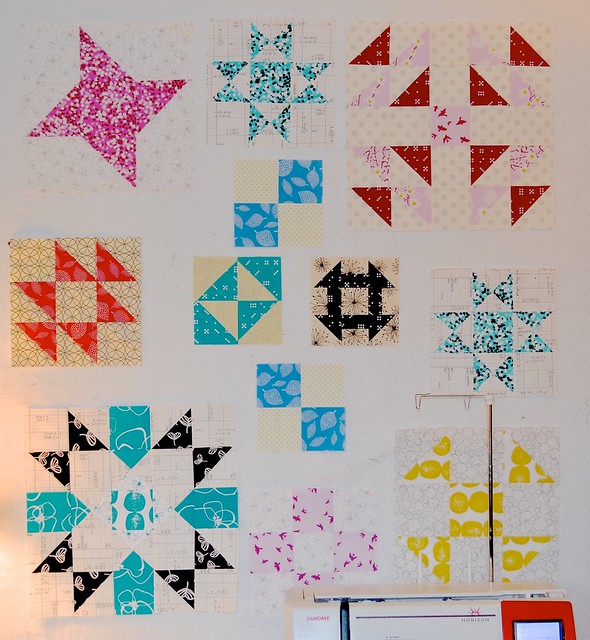
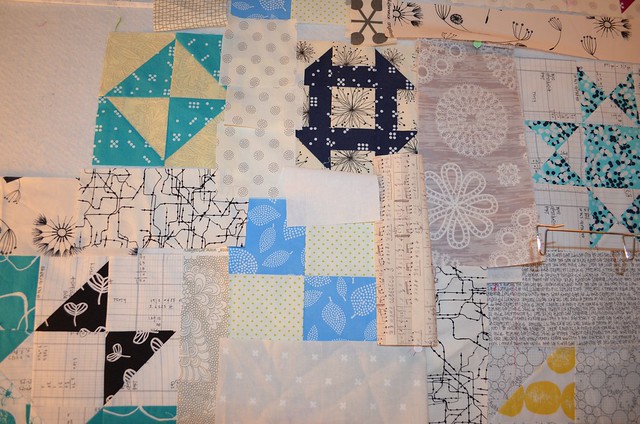
- Eventually I sewed background pieces to background pieces too, and start to make "blocks" with incorporate the quilt blocks and background bits.
- Y seams and partial seams are truly no big deal, but you can avoid them by working on making the "blocks" line up along even lines. Just add or trim off some of the background to achieve this.
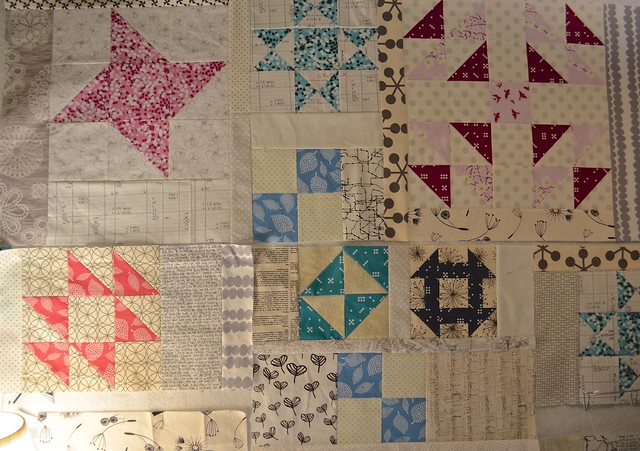
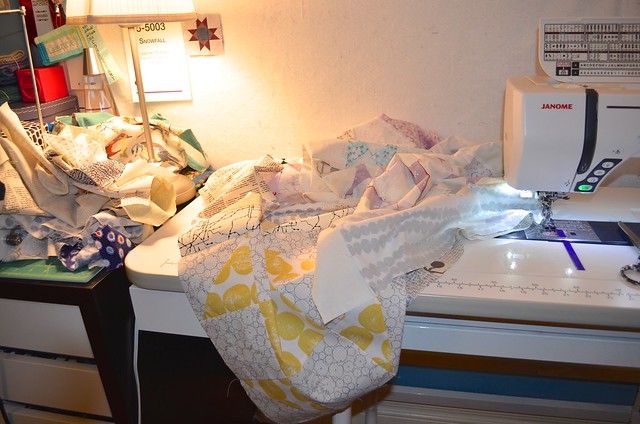
- Pressing as you go makes this approach work out much nicer. Each piece is not really squared up perfectly so if you don't press there is a greater risk of creating bubbles that don't lie flat.
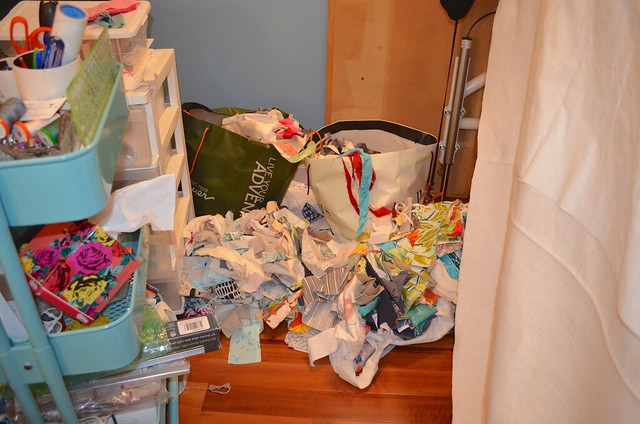
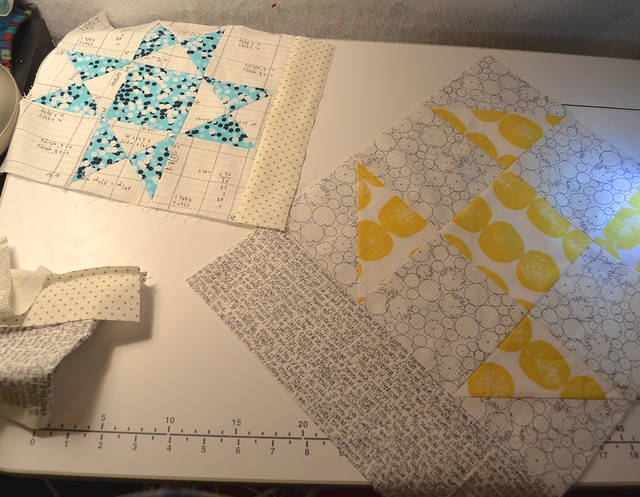
- My other rule for this particular project was that all the low volume background pieces needed to come from the scrap bags. It's messy but fun to work this way.
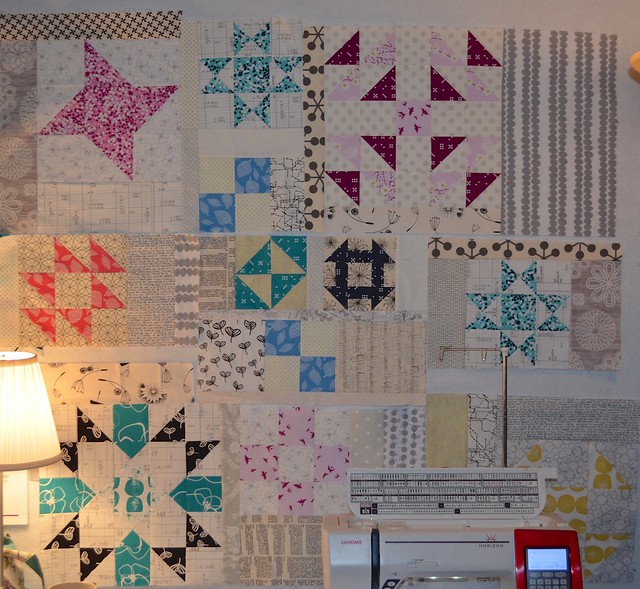
- There is the top when I stopped. It is a good size, about 50" x 50". I think I will add some edges to at least two sides to bring it up to a 60" square lap size quilt. I realized that I needed some time away from this project before I decided on the size and the outside edges.
- I have to say I really want to do this again, it was fun and relaxing and, as I expected, it worked out nicely without any worrying, measuring or analyzing.
Don't forget to check out Jess's approach too, over at Elven Garden Quilts.
And with that, Jess from Elven Garden Quilts, and I are declaring the Decipher Your Quilt series completed. We hope you have learned to be the boss of your quilt, and that we have given you some of the skills you need to make the quilt as you imagine it, resizing and designing blocks as you go. The various posts are all linked on my Decipher Your Quilt page - go here for reference in the future. Let me know if you have any questions.
Best,
Leanne
9 comments:
All great tips and advice. Thanks for sharing your process on the random layout. I'd like to try it sometime. Thanks to you and Jess for the whole great series too. Very useful reference tools for all of us.
I've loved reading these! Thanks for the great info!
Nice series - thank you. It was interesting to read about your process with your randomly placed blocks. It's looking terrific.
Great tutorial! Informative and a wonderful read! Thanks for sharing all that great info, and the pix make it even clearer! I'm visiting from the Northumberland Shore in Nova Scotia on the Sew Sisters blog hop!
I enjoyed reading this. So informative.
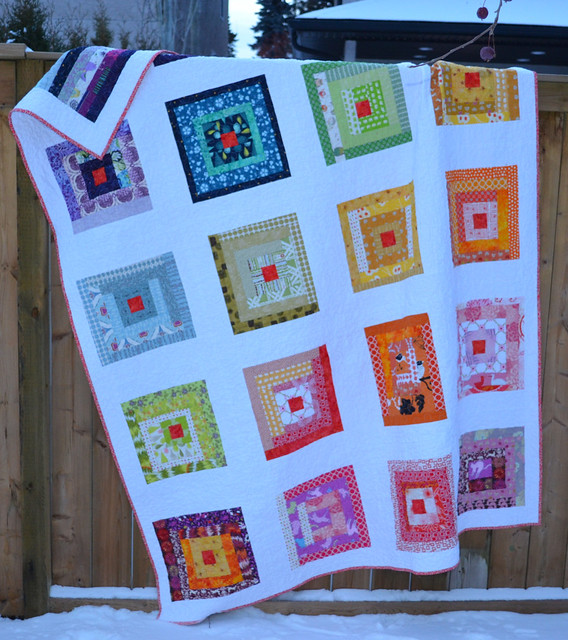
Thank you for taking the time to help us! I really really love the floating log cabins - great strategy for not having to fret over different-sized blocks.
excellent post Leanne I can see my self returning again and again and again as there is so much that I will gain from it
I do love on point as well though that is just a different grid and I'm glad you enjoyed the improv style of putting blocks together as that's where I'm going with that scraptastic sampler if you keep going??
I really like the one minute rule - there really is a danger of over thinking things!
Post a Comment