Monday, June 30, 2014

Breathe - just enough to show she's done


There are no quilt holders about tonight, and there were two rainstorms already too, which meant terrible light (and as I write this the third storm is starting. I love the sound of the heavy rain, in part because we don't have rain that often, instead we have snow but rain means clouds). So I am stopping in here with this iPhone photo of Breathe to show she is all done - bound, ends mended, washed and dried. In time to claim her as my June finish for A Year of Lovely Finishes.

But you shall have to wait a day or two for the proper Ta Da post, until I can get the photos this quilt deserves. I am quite smitten with her.

A Lovely Year of Finishes 

 I'm off to link up with Shanna and Melissa before it's too late. Oh and don't forget it is the end of Q2 of the FAL too, I think that you have a week to get your last minute finish in for that too - I don't want to be the only one rushing to finish one more on the list.

Best,

Leanne

More on Canvas, and a little quilting


My friend Cindy, made these wonderful picnic napkins with my Canvas pattern and these colours and prints are so exactly Cindy's style. I can just see her using them when she is off in her camper in the wilds of Ireland. It's time, I think, for me to make some Canvas napkins too.

Cindy showed her napkins off today on her blog as she officially announces that Canvas is available in her shop, Fluffy Sheep Quilting. Thank you Cindy for supporting my pattern, I am starting to feel like a "real" designer. Canvas is the first available pdf pattern in Cindy's shop, I am betting there will be more patterns from others there soon.


Edited:  I am dawdling over my breakfast and just saw this beautiful Canvas mini on Mary's blog, Fairly Merry, so I thought I would share it today too. I love the colours and the quilting, it sort of sums up how summer feels to me.

Michael Miller fabric challenge fabrics

Over the weekend I spent a lot of time working on quilting but only have little to show off today. I did pull out and pre-wash the Michael Miller fabrics that I received from the Modern Quilt Guild for the Michael Miller fabric challenge. My EMQG is participating in this challenge, and I might just make it to the next meeting so I wanted to have my project to show. Oh, and it is due to be posted at the MQG website a week or so before the end of this month.

Improv diamonds

I wanted to do something improv again for this fabric challenge. And everywhere I looked on the internet, folks were making diamonds. So improv diamonds it is. These are fast and fun to put together.

Improv diamonds

This is where I ended up at the end of my sewing time yesterday. I have since rearranged them several times but the overall plan is to arrange them in a sort of diamond shape. I think this may be enough diamonds and now the process of puzzling them together will begin.

I will spare you yet another in progress photo of Breathe but I did spend a few hours hand stitching her binding down. Now all that is left is mending in the thread ends, of which there are a lot more than I had hoped for. If I finish her off later today she will be ready to claim as a finish for A Year of Lovely Finishes, but it will be touch and go - if I do you will see another post saying so tonight before the midnight deadline. Today is one of those days that should be a holiday, as tomorrow is Canada Day which is a day off, but I have to pop into the office and then I have lunch planned with Marianne from The Quilting Edge.

The other thing I did this weekend was finish a pattern for submission to Fat Quarterly for its next issue. I battled Adobe Illustrator and wrote and re-wrote the pattern to meet the clear guidelines provided, but the writing and illustrating took several hours of what would have been sewing time. I truly need to invest my time in a proper Illustrator course - as I read somewhere this weekend as I was searching for specific tutorials on what I was trying to do, one should not expect to be proficient with a full vector graphic design program by just poking around in it (which is my usual MO for learning computer stuff). Anyway, my pattern has been submitted, cross your fingers that they like it.

Off to get ready for work now. Luckily, it will be time for lunch before I know it.

Best,

Leanne


Thursday, June 26, 2014

Almost there, still breathing

Breathe - in progress

Breathe is off the long arm and has her binding sewn on the front. I will be spending some time stitching it down by hand and mending in the ends - there are a lot of ends from where threads broke or bobbins ran out. More organized folks mend them in as they go. Right now she feels fairly cardboardy from all that thread on the Essex linen borders, but I am fairly sure that a wash will fix that.

Spiderweb block for Clara

I did finally finish my spiderweb blocks for Clara for May in the Modern Stitching Bee. I try not to get behind on bee blocks, but I have to say that I really don't like making these blocks. The spiderweb quilts are amazing but I cannot imagine making a whole quilt of the blocks myself, so a perfect bee block.

Spiderweb block for Clara

Some thoughts if you were making a bunch. Get your strips sorted and cut to the right widths before you start. Piecing them into strip sets before one attached the first strip to the centre point would also make the process more friendly and faster too.

By the way, have you been to Flickr lately? They have done another upgrade and I like it much better than the just past version. I have to say that I love flickr, and I am glad to see it becoming a little more friendly to use again too.

Scrappy Boxy Star for Celeste

These Bonnie Hunter's Boxy Stars are for Celeste in Always Bee Learning. She sent the fabrics already cut to size, so the blocks were a breeze to put together. Getting to the mail has been more difficult and it is on my list to mail both these sets of blocks off today.

Scrappy Boxy Star for Celeste for Always Bee Learning.

My other Boxy Star. This is one of those blocks that I would like to play more with one day. I still have Anneliese's June bee blocks to get done in the next few days - they are each composed of 36 HSTs with my own fabrics so I am back to the scrap bins again.

Pillow in progress - Canvas pattern

I woke up to read the wonderful things that the Pink Chalk Fabrics folks wrote about my pattern on the Pink Chalk blog and then again here in their newsletter today. Thank you Kathy and Diana and all the Pink Chalk folks, you made my day! You can now purchase my Canvas pattern at Pink Chalk Fabrics too.

Pillow in progress - Canvas pattern

So now I want to finish these funky Canvas pillows. With Breathe off the long arm, I can put these pillows on it tonight - maybe its time for a version of Canvas with matchstick quilting.

Finish Along 2014

There are a few things coming up here. It is the end of Q2 in the FAL this month, so I am checking my list to see if there is another finish I can manage in time. And I have to decide which quilt to enter for consideration for the Modern Quilt Showcase for the International Quilt Festival show in Houston as entries close tomorrow and clearly Breathe will not be finished in time.  Jess and I are, for sure, running our next instalment of Decipher Your Quilt next Thursday and I need to get my photos of how to make circles finished for that.

But for now, I am off to my day job. Which is a good thing, as I might have ordered yards and yards of Brambleberry Ridge - Violet Craft's new fabric line - last night.

Best,

Leanne


Sunday, June 22, 2014

Consider entering a quilt show

Cycles 2 won first place

I have become a quilt show enterer. I don't consider myself a show quilter, not by a long shot. But I have been entering shows anyway, and I have been winning ribbons too. The quilts in this post have all won something in a quilt show - one of them online, that counts too.

Now, I have to confess, I have only been to one quilt show in person. I went to the QuiltCon 2013 show, and it was wonderful (but I am planning to go to the AQS show in Grand Rapids, Michigan this August). Many folks suggested that it was not a usual show and needed for improvement in several ways, but since it was the only show I had seen I thought it was mostly wonderful. My point, however, is that maybe it is easier to enter when you have no idea of how these shows "work" or what other quilts might be entered. Although for many others, maybe they are intimidated because they think the shows have entries that are so much better than they actually are. I think that the right approach is to let go of all of that and just enter them.

Sunset

Quilting has been a popular craft for centuries and is done all around the globe. Styles of fabric and composition change, techniques are discovered, and re-discovered, technology evolves, thread options develop and creativity abounds. But they are just blankets after all. Once one becomes reasonably competent at sewing the straight or curved seams together, the rest of how a quilt looks is mainly creativity. There is no reason to think that those "others" entering a quilt show are more creative than you are. None at all.

One does need to have a thick skin in terms of the judging aspect. Most shows are judged at two points. First you need to pass the jury's screen when you enter, and then there are the prizes. My view is that if you don't pass the first jury, it is because your fantastic quilt is not quite what they imagine for the category. They are working from a photo - it's not because your points are not perfect or your binding was a bit wobbly. And this part is private, if you don't mention that you entered, no one but you will know if you are not allowed to participate. So, no big deal, enter your quilt.

In my view, if you get to send your quilt to the show, you have won the real prize. The show will be seen by many, often thousands of people - quilters and others. You will be inspiring for them all.

Shattered - Honourable Mention

Many of you are part of the "modern quilting" movement, as I am. Many quilt shows are only recently including a modern quilt category in their shows. I hope you, like me, want to see modern quilting become a totally accepted part of the quilting community. If you do, it is really important for modern quilters to enter these shows or these categories will be dropped.

For example, the American Quilter's Society had a modern quilt category in every 2014 show they held. But next year they don't have one for every show, just some of them. If we want to continue the trend of bringing all quilters together in this community, we need to participate in the shows as modern quilters. And I think enter modern quilts in other categories when there is no specific modern category - modern quilts need to be part of the community and showing them is how that happens.

There are local shows, shows your guild runs, and then there are bigger shows. I encourage you to enter them all. Be a part of encouraging the creativity of others and of fostering the love of quilting at every opportunity.

Some shows give you "comments" and many don't. If you view the comments as an evaluation by one judge - with who knows how much or little actual quilting knowledge - who you will probably never meet, already they are less important. I assume that they start with the view that all good quilts will score at the midpoint, and then they look for things that they, personally, find exceptional or not quite up to their view of good. So, a good score, the one I expect for my good quilt, it 50% or good or whatever they call the middle. If there are some things better than that, it makes my day. If they notice something less than that, I take that as a learning opportunity - or a chance for me to say that judge is not knowledgeable in what I consider good.

In the end, these comments are not important - as my kids say - I do as I like. I know what I want to do with my quilt and that is all that really matters. Don't avoid a show just because you don't want to be evaluated. You can always toss the comments out unread if you are going to be bothered by them.

Reflection

All of the shows I have entered are easy to enter. There is an online process, and you send photos. There is often an entry fee, and you might have to join the guild hosting the show but there are other benefits of joining those too. You do have to send your quilt to the actual show, and this can be a bit pricy (especially if you leave it to the last minute) but it is not prohibitive.

Many of the shows have cash prizes which are not small. I won $1,500.00 US at the AQS Show in Phoenix when Cycles 2 won first place in the Modern Wall Quilt Category and there are cash prizes for second and third too. It's real money people, well worth the entry.

Below are some shows I know are coming up, listed by last date to submit entries, and you can click the link to get more information. If you have more shows to suggest, leave a comments or send me an email. I am interested in shows all over the world that are open to anyone, so please share the shows in your City or Country. I will add a quilt show page to the blog and we can all keep an eye on the deadlines in the future.

I hope you will be entering them. I know you cannot enter them all and neither can I, but consider entering at least one. My quilts are lonely without more of my friend's quilts hanging along side. It is more fun to anticipate the possibility of winning with a friend too.
There are also Mancuso shows, I have emailed them for entry dates but you can read about them here (maybe you will be able to find their entry dates on their webpage, and if you do let me know where they are). The International Quilt Association hosts the show at International Quilt Festival in Houston, Texas. The entry dates for this year have passed, but we can watch for next year.

I need information for the UK, other European, Australian and other shows all over the world that we can enter, please send me details if you have them.

Today is the day I finish my May (oops) and June bee blocks!

Best,

Leanne


Friday, June 20, 2014

Finally, time to breathe

Breathe - in progress

Last night I hit the half way point with the matchstick quilting on Breathe. I am only using cotton thread for the quilting on this quilt, which is about 70" square right now. Since I keep changing colours, I need to wind bobbins and since I only have 5 bobbins I have been throwing out some bits of thread and letting the bobbins dictate when to change colours. This morning I ordered 45 more bobbins, enough of that - then I can keep half full bobbins with the matching thread spool for next time

When you are unusually busy in your real life and are matchstick quilting a large quilt, your pictures are not exciting. Luckily, my instagram friends remain tremendously encouraging, and refrain from saying they are bored. I am actually not bored at all quilting this quilt, and it is relaxing and calming too.

Breathe - in progress

I shipped Earth off yesterday to Charlotte, North Carolina yesterday for the American Quilter Society show there at the end of July. I first took out the machine stitching on the binding and hand stitched it instead and added a hanging sleeve and label (more not exciting sewing). If you are going to be at that show and can send me a photograph, please do.

I am going to go in person to the AQS show in Grand Rapids, Michigan, at the end of August and Snowfall is going to be shown there. So I will finally get to see one of my quilts hanging in person - it seems I have become a quilt show enterer. Oh, and I need to do a post here about why I think more modern quilts need to get entered in these shows, look for it next week.

You will recall that Earth was made from my Canvas pattern, which is now available at Fluffy Sheep Quilting - it feels very cosmopolitan to have my pattern for sale in three different currencies, Canadian dollars, U.S. dollars and Euros. I am slowly seeing where else I list my patterns (I'll not be satisfied until I have listed it in least 5 currencies) - edited: Sheila reminded me that Cindy lists the pattern in both Euros and British Pounds, so all I need is one more currency and I will have 5! - and I expect to have more patterns available by the end of July (including one for Cycles 2).

Breathe - in progress

Last weekend I was away working the whole time, so I am so happy to have this one off. Tomorrow I am going to finish my overdue bee blocks so I can mail them on Monday. I am going to put together my photos for the next Decipher Your Quilt post - about deciphering circles. And I am hoping to start something new. I have this fantastic fabric from Quilt Market crying for a turn to be used. So I will have something more to show you, besides this one project, I promise.

And, for tomorrow, Happy Solstice, June 21, the longest day of the year is one of my favourites.

Best,

Leanne


Friday, June 13, 2014

So Proud

Sunset

I'm away learning new stuff for my day job, but I am just stopping in here to let you know that Sunset has won first place in the Modern Wall and Bed Quilt category at Quilt Canada 2014 in the National Juried Show. You can see all the beautiful quilts that are the winners on the Canadian Quilter's Association web page here.

I am so honoured and proud that Sunset was chosen for this award. Thank you all for your encouragement while I was  making her last winter and for your ongoing encouragement as I continue to explore this series that I call the cycles quilts.

And thank you to all of you who have already shared a congratulatory message with me on instagram, you all made my day yesterday.

Best,

Leanne

Tuesday, June 10, 2014

About the quilting part, and a winner

Breathe - quilting in progress

I am this far with the matchstick quilting on Breathe - about 24" done (the quilt is currently about 70" square and the mid point is where the circles meet). I set out to use Breathe to sort out how to use 100% cotton thread on my beautiful Millennium APQS long arm machine.

  Breathe - thread pull

There is my thread pull. I gathered many of my cotton threads that are whites, creams, light pink, blue, aqua, and yellow. I am thinking of adding in some light purple too and maybe some more blues, I am not sure yet. I won't use them all but I like to have a number of choices and I am changing the thread randomly. I started pulling thread like fabric when I began this cycles series of quilts and now it seems quite normal to me that I pick threads as carefully as the fabrics.

I am winding the metal bobbins that came with my machine with matching bobbin thread. So far that seems to cause me less tension issues than working with a polyester bobbin and cotton top thread, which is how I tried to use cotton thread before on the long arm.

Breathe - quilting detail

Matchstick quilting on my long arm machine is not hard, it turns out. The machine naturally wants to move in a horizontal line so it many respects it is a matter of not "over steering" like on a car. I am using the stitch regulator as I am just not ready to have to move at a really steady pace to control the length of the stitches myself and I am hand guiding (no computers or pantographs involved) the machine from the front handles. The trick for me is to wobble the lines just enough to keep the industrial textured look you see above. I am just moving top to bottom for each new row of stitches on the quilt for now, being careful that it does not start to stretch or pull out of shape.

The long arm sews very quickly and the cotton thread, despite all the suggestions from the manufacturers, gives off a lot of lint and fluff when it travels quickly through the machine. The lint gets in the workings of the machine and I am guessing it is part of why the thread breaks more often with cotton thread.

Breathe - quilting detail

So, for those of you who are curious, here are my long arm cotton thread tips so far:

  • Oil and clean the bobbin case before each new bobbin. And if the thread breaks or you hear the machine change its sound, clear out the lint and oil again. If in doubt, clean the lint and oil again. This seems to be the key to making the cotton thread work in the machine, at least for me.
  • Different threads need different tension adjustments for both the bobbin and the top. Matt even told me different amounts of colour in the thread can affect the tension and I now agree totally with him. So I also check the tension with each thread change. I also found that cotton thread needs a different tension on both bobbin and top from polyester thread. These adjustments are getting easier for me as I do them more.
  • I put a new needle in to start the quilting on this project and I am going to change it next time I do more. I am not sure what the recommended length of time per needle is but I know that a new one works better and I am quilting a lot of distance with it. I am using a bigger needle than for the polyester thread, and I think that means that I am using a 4.5 size for cotton and I use 4.0 for poly but I could have those numbers backwards - the bigger needle is for the cotton.
  • The worst movement for the long arm is horizontally right to left. The design of the machine and the needle mean that the pull on the needle with this movement is the worst. That affects the machine's ability to make consistent stitches and can even cause the thread to break (that is what I learned from reading about the machine, I did not know it before). So when I move right to left I work to go slowly and at as steady a pace as possible. I also try to add more of the wobbles moving left to right than right to left.
  • I am being patient with the thread breaks, rather than letting them make me miserable. Somehow that seems to mean less breaks too, maybe being tense when you use the machine is a bad idea.

Now for the winner of the free copy of my Canvas pattern from my draw last week. Mr. Random Generator drew #24 which is Jules. Jules, I will email you out a copy of the pattern right away. If you missed out and would like to buy a copy of the pattern, follow the links in the My Patterns for Sale tab at the top of the blog.

Thank you all for your support on the release of my first for-sale quilting pattern. It is my plan to get some more patterns from my head onto paper really soon.

Best,

Leanne

Saturday, June 7, 2014

Saturday sewing and a June goal

breathe - in progress

As if I did not have enough to do, today I started to make this new Cycles quilt (if you don't know about this series you can check out Cycles, Cycles 2, Sunset and Snowfall under the My Quilts tab at the beginning of this blog). This new quilt is called breathe. Although the pictures don't show it well, all these fabrics are different colours.

breathe - in progress

Breathe is made up of circles which are 23" in diameter. After I took these photos, I added Essex linen borders so she is currently 70" square in total.
Once the matchstick quilting is done I expect she will be smaller, that is if I can manage to quilt such a big quilt that densely.

breath - in progress

I have to show off the circles before they were pieced together - not too shabby.
 
Making the top of breathe took most of my sewing time today. So I am linkin up to Kim at My Go-Go Life for Sewjo Saturday.

A Lovely Year of Finishes
And since I expect I will want to finish breathe now that she is started, she can be my June goal for AYOLF. I know, it would be better to set one of my Q2 FAL goals, but breathe is on my mind tonight.

It's past bedtime. In the morning I will draw the winner to my draw for a copy of my pattern, Canvas.

Best,

Leanne

Thursday, June 5, 2014

Quilt Binding Tutorial - hand and machine stitched


Today I am sharing a tutorial for binding a regular quilt using a double fold binding cut on the straight of the grain (not a bias binding) using either hand or machine stitching. There are lots of ways to bind quilts and I plan to make some additional tutorials over the next while for:
  • single fold straight of grain binding - I use this on my mini quilts
  • bias binding - especially useful for quilts with irregular edges
There are many excellent tutorials for making binding and my techniques are not my invention but rather how I bind a quilt after assimilating all the excellent teachings available to me online and in person.

Recently a wise person said to me, if a person makes a pattern, they should do the work of making tutorials for the techniques, not refer their purchasers to othe people's work. She is so right, so as I am now selling patterns, it is time for me to share this technique here.

Double Fold Straight of Grain Binding, hand and machine stitched:


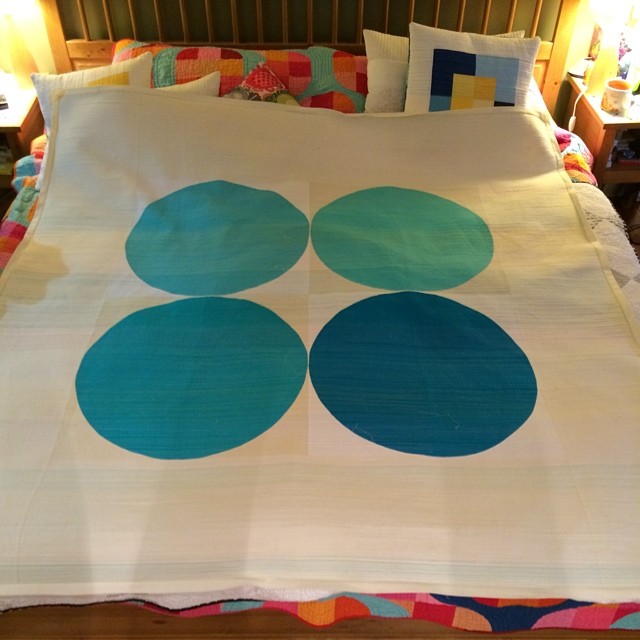
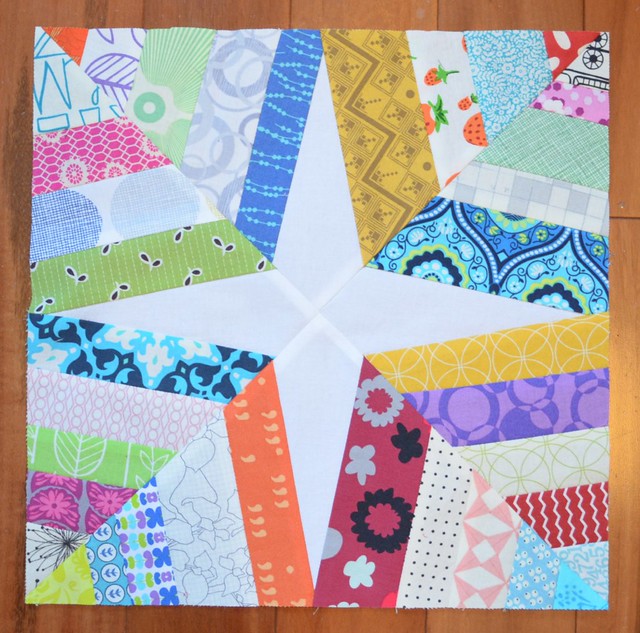
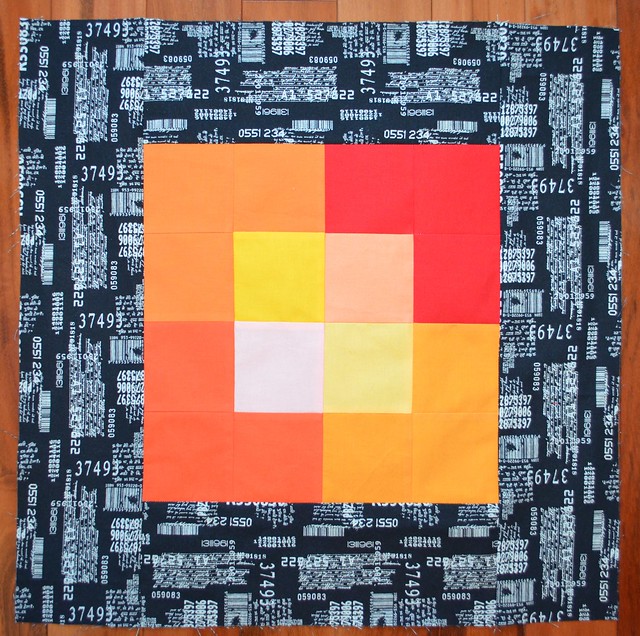
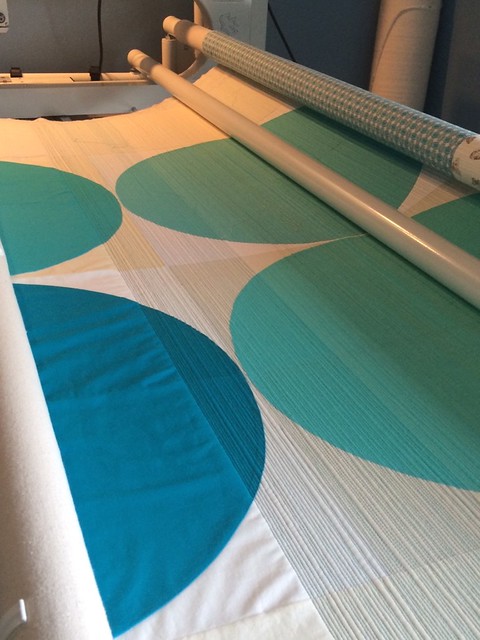
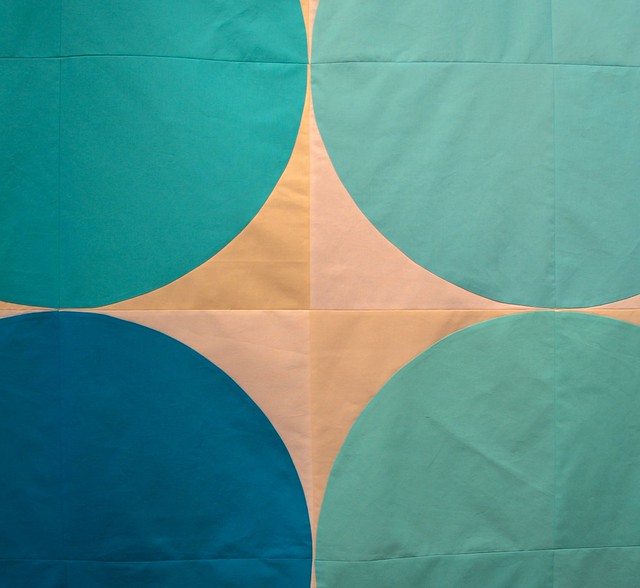
After quilting your quilt, pillow or other project, carefully square up the edges. I do this by first getting a good 90 degree angle on one corner of the quilt. I use a square or rectangular ruler and measure off a piece of the quilt design. For this quilt you can see that I used 8" from the centre motif. I trim the corner first.


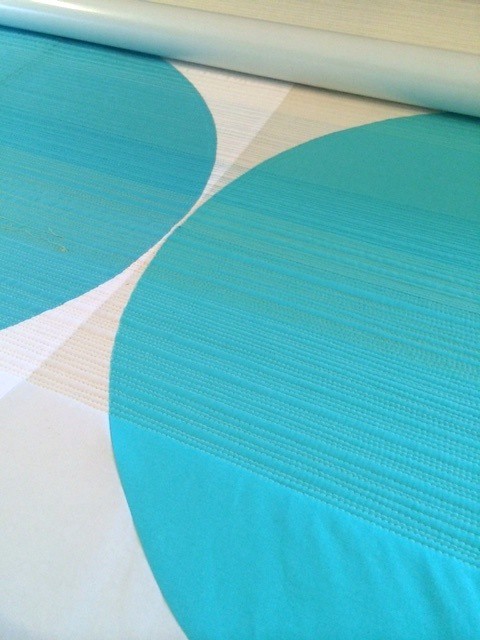
Continue trimming along the sides of the quilt, both measuring from your piecing reference and also making sure that your cut line remains parallel. You should trim the quilt slowly and carefully, especially if you have points that you want to keep right at the edge of the quilt. If you are working on a small area - right now I do all my trimming on a 36" square mat - make sure that your quilt is bunched up and not hanging over the edges of your table as it's weight will pull your edges out of line.


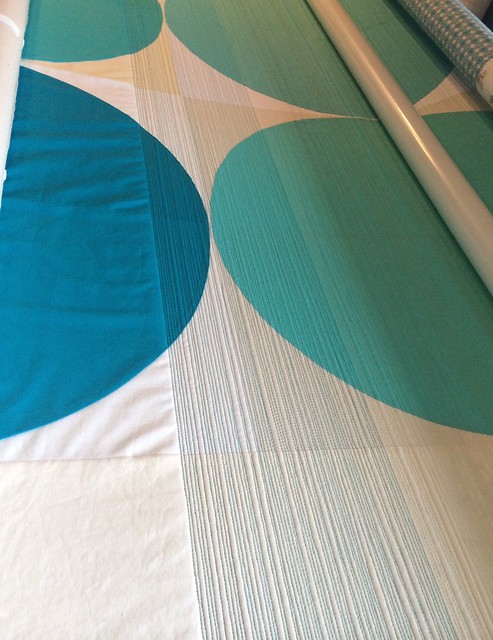
When I am finished trimming, I check my edges by folding the quilt in half each way. If there is a noticeable wiggle, I re-trim that edge. This is a matter of preference mostly. If you quilt is not going to every have to hang on a wall, a small wobble will never be noticed by people cuddling up in it, especially since people are not flat.


I cut 2.5" binding strips most of the time, but 2.25" strips can also usually work. Start with wider strips and if you find you don't like the width of the binding on the back of the quilt, then try a narrower or wider strip next time.

You need enough strips so that your binding, when sewn together, is as long as the total length of the 4 edges of your quilt plus at least 10". In math terms that is 2 x (length + width) + 10" = length of binding required. If cutting from yardage, take the total inches of binding and divide that by 40" to get the number of strips I need to cut. If you are working from scraps, either measure the scraps or measure the length of the overall binding as you add more to it.


Sew the strips together so that you have one continuous long binding strip. I just sew them across the grain as shown. Many folks join the strips at 45 degree angles so that there the thicker spot where seams join does not fall back to back on the binding. This is an excellent idea but I as I tend to go for a modern industrial sort of look I don't bother. You should do as you like.


Press the long strip of binding in half with the right sides facing out.


I stop and press the joining seams open and then continue pressing the binding in half with right sides facing out.


I then take my binding in a big messy clump to the sewing machine. If you are not going to use it right away, or you just like organization, you can roll it up nicely.


Lay your quilt right side facing up at your sewing machine, so that you can start attaching the binding at least a foot from the corner (or half way along the edge if you are making a small piece). Starting about 10" from the beginning of the binding strip, lay your binding along the raw edge of the quilt, with the raw edge of the quilt and the raw edge of the binding matching as shown.

You will need that extra 10" of unsewn binding at the start to finish the binding, so don't forget to leave it (or you will be ripping it out later).

I stitch the binding on 1/4" from the edge of the quilt. If you prefer a wider binding showing on the front, stitch 1/2" or more from the edge of the quilt. However, if you are stitching more than 1/2" from the edge, you will need to make your binding strips wider to start with.

Many people pin or use clips to lay their binding around the quilt before they start sewing. I find this a both unnecessary and also impractical as I get poked by pins/clips. Also as I go I find that I laid it out either too tightly or loosely and need to keep adjusting. So I just sew slowly and lay the binding in place along the edge as I go.

I use a slightly longer stitch length than my usual one (3.0 on my Janome Horizon, my usual stitch is 2.20). As I am sewing through the three layers of the quilt and two thicknesses of my binding fabric, the longer stitch gives some extra room for the thread to pass through all those layers.

I also use my walking foot to apply the binding. The walking foot allows the quilt to feed both on the top using the foot and underneath using the feed dogs. The stitches are more even and don't pucker, and the fabric does not stretch. The principle is the same for straight line quilting on a quilt - the walking foot makes a big difference in the resulting stitch. I have a walking foot with a quarter inch seam guide so I use that but a regular walking foot works just fine.


As I approach the end of the side of the quilt, I lay out the binding to the end and then I place a pin 1/4" from the end of that side. I mark this spot as when I am sewing close to it I can no longer see or feel the edge well given the size of the walking foot.


I sew along the edge to the pin. Then I backstitch a few stitches and cut the thread. I often take the pin out just as I get to it to avoid the possibility of breaking the needle but I have left it there for you to see.

Many people end differently at the corners. One popular approach is to stop at this same point about 1/4" from the edge, then pivot and sew 45 degrees to the corner of the quilt and binding. I don't bother, but you should do as you like. Also some folks don't cut the threads, especially if they sew off the end some way. I cut them to give me more room to mitre the corners.


To mitre the corners, I take the corner out of the machine. I first fold the binding at 45 degrees so that it is now moving away in line with the next edge of the quilt as shown above.


Being careful to keep that 45 degree fold in place, I fold the binding down along the next edge of the quilt. It is important to make sure that the fold is right along the edge of the side that was just stitched, as shown.


I turn the quilt so I am ready to sew the next edge. If it is a big quilt, remember to bunch the whole thing up so that it is not hanging over your table pulling on the edges. With a king size quilt it feels really awkward if you have a small sewing table but just pile it high.

I start sewing right at the edge of the quilt, sew a few stitches, backstitch and continue as before down the edge of the quilt.

Repeat at each corner.


When you are finished the last corner, you will be coming up on the beginning of your binding. Stop about 10" or more from the spot where you started your binding and cut the threads.


I join my binding horizontally, just like I sew the strips together. To do this I smooth out the edge of the quilt around the unsewn part. I lay down the two ends of the binding so that they meet at about the middle of the unsewn area and fold them back on themselves as you can see in the photo above. The goal is to have the folds meet exactly but to not overlap.


Trim off the extra lengths of binding on each side. I trim so that there is a generous 1/2" or more extra here in case I need to do some adjusting later. Finger press the fold hard enough that you an see the crease as you unfold. If you had an iron handy you could press with it too.


Open the binding up and place the right sides together with the creases matching as shown in the photo. This feels awkward as the quilt will need to fold to allow you to do this. Let the quilt fold.


I then pull this over to the side and fold the edge of the quilt as I do so. I pin the binding edges with the folds matching and then sew along the fold crease.


Before I trim the seam allowances at that join, I lay the quilt edge flat and check to see that the binding is now joined so that it fits the last part of the quilt. If it is too loose, I stitch another line to shorten it. If it is too tight, I stitch a new line and then I unpick the first stitched line (I unpick second as that means I can avoid the need to pin and line it all up).

Once I am satisfied that I have joined the binding so that it is the correct length, I trim the seam allowances along the join to 1/4", finger press the seam open, refold the binding wrong sides together and take it back to the machine. Stitch the remaining unstitched part of the binging in place.


I press the binding away from the quilt top all around.


You can see how the edges are mitred. I don't press them flat, but let them just pop up as shown.


Then I turn the quilt over and carefully moving along the quilt, I fold the binding over the edge and press. Be careful not to pucker or clump up the edge as you go by pulling the binding over too tightly.


I mitre the corners on the back as I go. First press one side over so that the 45 degree triangle forms at the end as shown.


Carefully, keeping that first 45 degree fold in place, I fold the next side of the binding over and as you do so you will see that it creates a nice mitred corner. If it is not as nice, unfold and do it again. It is really easy to shift the first fold as you make the second and that messes up the mitre.


Once I like the mitre, I press it in place, being careful of my fingers. A non-plastic tool that acts like your finger to hold this would be helpful, I should get one.


Once the corner is pressed, if I am going to machine stitch the edge of the binding, I put a pin in place as shown, right through the mitre. I don't actually put this pin in until I am coming up on that corner as I stitch as otherwise I invariably get poked by the pin as I am working with the quilt.


I machine stitch the binding from the front of the quilt. I stitch in the ditch where the binding joins the quilt. I use my fingers to carefully feel the edge of the binding folded under the quilt as I go so that I am confident that I am attaching it to the back.

You could use a bunch of additional pins or clips to hold the binding in place as you go but I don't bother. I just move slowly, being careful to check the placement of the binding as I go and feel for it under the quilt.


About 15" or so from the corner I check the folding of the corner and add that pin I showed you above. Then as I get to the actual corner, I move very slowly and remove that pin before I get to it. Carefully stitch right to the corner. Leaving the needle down, pivot the quilt. Make sure that your binding stays neatly folded around the quilt, and continue down the next side. Repeat until you reach the starting point, backstitch carefully and cut your threads.

Again, while doing this it is important to keep your quilt up on the sewing table so that it does not pull on your edges.


I then hold my breath and carefully examine the back to see if I managed to stitch all the corners and edges without "falling off them". I am not a pro at this method and often have to fix missed bits. I do that by either restitching by machine or just hand stitching the missed bits.


This method leaves the front of the quilt looking really nice, just a line of stitching along the binding.


Instead you might prefer to hand stitch your binding - I usually do. I do all the steps set out above, up to the start of the sewing, including pressing the binding on the front and back of the quilt.  I don't pin or clip any of the binding in place, but if you like to, you should go ahead.

To hand sew the binding, I knot my thread and hide the knot under the binding in the seam allowance of the quilt. I take a small stitch or two in the seam allowance to anchor the thread and then I do a variation on a hem or matress stitch. First I run the needle through the fold in the binding for about 1/4" as shown.


Then I run the needle through the back of the quilt (being careful not to go through the front) about 1/4" of an inch right at the point where the binding meets the quilt back. Repeat. I carefully fold the binding in place as I move along th quilt edge, along the fold I had pressed with the iron.


When I get to the corner, I refold the mitre as I had done at the iron. First fold the edge you are stitching out.


Then fold the edge you are meeting in. Redo this until you like the mitre you see.


I then stitch so that I am bringing my needle up right at the corner. Then I catch the binding that is on the bottom of the mitre by a thread or two, and go through the binding on the top of the mitre, bringing the needle out. you can see this better in the photo.


I then take a stitch toward the corner in the bottom part of the mitre, coming up close to but not at the corner.


 I then take a stitch back to the edge of the top binding along the mitre fold as shown, and continue stitching along the edge. I don't always do this extra stitch along the mitre and my bindings look fine after washing, drying and heavy family use. However, it often feels like this little stitch will make the binding more durable.

Finish stitching around the binding.

My last step with either method of binding is to examine the seam on the front of the binding to see if there are any threads sticking out and if so, trim them off.

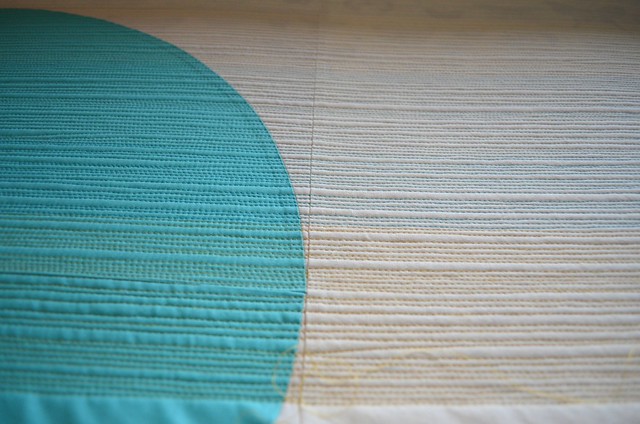
By the way, I have decided that this lovely yellow fabric was not the best choice of binding for this quilt. As it is a quilt with a nice big border, I am going to just cut the binding and about 1/2" of the quilt off right around and start again.

Let me know if you have any questions and also feel free to add any of your own binding tips in the comments.

Best,

Leanne