
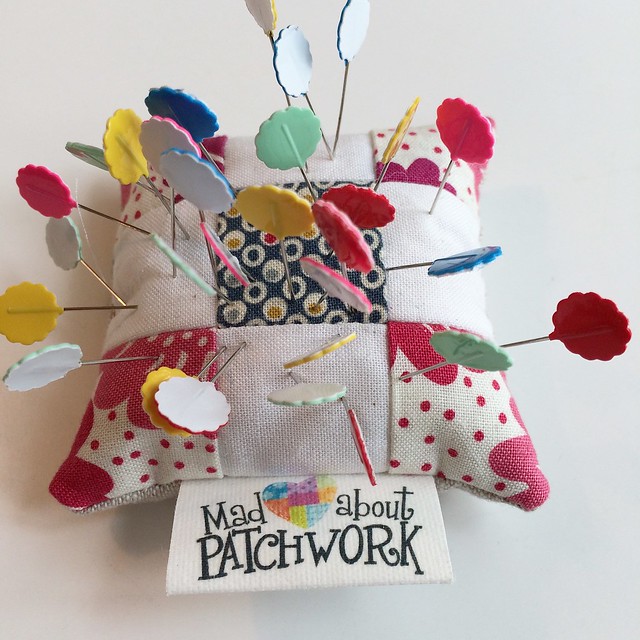
I don't have all my usual pincushions unpacked, but I did unpack this tiny one from Mad About Patchwork. They sent it to me for shopping at their sidewalk sale (I think it was a sidewalk sale, but I shopped on line) last summer. It is nice as it is filled with some kind of heavy sand item and stays put. So I loaded it with flat topped pins. I use these pins to position and hold the first piece of fabric when I paper piece, as one can fold over these pins and iron over them. Of course the ironing seems to contribute to the flowers falling off the pins so try to avoid that part.
My styles of paper piecing is messy and wasteful. I have had several great paper piecing teachers, who are mostly more careful than I am, so my style is an amalgamation of what they have shared and what works for me. Too much fuss and bother does not work for me.
So here is a mini tutorial of how I approach paper piecing.
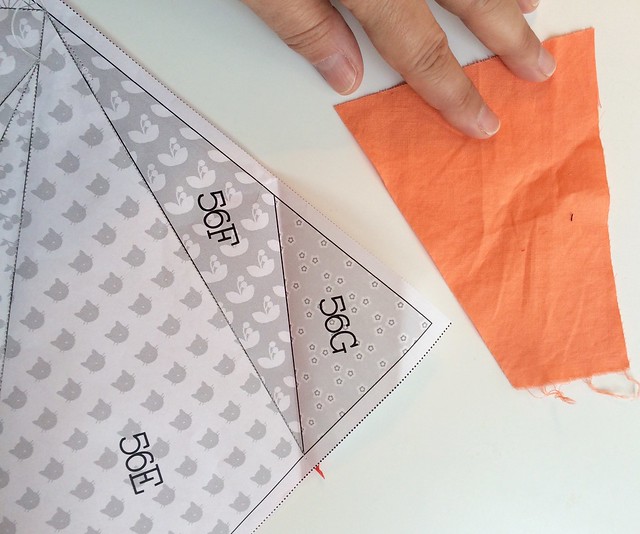
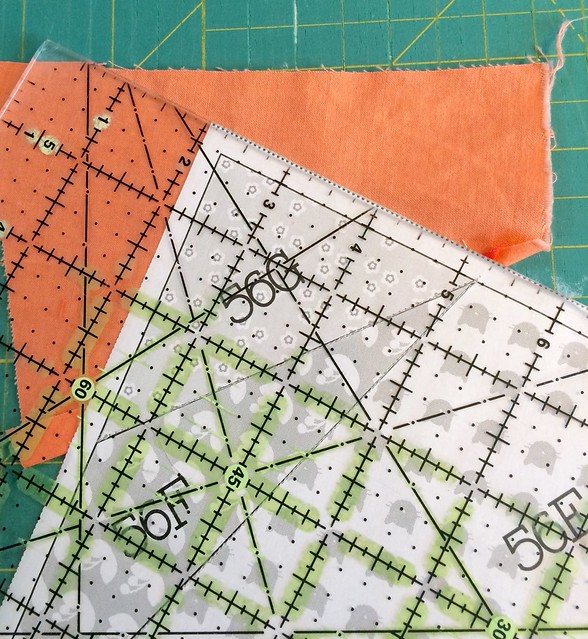
I look at the piece to be added - here 56G - and I look for a scrap that is about the right size. If I have none, I then cut a new strip off the yardage. I generally cut the new strip the width I need or about 3 - 6" wide. Then I would likely bring the whole strip, or cut a chunk off of it. In the end most of the scrappy bits fit somewhere, at least that is how it is working so far.
When the fabric piece is close to the size I need, I do check to make sure there is extra.
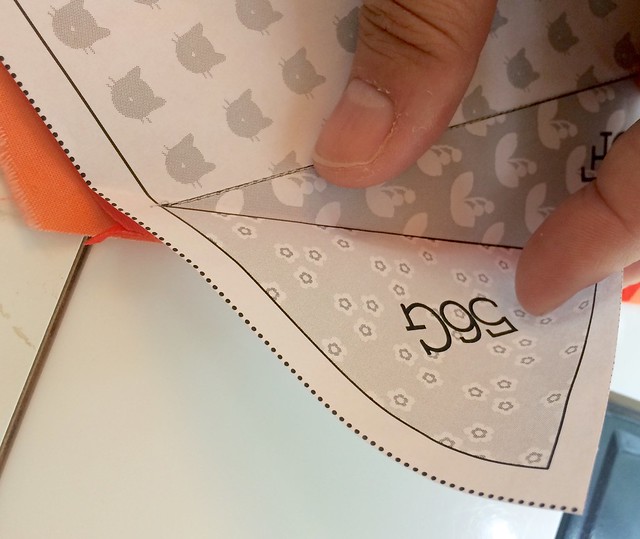
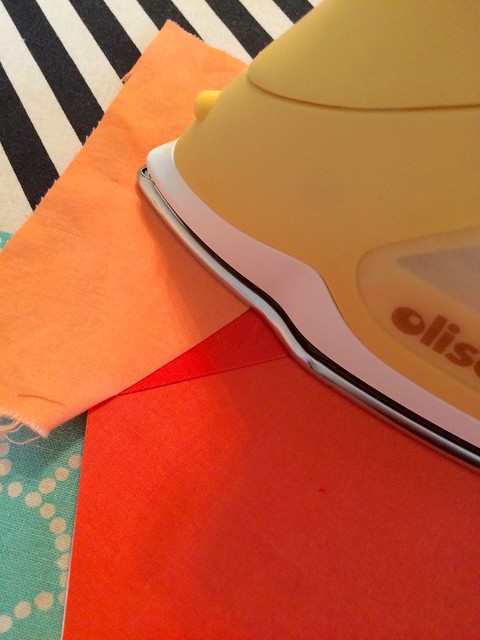
To sew it on, I first fold the paper back on the sewing line and trim the last piece attached so that it has a 1/4" extra over the stitching line. Here that would be piece 56F.
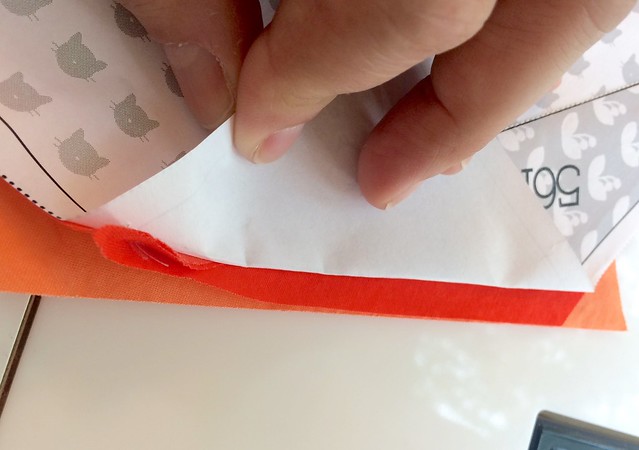
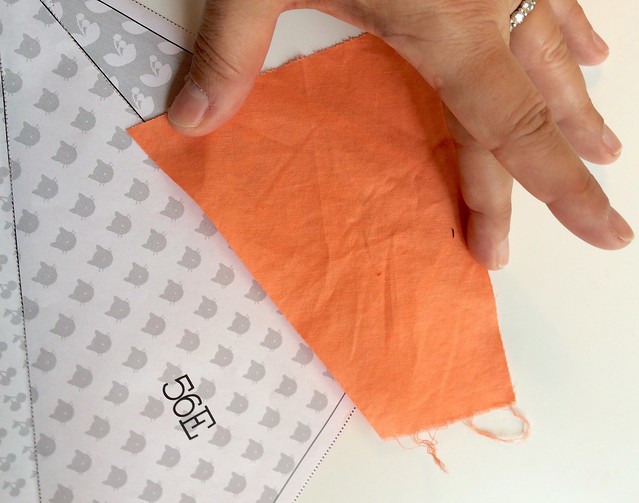
You can see piece 56F has been trimmed (the darker orange) and then I line a straight edge of the new fabric piece up with the edge of the earlier fabric piece. This gives that stitching line a 1/4" seam allowance for both fabrics. If my new fabric piece does not have a straight edge I cut one on it.
Note, if you are not working with solids (which are the same on both sides) you need to place the new fabric right side facing up to meet the right side of the previously sewn fabric. And for the very first piece, it is right side facing down, away from the paper.
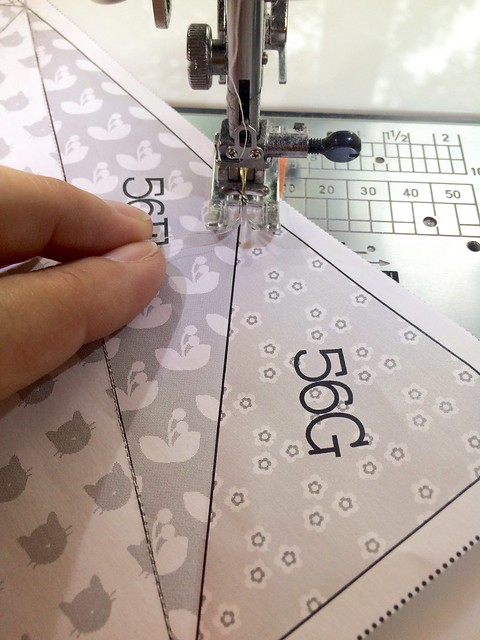
I bring the fabrics and paper to the sewing machine and stitch the marked line. I have set my stitch length to short (I move to 1.7 from my usual 2.2 on my Janome Horizon) so that the stitches unravel less. I do not back stitch or lock stitch and I try to start at the start of the actual line and end on it too.
Once I stitch I check to make sure that the fabric, when opened, will cover the entire area. If not, I rip it out and do it over.
I press every single addition. It is worth the time as then the finished piece has all the fabric the right size with no small bubbles and bumps that can be added if the fabric is not pressed flat.
Then I trim the piece. In this case it was the last one on the paper so I trim the outside edges. I use a ruler, every time, to do this. The point of paper piecing is accuracy, so I use the tools that make that happen.
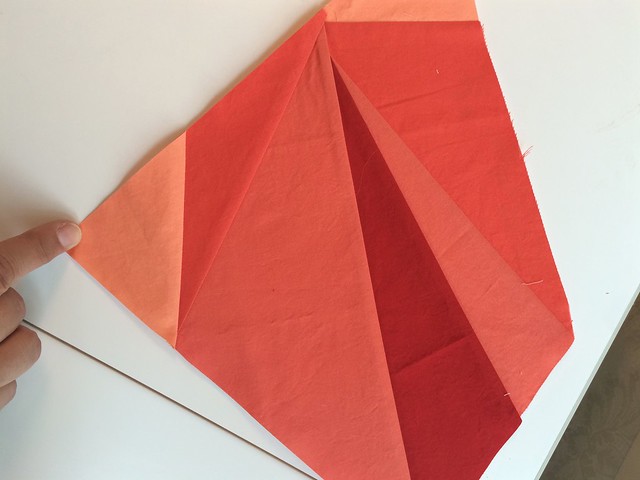
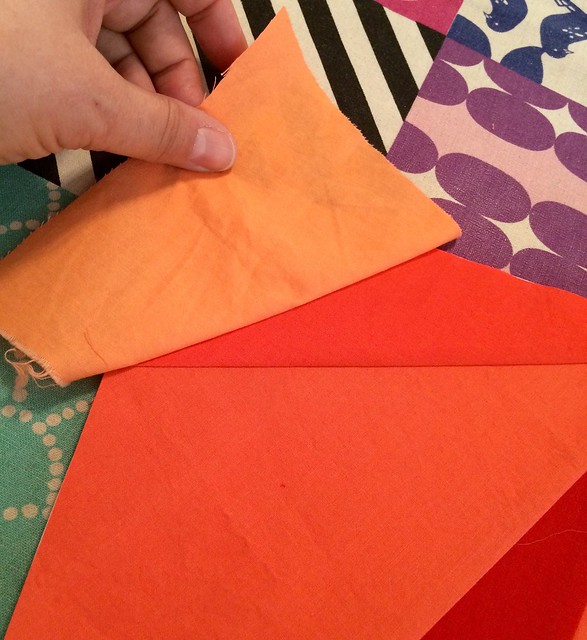
Here is the whole piece, including the one I just added. You can also see the different reds and oranges - the contrast is hard to photograph well, especially with my iphone, which is how I took all these photos.
I know that this mini tutorial does not answer all the questions, so if you have more leave them in the comments and I can do an update or if you are a commenter I can reply to I can discuss it with you by email too.
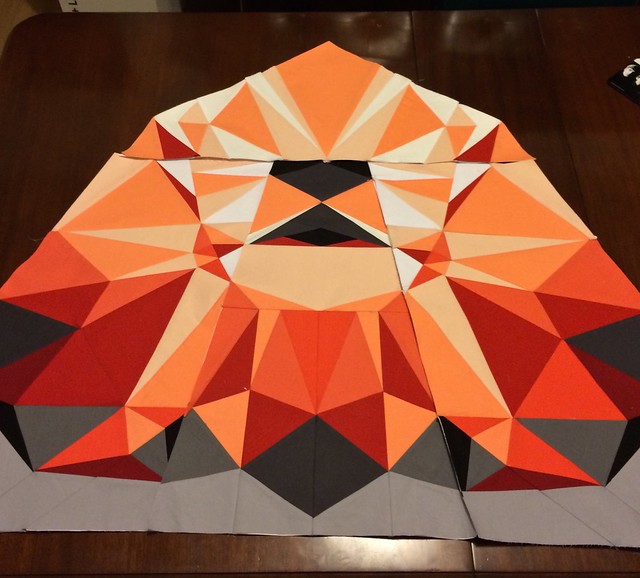
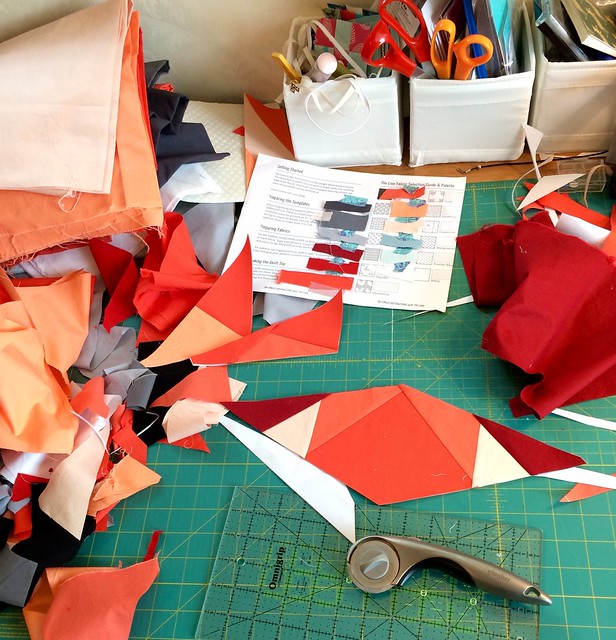
That is the photo of my progress on this pattern as of Friday night. I thought I would share it again as it was added to Flickr Explore.
The pattern is Jungle Abstractions, the Lion, by Violet Craft. I have not yet joined the bits I pieced on Saturday so I don't have a new photo of my whole progress so far yet, but I can tell you I am half way through the pieces. In the end, the paper piecing will join together to make a 60" square - a very big paper pieced lion.
I am off to unpack and sew and maybe do some getting ready for University shopping for my boys today.
Best,
Leanne
11 comments:
I knew you had a system for paper piecing that works more efficiently than mine with the quick progress you were making - thanks for the share and congrats on being picked up on flickr explore.
Cool about explore. This is coming along so nicely!
Your lion looks great!
The lion is soooo cool! I'm just curious though... If you do not sew 1/4 inch past the line on both sides without backstitching, do you experience the seams coming undone ever?
I like to use templates when paper piecing to minimize wastage. This is the second post i read today featuring this pattern, i look forward to her next design.
Leanne, Thank you thank you! I'm just beginning to paper piece and your tips and tricks are spot on.
And "Leo" the Lion is too cute at this stage.
this has been so helpful having a mental block when it comes to FP though I did finally manage a very basic house the other day, can see life is much easier with plain fabrics as I do get so confused!!
It's looking amazing! I paper piece exactly the same way as you, those pins have changed my life (even if it's just in a tiny way)
Thanks--this was very thorough, and the many pictures are very helpful.
That Lion!!! 💖💛💖
Love paper piecing and love to learn! I also love the Lion! Gorgeous! Thanks for sharing your tips!
Post a Comment