Tuesday, April 12, 2016

Scraptastic Tuesday - the April link is open and I have a quilt to share


It's the second Tuesday of April, so the Scraptastic Tuesday monthly link is open.
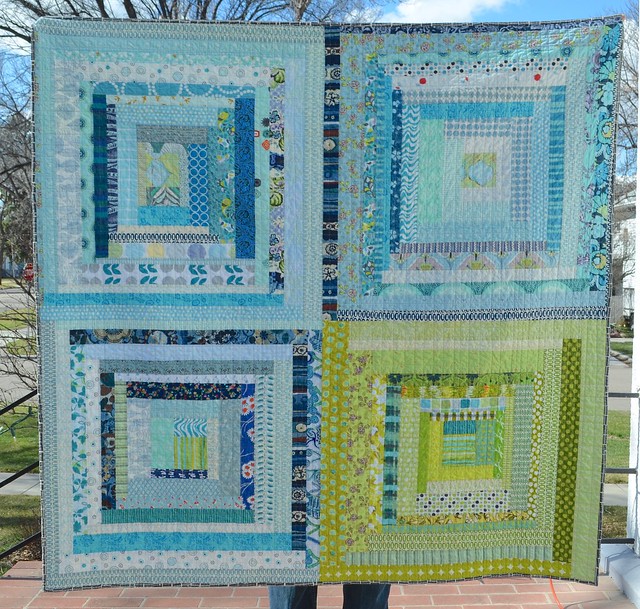
Villa

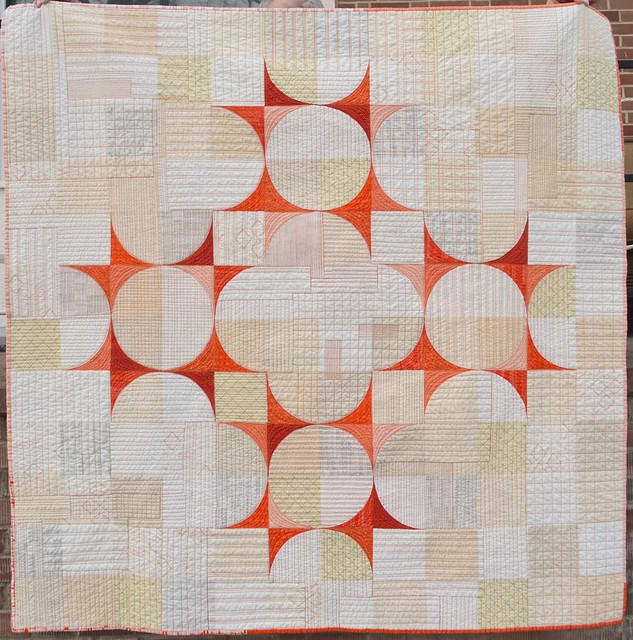
 I am excited to show off Villa - my scrappy giant log cabin quilt. This quilt is 55" by 56" after the wash. I have shared a lot about this quilt on the blog before, and I have been waiting to show her off for a couple of weeks now.


As you can see in this photo, I quilted a cross hatch on this quilt. Using the long arm, I quilted horizontal freely drawn lines randomly spaced from about .5" to 2.5" apart. Then I took the quilt off the machine and reloaded her turned so that the next set of similarly quilted lines would be perpendicular to the first lines. After washing, the effect is wonderful - very vintage looking which compliments the scraps and the log cabins well -  and worth the extra quilting time.
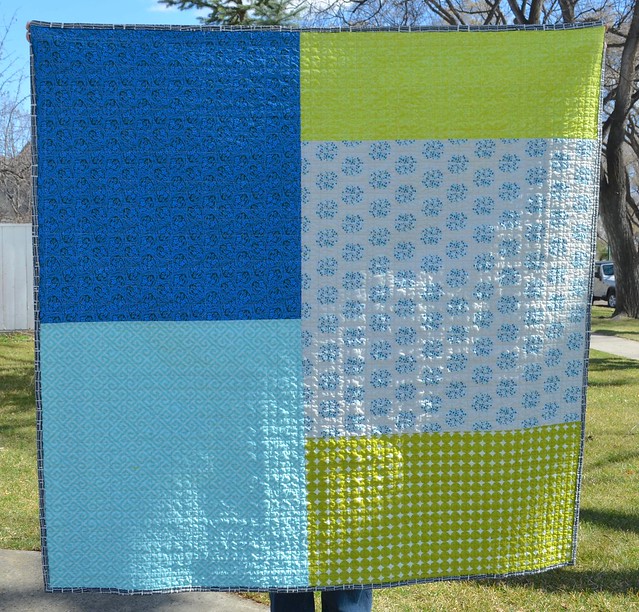
Villa - back

I pieced the back with some large pieces from my shelves that work nicely with the front.


The binding is a black and white print from Doe by Carolyn Friedlander which compliments the vintage look and does not add more colours. I stitched this binding on by machine.
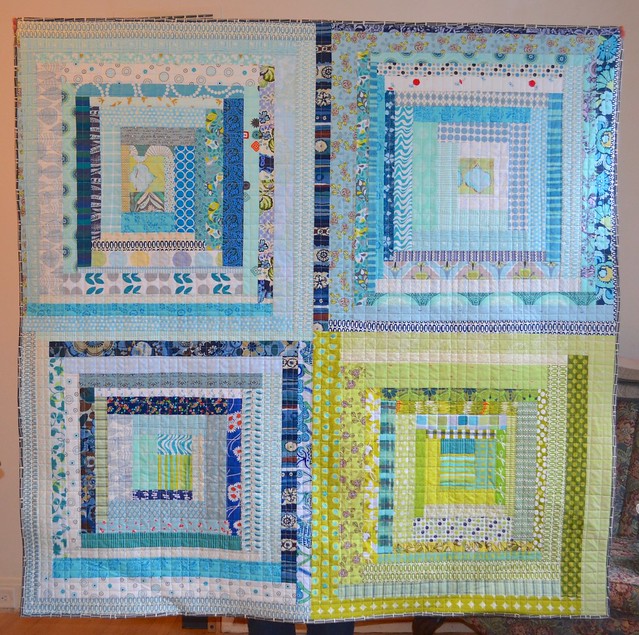
Villa - before the wash.

Here is a before the wash photo. She is lovely but a bit stiff and very flat.
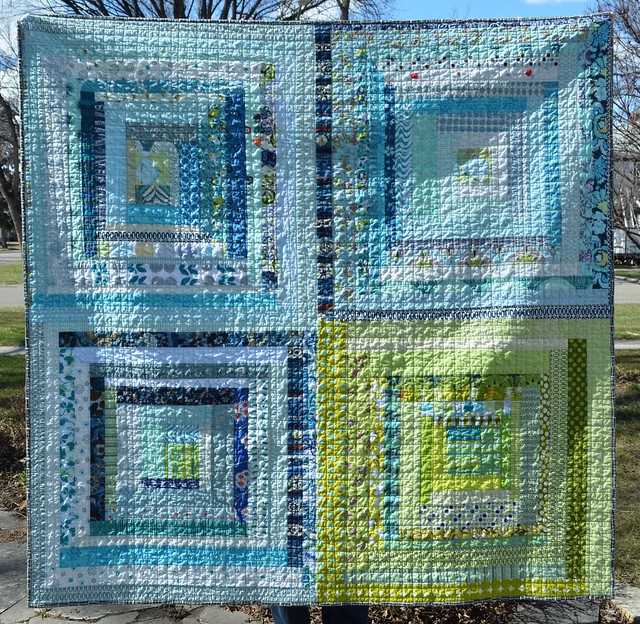
Villa

This photo is in the bright sun, and it shows off the puffy goodness of this quilt. I have to say that I never tire of log cabins, and so it's time to make more scrappy ones.

Now its time for you to share your scrappy projects, plans and ideas.


A huge thank you to our generous sponsors for providing the following prizes which will be awarded randomly among those of you who link up.

      Please join Nicky from Mrs. Sew and Sow and I by linking up a blog post or flickr or instagram photo sharing a scrappy project, in progress or finished, or your thoughts on dealing with your scrap mountain:
      • You don't have to have joined us before, everyone is welcome.
      • One link per person, and it will be your entry into the random draw for the prizes. It is the same link up here and at Nicky's blog - Mrs. Sew and Sow - so you only need to link up on one of our blogs.
      • You can link up from your blog, instagram or flickr, but you have to link up to be entered in the prize draw.
      • Please visit at least a few of the links, they are very inspiring, and leave comments too as everyone loves to connect. 
      • Use the Scraptastic Tuesday button and invite your friends to join us too. Please share our button, or a link or the hashtag #scraptastictuesday in your linked post or photo. 
      • The link is open until next Monday night at 10:00 pm MST. We will announce the winners next Tuesday. 
      • If you have trouble linking up, let me or Nicky know and we will get you sorted.
      Best,


      Leanne


      Friday, April 8, 2016

      It's time to link up your Q2 FAL list!

      2016 button 250 best
      Here we are - already facing the second quarter of 2016....can you believe it? As you are already aware, the 2016 FAL has gone global - a community of bloggers across the world, jointly hosting the FAL. Our hosts are:
      For those of you who are new to the FAL, it is a place to find motivation and encouragement to complete those unfinished projects that are hanging about becoming UFOs. Every quarter you post a list of projects you hope to finish in the next three months, and then at the end of the quarter, you post a link from your blog, Flickr or Instagram of each successful finish from your original list. Each finish is an entry for wonderful prizes from our sponsors. There is no penalty for not finishing a listed project, so feel free to make your list long or short, as you wish.

      The 2016 Schedule and Rules for the FAL are on my permanent FAL page, here, let me know if you have any questions.

      Here are the fantastic and generous sponsors for Q2 of the FAL - you can see each of their prizes listed under their logo (think about visiting them and saying thank you):

      As you may recall from Q1, there was a return of tutorial week at the end of each quarter, between the opening of the link for finishes and the day that link closes. Did you enjoy this? Please share your thoughts in the comments section below! If you have a tutorial that you would like to share, please let me or another host know.

      It's time to round up those projects you want to finish over the next three months, take a photo of where you are now, and make your list. Please ensure that you have at least started your projects - pulled fabric with a pattern or plan, and remember that it is finished projects that will get you entry toward the above listed prizes. So while we love to see your bee blocks, the "finish" is when they are a completed, usable project. It is very helpful is you tag your Q2 list as #FALQ2yourname.

      2016 FAL Q2 List of Projects

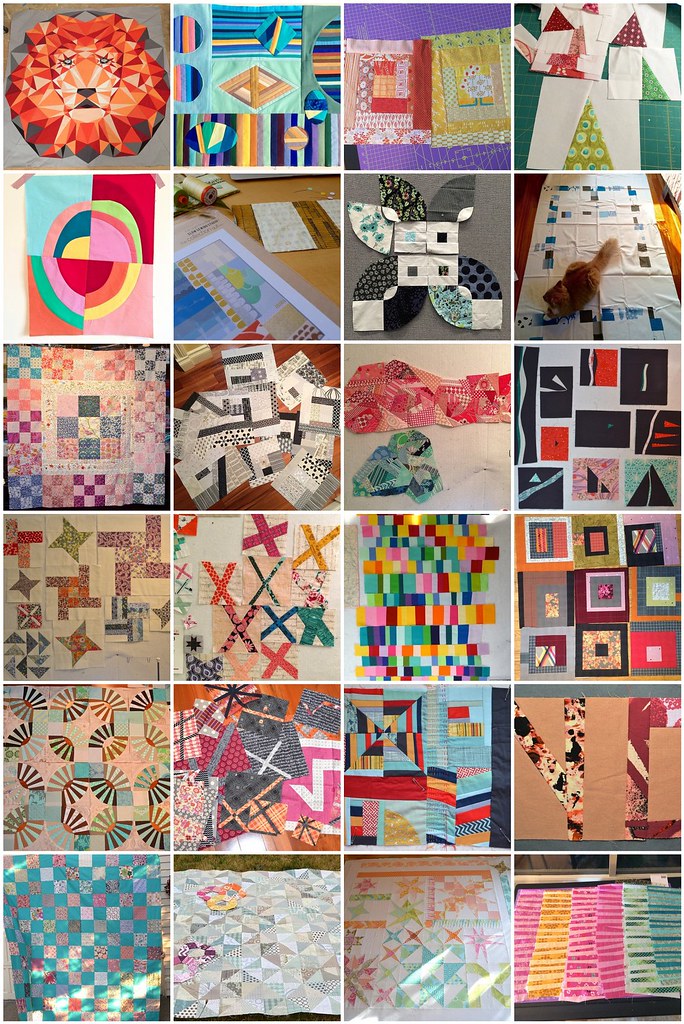
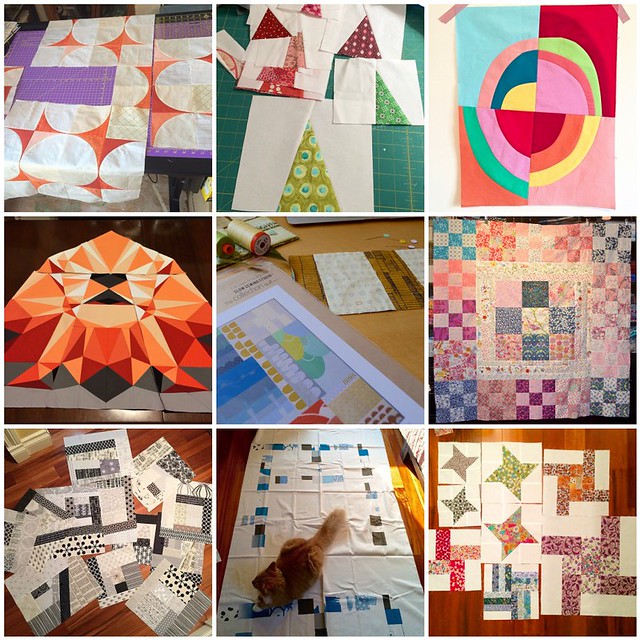
      That is my Q2 mosaic of projects. Each of those will be a quilt, except for 6 (counting from the top left) will be a pillow and 13 will be a guitar case. I decided after only finishing one of my list of 9 last time, it was better to have more options this time round. I know there are a few other unfinished projects around my sewing room but this is most of them and I am hoping to finish a few more than one this quarter.

      The 2016 Q2 link for your list of proposed finishes is now open below on my blog and on each of the hosting blogs. You only link your list once, on one blog - and that link will show up on all of the blogs.

      If you are using Flickr or Instagram, link a mosaic and put your list in the description. Katy of The Littlest Thistle has a great tutorial on how to link-up if you have need it.

      We also ask that you become part of the FAL community. Please check out the links of others and visit and comment on their lists. We all need encouragement to get those finishes done, so please share some of your own too.

      The Q2 link will stay open until 11 pm EST, April 16th - as we are global, you might want to check your time zone to determine your last possible time to link. 

      Best, 


      Leanne


      Wednesday, April 6, 2016

      2016 FAL Q1: Last call to link up your finishes

      Q1 FAL 2016 - to finish list

      It's time for me to fess up about how I did with my Q1 FAL list. One finish of the nine projects on my list. Still a finish is a finish, and I am happy to have one at least.

      Spin

      I finished Spin, you can read about her here, I am very proud of this quilt. I still have to write the pattern up, and I am going to make that happen soon - it's just more fun to use my free time to sew, not sit at the computer.

      If you have not yet linked up your Q1 finishes from your Q1 list of projects to be finished, it's time to get that done, go here, as the link closes around supper time tomorrow night (April 7). We have a lot of fantastic prizes and each finish is an entry, so don't forget to get your projects linked up. (Don't worry, the hosts, including me, are linking up our finishes but we will not be eligible for prizes.)

      And get your Q2 Lists ready to link up starting on Saturday. I'm thinking I am going back to my huge long list of unfinished projects so there are more options for finishing, as a nice short focused list did not work so well for me.

      Best,

      Leanne

      Sunday, April 3, 2016

      Some blocks and a #2016FAL reminder

      Umbrella block


      I am just popping in today to share a couple of projects and to remind you about the FAL Tutorials.

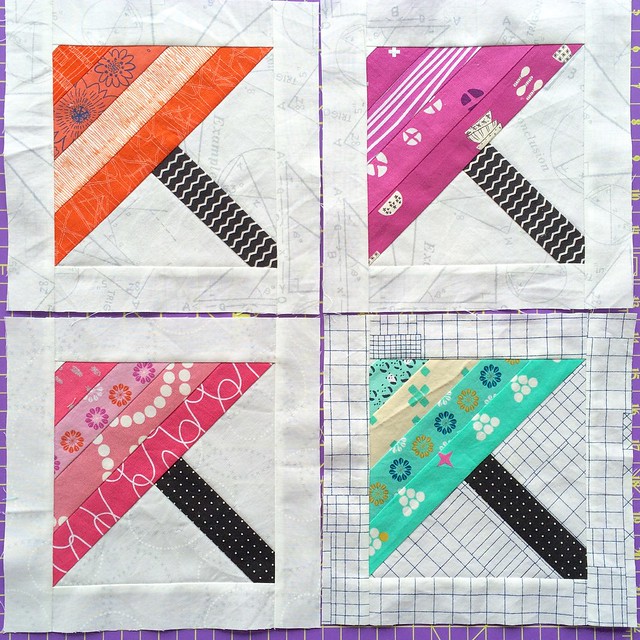
      I made those 4 Umbrella Blocks for #dropsofloveforem which is a project started by Katherine (@kakiofhoneyhill on Instagram). They have enough blocks now but are looking for donations for an auction, go here.

      Th Umbrella block was fun to make and the pattern is a free one from Craftsy - go here. It's another great scrap buster too.


      I also made this block to send to Hillary for her fly Merel fly project - read about it on her blog Entropy Always Wins here. This block is from Kajsa Wikman's book Scandinavian Stitches, which I was happy to pull off my shelf and read again. Raw edge appliqué is not something I do often, and when I do I wonder why that is. It is really fun to sketch away with the black thread.

      I have to get both of these projects into the mail Monday morning, I missed the mail on Friday by just letting the day get ahead of me, so tomorrow I will get my much more reliable spouse take care of it.

      I wanted to remind you to visit the excellent tutorials in the 2016 FAL Tutorial Series and to link up your Q1 finishes if you have not done so yet. 

      The tutorials are here:


      Tomorrow I have a quilt finish to share, and I am slowly catching up with my internet quilting homework. But today I have to spend much of the day on my day job, sigh.

      Best,

      Leanne

      Friday, April 1, 2016

      A FAL 2016 Tutorial: Improv Herringbone Table Runner


      Today, I have an easy tutorial showing you how to make this improv herringbone table runner. I finished it last weekend and it looks great on my table. My runner is about 12.5" wide by about 42" long - this project is simple to customize to your own table. Measure your table so that you have a finished size in mind.


      Start with a bunch of fabrics that you like. I pulled out a bunch of solids in colours that pleased me and added just a couple of prints. Cut a bunch of strips from 1" to 3" wide.  Cut strips about 20" long - or along the long side of a fat quarter. If you cut width of fabric strips, cross cut them in half. I cut a bunch of strips and then later in the piecing as I started to run out of options, I cut more strips so that I had lots of choices as I went. The left overs went into the scrap bin.

      You could, if you want, cut these strips without a ruler and that will give you a more organic shaped herringbone. But improv can also have straight cut edges.


      To start the herring bone, pick out two strips and sew them together at a perpendicular angle. Press each seam as you go.


      Continue to add strips to one side and then the other. After pressing each seam, trim on the side you are going to add the next strip to.


      This photo shows the part that is trimmed. I also trimmed along the side when it became a bit wobbly.

      I used to want someone to teach me how to pick the colours for this kind of improv piece. Eventually I learned that I just had to relax and place the colours mostly randomly. For this piece picked a lot of colours that were similar with just a few that contrasted. I tried to use only a small number of contrasting pieces so the pops of colour would be both intentional and dramatic.

      Also, remember to look at the piece as you stop to press. If you don't like some of the colours, you can just slice them off and start again on that side.


      I planned to quilt the runner densely and I knew that would make it draw in and shrink in size.  To make sure that the runner did not get too small, I planned to make the top of the runner a good 4" or 5" wider than I needed and I encourage you to do that too. Measure the width of the piece as you add fabrics and when you are able to trim the top straight and have the width you need (in my case about 16"), trim the top straight.


      Keep adding more strips and every so often trim the sides perpendicular to the top cut so that you can keep the piece growing in a rectangular shape.


      You can see more trimming in this photo. Also you will see that sometimes I added two strips on one side before I added to the other. Because this is an improv piece, the "V" created by the herringbone does not run exactly down the middle and sort of migrates from side to side. If you want, you can manipulate the location of the V, depending on how wide each strip is before the next one is added.


      When you get to the final end, you need to keep adding strips until you can cut a horizontal line at the required length. Again, I added about 4" to my planned final length to give me room for trimming the final runner.

      You can also see in this photo that my trimming along the sides was not perfect as I went, but that is not really a problem as the runner will be trimmed after quilting.


      Make a back piece for the runner that is longer and wider than your top. I added two layers of cotton batting and basted the runner just as I would baste a quilt. (If you need a reference, my tutorial for basting a quilt is here.) I also suggest you consider adding a layer of heat resistant batting for one of the two layers if you have some on hand as we often put hot bowls on table runners. Since I did not have any handy, I just used the two layers of cotton batting.


      Quilt as desired. I used my walking foot on my domestic sewing machine and quilted straightish lines randomly spaced following the lines of colour.


      It's a good idea to go and measure your table again. Then trim the quilted runner to the size you desire.


      Bind the runner and enjoy your lovely runner.

      I used a single fold binding and my tutorial for single fold binding is here if you need a reference for binding. Once the binding is complete, the runner is ready for the table. Generally I would wash the runner first before using it, but this time I did not bother as I know it will be spilled on soon and washed then. I am certain the texture from the quilting will be enhanced by a wash.

      Please let me know if you have any questions and I would love to see photos of any runners you may make.

      2016 button 250 best


      Don't forget to link up your Q1 2016 FAL finishes before the end of April 7 - go here - and also to check out the other FAL tutorials this week. Here is the schedule:

      Best,

      Leanne