Showing posts with label 2013 FAL. Show all posts

Tuesday, October 8, 2013

Q4 Begins - Link your list for the last quarter of the 2013 FAL

she can quilt

I have been reading all of your Q3 Finish-A-Long finishes posts - and will continue to read till I have read every one. I recommend perusing these links  for all the inspiring finishes and lovely stories about the projects. And, thank you to all of you, for all the compliments and nice things you have said about my cheerleading, encouraging and cajoling in the FAL. It truly is fun to be your "fearless leader".

This fall I have been tidying and cleaning, sorting and rearranging - the whole house it seems. This organizing fever has spilled over into my quilting plans. My Q4 list is crazy - I know several of you will just laugh and laugh, but I am optimistic. And I remind you, there are no penalties for not finishing your list, so go large. Here is mine:

Pickle Dish Quilt - in progress

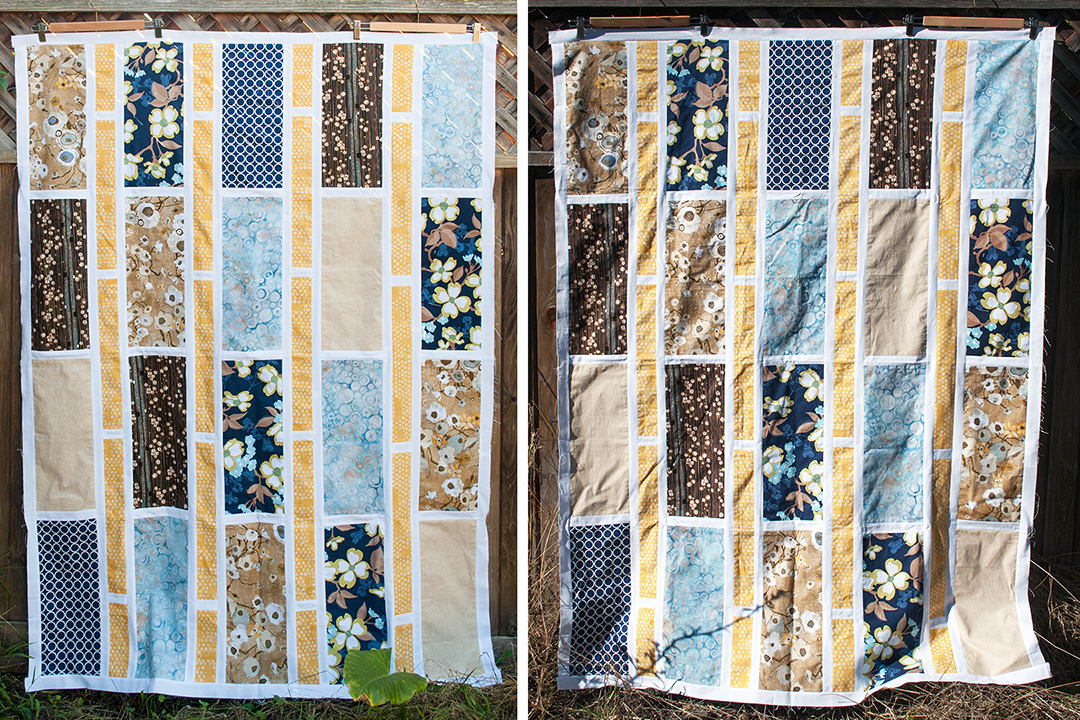
1. Pickle Dish - I think this has been on all my 2013 lists. I have only about 24 dish units to make of the 200 required, I have 7 of the 25 blocks of 8 dish units sewn, then there is quilting and such but I really, really want this done as it would be nice to gift it at Christmas.

Asterix and other symbols - in progress

2. Asterix and other symbols quilt - I have all the blocks back from the talented quilters in Always Bee Learning, and worse, it is my month again in November. It is time to make these blocks into a quilt, I mean, look at how cool they are.

Improv Sampler - in progress

3. While we are on bee blocks, look at those beautiful improv sampler blocks from my friends in the Free Bee. I know how I want to piece these and quilt them, this is quick project and will be such an excellent quilt.

Stonehenge block quilt - in progress

4. This block is called Stonehenge from the 99 Modern Blocks book and was made for me in the now finished Modern Blocks Bee. I might add some warmer coloured blocks too, I have more fabrics. But they are quick and easy, so surely I can finish this one too.

Cycles 2 - in progress

5. Cycles 2 - This feels like cheating. All it needs is the binding, but I don't want it to get set aside, so it is on the list.

No - for the No quilt

6. The No quilt is a project near to my heart, and has sat mostly stalled. I have some lovely embroidered contributions and I need to get more blocks done. This quilt is for my office, to remind me to say No more often - just because I can do something does not mean I have time or should do it.

Emerald Irish Chain

7. Emerald Irish Chain - Truly should be done already. Enough said.

Placemat in progress

8. Placemats - The awful brown table cloth is making me crazy, I need to get these done.

Giant Plus top

9. Giant Nordika Plus and pattern - I love the giant pluses, it will be easy to finish this one.

Mystery Quilt - basted

10. Mystery quilt - This is the most beautiful quilt top I have made - Sheila's pattern and teaching have a lot to do with that. I have been too scared to quilt it, but I think I will be ready this quarter.

Flying Geese

11. Loads of flying geese - I love making these now that I have ruler assistance to keep them nice. I see these as a fill in piecing project, when I just want to sew something fast. And I love all the flying geese quilts I keep seeing, so maybe I can have one this quarter.

My new sweater project

12. Cria, a sweater for me - I am excited to be knitting a sweater again, and this yarn is soft and lovely. This project should fit nicely around all the rest, and I keep it in my bag for all the lines, time spent waiting for kids and such.

You know there are more bee blocks in my drawer, and some other quilt tops too. But I am stopping at 12, after only finishing 2 things this quarter, my chances are slim. But I am hopeful none the less.

Now the news. The FAL will continue for all of us in 2014. As you will recall, Rhonda from Quilter in the Gap is the mastermind of the FAL, having started it in 2012 She decreed that it would move each year to another blog. So the FAL moved from Tennessee, U.S.A to Alberta, Canada and next year I am ever so pleased to announce that the FAL is off to Scotland!


Yes, my real life and internet friend, Katy from The Littlest Thistle is going to be our host for 2014. That's her in the middle, at Sewing Summit the year before this most recent one. I love this photo and stole it from her blog (hopefully she will be ok with that).

If you don't know Katy well yet, check out her blog - she is talented, funny and smart (she just explained a lot of math to all of us in a way anyone can understand in her tutorial this week). I know that we will all have the best time finishing along next year under her leadership.

Enough, get your Q4 lists done and link them here. If you need to check the FAL rules they are here. If you have questions, let me know in the comments or by email to shecanquilt [at] gmail [dot] com.

I will let you know our fantastic Q4 sponsors in a few days, I can assure you that you will want plenty of entries in the Q4 draws, so do go large with those lists - lets make Q4 the quarter with the largest number of finishes in FAL history.

Best,

Leanne

Sunday, October 6, 2013

Katy Explains The Maths Behind The Perfect Zippy Pouch - a 2013 FAL Tutorial

she can quilt

Today, Katy from The Littlest Thistle is going to show us how to make perfect zippered pouches. I have been lucky enough to meet Katy in real life, and she is fun, interesting and generous. Don't be put off when her tutorial starts talking about math - and seemingly complicated math at that - you have all the calculating power you need on your cell phone or computer to lick this bit of math in an instant. And with Katy's help, you will be sewing prettier and technically complicated zippy pouches too. Read on.

Hi I'm Katy from The Littlest Thistle, and I'm here today with a FAL tutorial to help with an oft puzzled over conundrum - how to create a zippy pouch with a flat bottom and vertical sides.


So lets take a look at the 'traditional' zippy pouch, where you squish the sides down to meet the base, sew along a line and chop the extra off:


You can see the sides slope down to meet the base, which is not necessarily a bad thing, it's just that with patterned fabric with any kind of horizontal or vertical pattern you'll lose the effect with things wrapping oddly round the side.  The angle of the sides depends on how far up the seam you go before stitching the line across, and it's not easy to see what the effect will be until the pouch is turned through.

The next option is to cut a square out of the bottom corners of the rectangles you're using to make the sides.  You sew the sides and base together, leaving the square openings free, then you squish the sides down to meet the base again, but this time you have a cut edge to sew along the seam allowance for:


You can see the sides are at less of an angle, but they're still not vertical.

Now I do have to break the news to you that there's maths involved in the ultimate solution, good old Pythagoras and his theorem in fact, sorry!  The good news is, it's easy, and you can do it on the calculator on your computer :oD

Taking the 2nd example from above as a starting point, we're going to use the cut out corners method, but instead of vertical sides on the fabric we start with, we're going to angle it up to the top.  By doing this, when the right angled triangle at the side is folded round and the base is folded up, they will meet to push the front out, leaving the sides vertical.

A right angled triangle is one where the side and the base are at a 90 degree angle to each other, or thinking about a clock face, the big hand (side) is at 12 and the small hand (base) is at 3.  We need a right angle between the side and the base to keep the base flat otherwise you would end up with a rocking pouch!

Because we're using a right angled triangle, to work out how to get the height and the depth we want we need to use Pythagoras:


In the diagram above:

a = the height we want the pouch to be + seam allowance top and bottom
b = half the depth we want the pouch to be (as there is a front and back) + 1/2 seam allowance
c = ?

Pythagoras says:

a2 + b2 = c2

So since I've decided that I want a height of 7 1/2", a depth of 4 1/2" and a seam allowance of 1/2" I get:

a = 7 1/2 + 1/2 + 1/2 = 8 1/2
b = 2 1/4 + 1/4 = 2 1/2

c2 = (8 1/2)2 + (2 1/2)2 = 78 1/2  (that is, c2 = 72.25 + 6.25 = 78.5)

c = √(78 1/2) = 8.86 which we round to the nearest 1/8 inch, making 8 7/8  (8.875)

(** For those who have forgotten a few math things: c2 means c multiplied by c. When you know the value for c2  you then have to take the square root of that value to get c and you can do that by putting the value of c2 into your calculator and hitting the square root button that looks like this:  √. The calculator will tell you the square root and you can check by multiplying that number times itself to see if you get the c2 number you started with.)

Are you still with me?  I hope so...

In the diagram above, there are some unlabelled measurements, so for the depth to work correctly the bit below c must be the same length as b, ie 2 1/2".  The width of the pouch is entirely up to you, but I went for 10".

If you are going to create your pattern using paper and pencil, I suggest you draw the triangle sides on a separate piece of paper with side a vertical and side b horizontal to ensure you have your right angle, then you can connect the 2 and double check that c is correct by measuring it.  Once you're happy that you have all the right measurements, cut them out, and tape them to the main body.  Gridded paper, like graph paper, can be really useful for this kind of thing.

If you want to use a program like Illustrator to create your pattern, as I did, I suggest you also draw your triangle with a vertical and b horizontal, joined by c, then group the lines together and rotate the shape until c is vertical.  Using the grid functions available on most drawing programs should help ensure that your measurements are correct, and that you have managed to get c vertical

Here are a few step by step shots to show you how the construction works:

Front of pouch piece cut out

Having added the zips, I'm now constructing the pouch.  Note that the cut out bits are unstitched

Stitching the corners closed

Finished front on (that left side is vertical, honest!)

Side on shot

This actually allowed me to tick off one of my Q3 finishes, so thanks for helping me out with that Leanne!

And thank you Katy

Don't forget to link up your Q3 finishes - the Q3 post-quarter link is open here and it will close at midnight MST, October 7, 2013. And if you still have some UFOs I hope you will join us for Q4 of the FAL, Q4 FAL lists can be posted starting on October 8.

Saturday, October 5, 2013

Anna's Quick and Easy Sewing Machine Cover - a 2013 FAL Tutorial

she can quilt

Today, Anna from Hoot'n'Haller, is sharing her tutorial about how to make a quick and easy sewing machine cover. My sewing machine really needs a cover, I wonder if your's does too. It seems that I am constantly putting off making things for my own sewing room - I might have to fix that this weekend. Anna shows us how simple it is to make this sewing machine cover, read on.

Hi everyone! This is Anna from HootnHaller. I am so excited to share a tutorial today for a quick and easy sewing machine cover. I have been meaning to make a cover for my machine for over a year, but something else always takes precedent. Recently, I have been learning a lot about the maintenance of sewing equipment and now I completely understand the importance of keeping my machine away from added harmful dust! This sewing machine cover is meant to be a super fast project so that you can squeeze it in between your many other sewing projects.

Supplies
Fabric
Flexible ruler
Ribbon (at least 4 feet)
Basic sewing supplies

Instructions
Before you begin your cover you will need to take three measurements of your machine. First, determine the width of your machine.


Second measure from the bottom of the front to the bottom of the back, going over the machine. See the photo below for more clarity.


Third, determine the height for the side ties that will hold the cover onto the machine. I chose to place my ties 7" from the table.


The measurements for my machine were 18.5" x 30". The next step is to make a "quilt top" that meets the measurements you took for your machine. You can make your sewing machine cover with elaborate patchwork or even choose to use the whole cloth method. Since my sewing machine is set up in my bedroom, I chose to create a simple patchwork top that would fit in well.


Next, cut a piece of fabric to the same dimensions as your top. This side will most likely face the inside of your machine - though you could definitely make your machine cover reversible! Layer the top and backing right sides together.


Cut your ribbon into four sections, each at least 12" long. Go back and double check the measurement you took earlier for the placement of the ties. Use a ruler to measure your determined distance from the end of the cover. Place the ribbon in between the two layers and pin in place. You will do this four times - twice on each of the long sides of your machine cover.


Place pins around the perimeter of your machine cover. Mark a 3-4" section at one of the ends where you will not sew. This gap will be used to turn your cover right sides out. Sew a quarter inch seam around the perimeter.


Clip the corners to eliminate bulk from the seam allowance. Now, turn your project right sides out! Use a blunt object object, such as a pen, to push the corners out. Give your project a good press, make sure that the seams are pushed out and even.


Topstitch around the edges of your cover using a one-eighth inseam allowance. You will probably want to pin the turning hole shut to ensure that you stitch through both layers. Once you have finished the top stitching you have a completed sewing machine cover. Tie it onto your machine and enjoy!


I hope that you liked this tutorial and that you will cover up your machine to keep it safe from dust!


And thank you Anna

Don't forget to link up your Q3 finishes - the Q3 post-quarter link is open here and it will close at midnight MST, October 7, 2013. And if you still have some UFOs I hope you will join us for Q4 of the FAL, Q4 FAL lists can be posted starting on October 8.

Thursday, April 4, 2013

Photo Tips for Quilt Photographers - A 2013 FAL tutorial

she can quilt

My friend Anne's blog, Play Crafts has such lovely photographs and even a really user friendly palette builder. I was excited when she agreed to do a tutorial for us of tips for improving our pictures of quilts. I think you will really enjoy this tutorial, it will improve your photos, whether you take them with your phone or with a more fancy camera - read on.

First off, I want to thank Leanne for giving me the chance to share this tutorial with you all! There are a ton of useful photography tutorials out there, but I wanted to focus on a couple of things that you can do to improve your photos, regardless of what type of camera you use.

One quick caveat before we begin: photography is an art, which means that it's fairly subjective. You may not like the same types of photos I like, and that's totally okay! Hopefully I'll be able to give you enough knowledge that you can have more control over getting photos you like.


The thing I want to focus on today is light. Your photo is only going to be as good as your light, so it's an important thing to pay attention to! There's a lot you can do with software after the fact (my favorite is Adobe Lightroom followed by Adobe Photoshop) but you're best off starting with the best light you can.

So what's that look like? In a nutshell, you want indirect, full-spectrum light. I realize that might not be clear, so let's break down what that means.

Indirect Light vs Direct Light

 Indirect light refers to a quality of light that produces soft shadows. This means the shadows aren't super dark, nor do they have hard edges. This is also referred to as soft light. The opposite of this is hard light or direct light.


Direct light is light that is coming directly from the light source (the sun or a light bulb for instance) and therefore is all coming from one direction. This produces sharp shadow lines and really high contrast between the lit areas and the shadowed areas. Our eyes can adapt quickly to different light conditions, so we can see details when looking at the lit areas and when looking at the shadowed areas.


However, a photograph doesn't have the ability to show details in both areas at the same time. So when taking pictures of quilts in direct light, areas that are too bright for the camera to capture are white, and those that are too dark are black. This leads to a quilt not looking as colorful because more areas are bright or dark depending on if they're in direct light  or shadowed.


Direct light does highlight the texture of the quilt well, although be aware that sometimes it is still too much contrast for our eye to be able to easily make sense of what's going on in the image. And in the case of quilt tops, sometimes you don't want to highlight the texture! (Look how much I needed to iron that quilt top in the first comparison image!)


Indirect light on the other hand, means that the light has gone through a filter, or bounced off of something else. This means that the light is coming from multiple directions, each casting it's own shadow, which gives the shadows a softer edge. The shadows are also not as dark, and the highlights are not as bright since the light is hitting in different areas. 


This reduces the contrast of the image which allows the camera to capture more of the details and retain more color. 


To find indirect light, head to shaded areas, preferably near lit areas so you still get lots of light. The deeper the shade, the harder it will be for your camera to take a picture that isn't blurry since there's so little light. Be aware when taking photos in shade that you don't want any lit areas in the photo itself, as you'll get back to the high contrast problem. Dappled light looks pretty but is very difficult for a camera to capture, and a quilt in shade with a bright lit background can be difficult as well.


My favorite indirect light is overcast days. We get plenty of that in the morning where I live, and it keeps everything bright but super soft shadows. Just make sure the sky doesn't get in your image, because it will just look white or grey like in the image above.


Finally, if you're indoors, you can take a photo near a window. If there is direct light coming through the window, draw a sheer or curtain to filter or diffuse the light. This is similar to those white covers professional photographers put over their lights to keep harsh shadows out of their shots. If your curtains are super thick, then it will be too dark, but play with it and see what works best.


Overall, I find that soft light lowers the contrast so that the camera can capture the most range of color without adding too much visual chaos with the highlights and shadows.

Full-Spectrum Light

So now that we're aware of our highlights and shadows, it's time to think about the color of our light. Most light sources just look white, but they are often not. If you've ever been to a home improvement store, they often have light displays to show the "temperature" of the light source, and you can see some are more blue or more yellow. 

Full-spectrum light refers to a light source that includes all the colors. (Remember, in light, all the colors = white which is why you see rainbows and why prisms work, because all those colors are there in sunlight.) Sunlight is the best source of full-spectrum light which is why you so often hear the adage to take your photos outside.


We see color because those are the colors of light reflected from an object. So something that is orange reflects orange light, something white reflects all light, and something black reflects no light. This means that if your light does not have all the colors in it at equal levels (so it is limited-spectrum), colors will not appear the same as if you had full-spectrum light. This is most obvious when dealing with light that is a complementary color to the object. A blue light (such as twilight) on an orange object will appear much more muddied. 

No amount of photoshopping can truly fix this since neither the camera nor photoshop can add the missing light where it belongs. Above, I took a picture of the same block in daylight and under a standard CFL (which has a yellow cast to it). I photoshopped the picture taken under the CFL to remove as much of the yellow cast (so the white looks white) and you can see the purples are still muddied (purple is complementary to yellow) and the greens and pinks have a more yellow cast to them. 

Here's a series of photos I took using different light sources, using my Kona card to show the effects. These effects may seem subtle, but that's because the color area is so small, on a quilt it would be a lot more noticeable. 

In each comparison, the top shows the untouched image, the middle shows the image photoshopped to get a true white, and the bottom is sunlight in indirect light.


Incandescent light is yellow/orange, and so the purples and blues are a bit muddied, and the pinks went a bit orange.


Standard CFLs (Compact Florescent Lights) have a pretty strange light spectrum, but the major difference is in the olive greens. In sunlight, they tend towards brown, while under CFL they look a lot more green.


Florescent lights have a green cast (which is why people look so bad under it) and therefore the reds get muddied and the green/browns go more green, similar to the CFLs.


Shortly after the sun sets, there is some light still being reflected from the atmosphere. However, the color of the light has a strong blue/purple cast to it. The biggest difference in the twilight shots is that the oranges and yellow-oranges go redder, and the yellows get muddied.


Even outside, the colors will shift as the day progresses. Sunset is a wonderful time for taking landscape and portrait photos (it's often referred to as the golden hour because of the gold/red hues and because it lends such a warm tone to photos) but it can add a gold or red tone to your quilts which may be unwanted. I don't have a Kona color card picture, but above is a photo I took of Balanced Rock in Arches National Park, 30 minutes apart before and during sunset. You can see what a difference the light makes.

Conclusion


Here's a quick recap of the tips covered in this tutorial.
- Your photos will only ever be as good as the light you start with!
- Photos in indirect light will have more saturated colors and less contrast.
- Find bright shade, take advantage of an overcast day, or use a sheer curtained window for indirect light.
- Full-spectrum light gives you the most accurate colors.
- Sunlight is the best full-spectrum light.
- Even sunlight changes to limited-spectrum light during sunrise, sunset, and twilight.
- Photoshop cannot totally fix color issues caused by limited-spectrum light sources.

Hopefully you find this helpful, and it will help you with your photos in the future! If you have any questions, please feel free to ask!

And thanks again, Leanne!


Thank you Anne!

Don't forget to link up your Q1 finishes - the Q1 post-quarter link is open and it will close at midnight MST, April 7, 2013. And if you still have some UFOs I hope you will join us for Q2 of the FAL, Q2 FAL lists can be posted starting on April 8.