
Yesterday, I set out to spend the day doing fun things. First I worked in my garden for the morning. My garden has some established fantastic plants but it also needs a lot of changing about. Yesterday I planted raspberries, blueberries, rhubarb and pumpkins in the old compost/ weed patch. I am guessing I will have plenty of weeds to dig up there again as I water in these new food plants, but it is good dirt and a nice spot, so whatever.
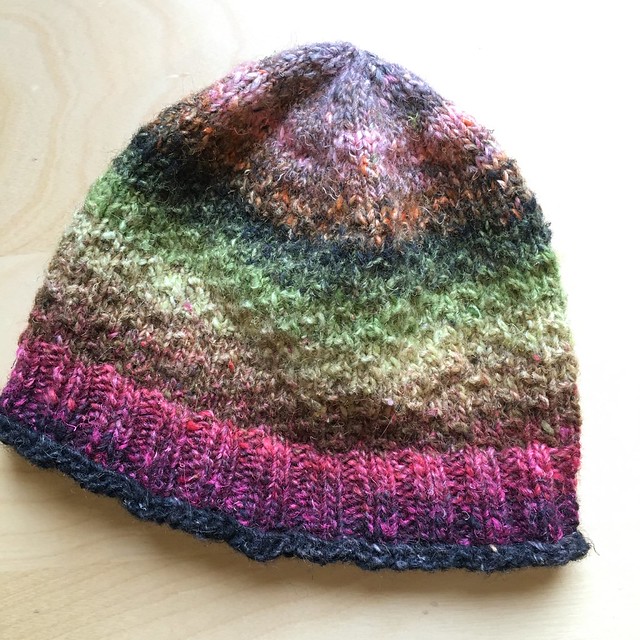
But then I was tired and my sore knee was hurting - it benefits from activity but then complains. So instead of the popping up and down of sewing, I pulled out my knitting and after a long while finished this hat. It took a long while as I ripped out the top decreases three times so as to not have any yarn left over and a good size hat.
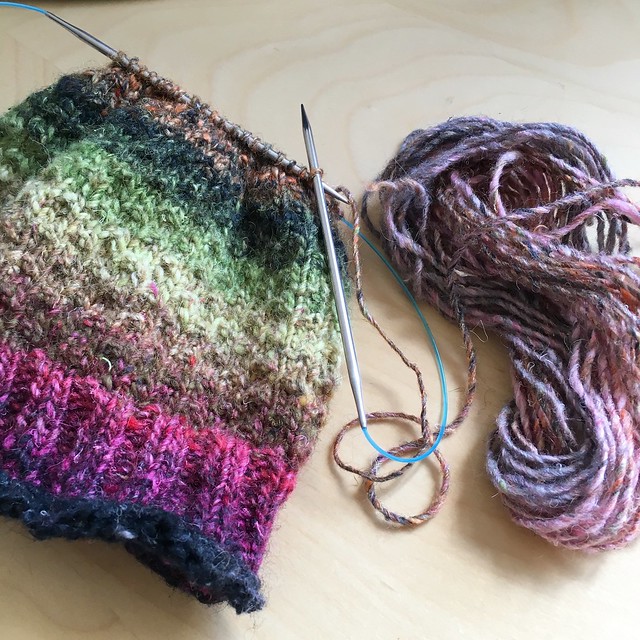
I had one ball of this wonderfully coloured Noro yarn (Silk Garden colour 309 lot C) - well I hope I might have more but I only had one at hand - so I wanted to use the entire ball for this hat. The design is my own.
By the way, this hat has yet to be blocked. I will do that today and try to share a photo with you of the difference this coming week, which should be noticeable. Blocking is a good wash and dry, and then laid out on a towel or over a glass to dry in the correct shape.
For those of you who will ask for a pattern, here is the recipe which I am sharing from memory and the photo as the hat is off in another room right now. My hat was made with size 4 needles, or maybe they are 3.5, I swatched to get a fairly tight gauge as it is a hat so should be warm, and I cast on 88 stitches (a number divisible by 4) to knit in the round. I knit 4 or 5 rows of stocking stitch to get a short rolled brim and then I did ribbing of k2 p2 for about 2". I changed to a pattern that would add the tiniest texture to the stocking stitch. It is:
- Row 1, knit the row;
- Row 2, k3 p1 (repeat);
- Row 3 knit the row;
- Row 4 k1 p1 k2 (repeat)
When I was at the top (about 6" from the brim for an adult size hat but this can be more or less as you like your hats to fit), I decreased as follows:
- First decrease row: k2tog, k7 (repeat)
- Knit 2 rows
- second decrease row: k2tog, k6 (repeat)
- repeat with each decrease row having less knit stitches until you are close to the top. If you are running out of yarn, knit only one row in between decreases and then on the last few stitches just decrease without knit rows in between until there are about 8 stitches left and then run the yarn through them, pull tight and stitch closed on the back. Mend in any other loose ends.
You can make a hat like this any size, bigger or smaller, just make a gauge swatch so you know how many stitches per inch you are knitting with your yarn and needles, then cast on enough stitches for the size of head you plan to wear the hat (remembering that you want the hat to be tight to stay on and it will stretch some) and make it long enough before you decrease for the wearer. Also you can make the ribbing shorter, skip it entirely or make the entire hat in ribbing. The stitch pattern in the middle of the hat between the ribbing and the decreases can also be anything you like, plain or fancy cables or lace or something else.
I still often follow a pattern for a hat when someone else has done the math and planning for me but when I just want to knit, this is my hat recipe.
Today I am waffling between starting my day with a good tidy of my own room - more likely and sewing - might be best left for the afternoon or the tidy/clean will never get done.
Happy Father's Day to all the fathers!
Best,
Leanne
3 comments:
My knitting needles have been calling and I bet I have a skein of silk garden. Love your recipe.
Love the hat and I think this may tempt me to hunt for my needs and visit the wool store!
It's lovely!
Post a Comment