Jess, from Elven Garden Quilts, and I are back today to talk about deciphering some common quilt blocks that don't fit on a grid. It's my job to talk about the math and you can head over to Jess's post to learn how to spot these blocks.

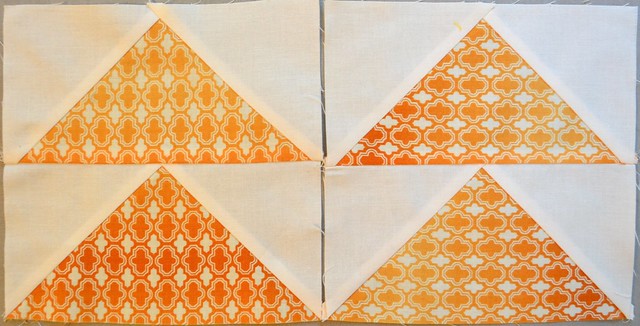
I am going to start with flying geese. From a math perspective, these are really cool special right angle triangles and you can use the Pythagorean theorem to figure out the length of their sides.
However, let me assure you that, as a quilter, you do not need to pay any attention to that math at all to make all sizes of flying geese. All you need to know is that you need the flying goose unit to be twice as long as it is high, plus 1/2" added to each for seam allowances. So quilters tend to make flying geese that finish in the quilt at 1" x 2", 2" x 4", 3" x 6", 4" x 8", etc. as these sizes are easy to calculate and make. (So the geese, unfinished are 1 1/2" x 2 1/2", 2 1/2" x 4 1/2", 3 1/2" x 6 1/2", etc.)
There are many clever ways to make flying geese, and useful rulers too. Flying geese are also often paper pieced. Today I am going to show you the simplest method I know. Start with your rectangle that is twice as long as wide plus 1/2 on both sides. My yellow rectangle, above is 2 1/2" x 4 1/2".
Cut two squares equal to the smaller measurement. My squares are 2 1/2". You can see that if you line the squares up with the rectangle that the two squares side by side are 1/2" longer than the rectangle unit.
Sew along the drawn line. Cut off the outer corner 1/4" from the sewn line.
Press the inner triangle of square open. Then line up the other square and sew along the line.
Another thing to realize is that a flying goose unit is the same size as two HSTs of a similar size sewn together. So if I sew two 2 1/2" HST units together, I will get a flying goose with a line down the middle that is 2 1/2" x 4 1/2". However, to avoid the seam down the middle of the goose, quilters ofter prefer to make flying geese.
The next odd ball block that I am going to tell you about is quarter square triangles. There are more precise approaches, but my approach to making these handy units - which also are two flying geese, nose to nose - is to start with squares 1" larger than the unfinished size you want the units to be. You will have plenty of room to trim the blocks neatly with this approach.
Press open. Do not trim at this stage.
Draw a line corner to corner, using the corners that are not already sewn, as shown.
Stitch 1/4" away from the line on both sides of the line. Cut along the line.
Press open.
Trim the resulting blocks to your desired size. I trimmed these two blocks to 2 1/2" squares. When you trim make sure you line the diagonal lines with the 45 degree line on your ruler. Do you see now how they are just two flying geese, nose to nose?
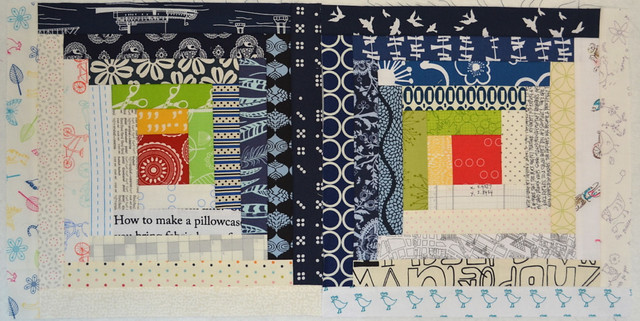
The math for a log cabin block is not hard but it is tricky to reproduce a block without any starting reference point. Usually, log cabin blocks are made with equal size logs and the logs are placed all round the inner square so that there is an equal number of logs on each side of the inner square.
So with those two blocks above, I can see that the inner square is larger than the logs. And I know that the blocks were 12 1/2" when they were done. So I counted the logs on each side of the square and see that there are 5 on each side of the centre, or 10 logs across plus the centre. Given that I know quilters like to keep the math easy, I would immediately assume that the logs are finishing at 1" and the centre is finishing at 2" - 10 x 1 = 10" + 2" = 12". Since the final logs are sewn on only one side only, that leaves the expected 1/2" around the block for seam allowances.
Then I remember that each log and the centre square also need seam allowances so I know that the fabric used to piece each log will be 1 1/2" wide and the centre square is 2 1/2" wide. If you like to cut your logs all at the start, then you can look at the picture and figure out their length, always adding 1/2" to the finished length. Or you can measure the required length as you make the block and cut your logs as you go, which is more often what I do.
Also, given the number of logs in these particular blocks, I would caution you to use a carefully tested 1/4" seam allowance or before you know it the blocks will not be the correct size. If each log is even 1/16" out of size after it is added, by the time you add 10 logs horizontally and 10 logs vertically you will be out more than 1/2". So I also measure and trim my log cabin blocks with every round to ward against such a huge discrepancy in size from my plan to the end result.

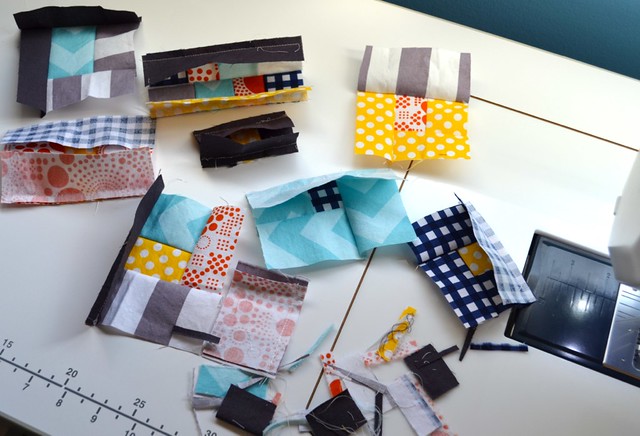
Another type of block that Jess and I thought we would discuss in the oddball group is improv blocks. Often, there is no math for improv blocks as they are built freestyle and then trimmed to a required size for piecing in the quilt. The mathy thing to keep in mind with improv blocks is their proportions and scale, and you just eyeball those features - all of which are why I love improv blocks.
Remember to head over and read Jess's post on recognizing oddball blocks. And if you have any questions on this or any of the Decipher Your Quilt posts, just let us know. We will be back in two or three weeks with more deciphering.
Best,
Leanne


12 comments:
I enjoy your deciphering so much because I HATE math, but love quilting. I wish/hope you two are considering putting all these tips and explanations in a book - a handy reference guide. Thanks for helping me with my quilting.
Great post. I had to do flying geese in a bee block and hadn't realised they are more simple than they look (unless they're flying in a circle!) but I hadn't spotted how to do the quarter square triangle easily which I'd been itching to have a go at!
I hope to get some geese into a fall quilt. Summer looks like it will happen sew...
Very interesting as usual! I hadn't thought of quarter square triangles as flying geese before - but of course they are!
another really helpful one!
Leanne your lesson on flying geese was so helpful, will be returning to this again when I need to make one of these blocks, no change of mind will have a go and write the instructions down and keep it with my block for reference. Log cabin blocks I do find tricky as if I go just the slightest bit crooked it really shows so tend to avoid them. I suppose this is the wrong attitude!
Great lesson! Any tips to prevent your machine from eating the corner of the flying goose block? That is my number one problem when making these. Not really a deciphering question, I know, but if you do have any tips, I'd love to hear them.
NIce reminders of the flying geese and teh quarter square triangle. I often avoid QST but shouldn't. When I made them for your latest MSB quilt your method worked beautifully with no fuss - need to remember that!
Apologies for my typos above. Too much rushing!
Rosemary B here:
I have learned SO MUCH. You two ladies are fantastic
Thank you THANK YOU BOTH for offering all of this information
I have been printing this out and reading it over.
My brain is definitely bigger now :-)
These tutorials about deciphering our quilts are helpful. Thanks for teaching this old dog new tricks.
More info and inspiration - thanks x
Post a Comment