
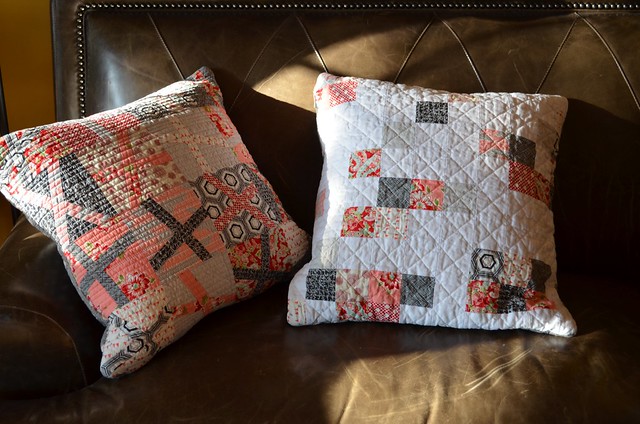
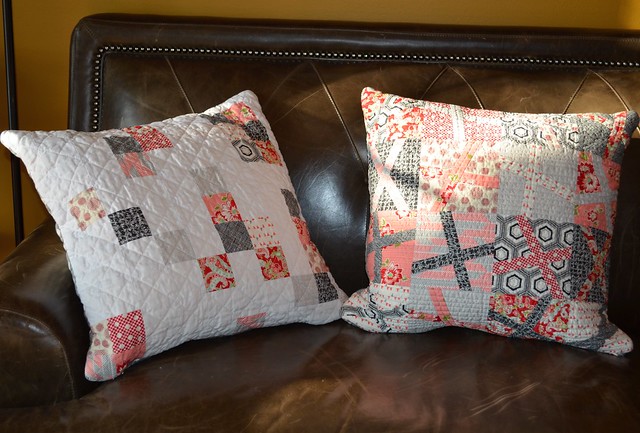
Almost two months ago, I told you I was making these pillows with the Fluffy Sheep Quilting She Can Quilt Blogger Bundle of fabrics and I promised to show the to you when they were done and share a tutorial too. Then I was busy and travelled a lot but finally, here they are.
These two pillows finish at about 19 - 19.5" square depending on how you trim them up. I used the fabrics from my bundle and added Essex linen to the pixelated pillow. The pillow form inside is a down filled 20" square from IKEA. These photos were taken after I washed the pillow covers.
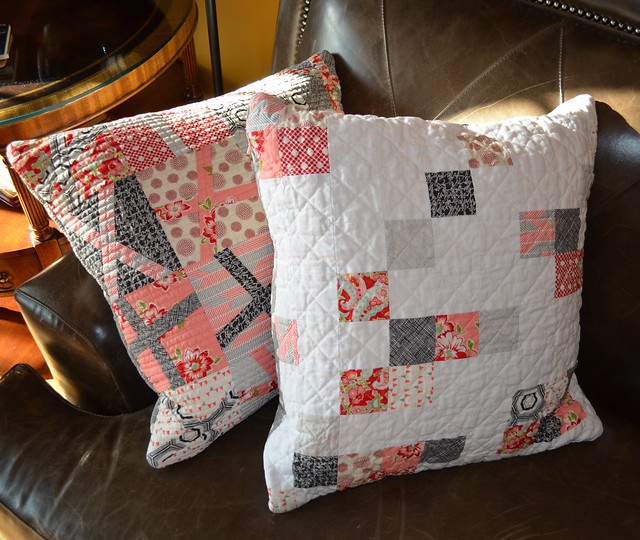
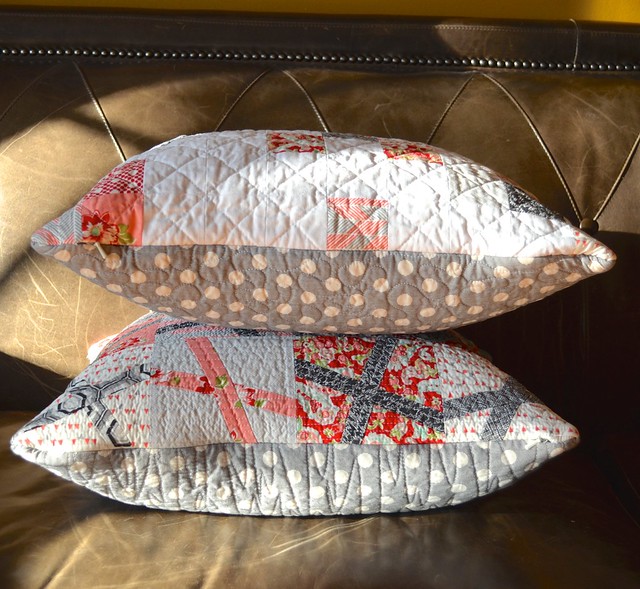
For comparison, the picture above is before I washed the pillow covers. You can see the added texture, drape and softness that washing adds.

There are the fabrics in the blogger bundle Cindy invited me to choose for Fluffy Sheep Quilting. There are more bundles in Cindy's shop, should you want to make a pillow just like one of mine. There is plenty of fabric in the bundle to make each of these pillows and have more left for another project.


Sew the strip to both sides of the background and press. You will see that the background no longer lines up perfectly but don't worry about that right now.

Slice the block again on whatever angle you like to make the other side of the cross. Make sure you have a strip long enough to piece in this spot.

Sew the second strip in place. It is a bit tricky to position the fabrics so that the first strip still looks straight. I just eyeball this placement and didn't worry that it is not exactly right. If you position the second seam and then fold back the fabric at the 1/4" seam allowance, you can see if you are close to lining up the seam or need to move the fabric a bit. Press this unit and then trim it back to a 5.5" square. Make 16 units in total.

When you have 16 improv crosses made, lay them out until you are pleased with the layout. If one really is not working for you, remember that you can always make another unit and change out the offending unit.

Sew the 16 improv cross units together in a 4 x 4 grid, using a 1/4" seam allowance. I sew the units in each row together, press the seams and then sew the rows together. Press the seams again.
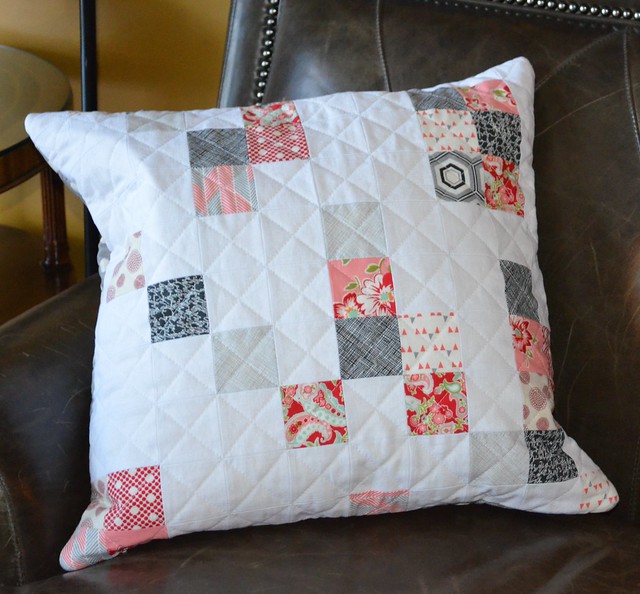
This pillow front is far simpler to make. Cut out a number of 2.5" squares from your prints - I cut about 45 squares but did not use them all - and cut a number of squares of your background fabric. Don't cut all your background squares to start, you may decide you want to add in more prints and it is easier to just add the rest of the background in once you have decided on the arrangement of the prints.

In the end you need a grid of 10 x 10 which equals 100 squares. Arrange the squares in a random and pleasing arrangement. I have been asked the trick to this kind of improv layout and there isn't one. Just lay out your squares and see what you like. Keep in mind the amount of background you want to see - I was going for about 1/3 patterns and 2/3 background. I rearranged them until I had a reasonable balance of the blacks and reds. Do not take too long doing this as there are countless options - I set myself a 15 minute time limit. In any blanks, add more background squares.

Then sew the squares together row by row, press, sew together the rows and press again. I pressed the seams all open but pressing to the side also works. I pin at each point the seams meet as I wanted to end up with a fairly squared off grid.

Next, quilt the pillow top. Make a quilt sandwich by cutting a 22" square of scrap cotton - I just used Kona white, lay a 22" piece of batting on top of it and then put the completed pillow on top of the batting. Baste (I used pins but basting spray works too). Then quilt as you like. For this pillow I quilted straight horizontal lines about 1/4" apart. On the other I quilted a diagonal grid from corner to corner. Once the top is quilted, trim it to about 20.5" square.
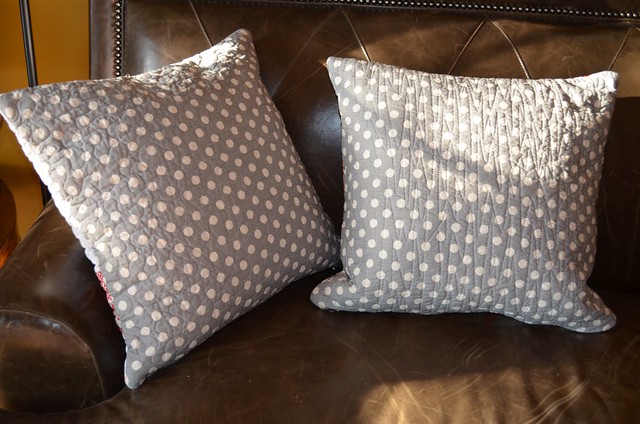
For the backs, I sandwiched a 21" square pieces of unimportant cotton - unimportant because you will not see it inside the pillow, I used white, batting and then this Sweetwater spot fabric. Baste (I used a few pins to baste these layers but basting spray works too). I quilted the back pieces each in a different allover free motion quilting pattern. Once the backs are quilted, trim them to be 20.5" square (or the same size as your pillow fronts).

An optional step, but one I recommend, is to zig zag stitch all around the edge of the top and bottom quilted and trimmed pieces of the pillow - or if you have a serger, use it to lock stitch the edges. This will stop the edges from fraying too much and also hold your quilting stitches in place.
There are several easy to finish the pillows once you have the top and back quilted. I decided to use an invisible zipper. (The zipper pull is on the far left for the top pillow and the far right for the bottom one, but you can see that the zippers are basically invisible.) Invisible zippers are really easy to install. Truly, they take a couple of minutes.

I have an invisible zipper foot. If you don't have an invisible zipper foot, you will need to carefully press open the zipper teeth before you stitch so that you can stitch close to them with a regular zipper foot. Open the zipper and place it back side up on your ironing board. Carefully roll the teeth to the centre and press open, being careful not to use an iron too hot which melts the zipper teeth. You need to do this because on an invisible zipper the teeth curve to the back which is what makes it invisible but also makes it hard to stitch that close to them without an invisible zipper foot which rolls the teeth away as you stitch.
For the next pictures, I used another pillow for the tutorial, please don't be confused. The coloured fabrics are the right sides of the pillow in these photos.

On the bottom edge of your pillow, fold it in half and on the front mark the centre point with a marker. Do the same on the bottom of the back of the pillow. Lay your invisible zipper along the edge of the pillow and trim any excess length on the zipper. Carefully stitch across the end of the zipper end to create a new zipper stop if you trimmed off the original zipper stop. Position the zipper in from the edges of the pillow front about 1.5 to 2" on each side. Mark the zipper on both sides of the teeth where it meets the middle mark on the pillow top. Also mark the zipper where the zipper teeth start (see the far left part of the photo below).

With the right side of the pillow top facing up, turn the zipper over so that the zipper pull is facing the pillow top (look to the far right of the picture above). Open the zipper all the way to the new zipper stop. Pin the zipper's edge fabric along the outer edge of the pillow top's bottom edge. Start pinning at the centre marks and then move to the top and bottom of the zipper. Pin with the pin heads toward the end of the zipper as shown so that they can be removed as you sew.

Position the invisible zipper foot right at the top of the zipper at the mark you placed where the zipper teeth start. Make sure your sewing machine's needle is set to land close to where the zipper teeth are. If you are using a regular zipper foot, start in the same spot, just where the zipper teeth start.

Backstitch at the beginning, slowly stitch toward the pins. You should be affixing the zipper to the right side of the pillow front or back. For me, the zipper wants to slip away from the edge of the pillow so use lots of pins and move slowly. Remove the pins as you reach them. Stitch as far as you can go and then backstitch.

Place the bottom edge of the pillow pieces with right sides together. Match the centre marks of unsewn part of the zipper and the bottom edge of the pillow back. Pin the zipper along the pillow back edge as for the top, starting at the matched marks and moving in each direction. Orient the pins so the pin head is toward the zipper stop. Stitch in place just as you did the first part of the zipper.

That's it, you have installed the invisible zipper. Open the pillow top and back to make sure that you have installed the zipper so that when it is closed the tops of the pillow pieces face out. Test the zipper to make sure that your stitching is close enough to the zipper teeth and that you can close it. Add more stitching if needed.

To finish the pillow, first OPEN THE ZIPPER UP AT LEAST HALF WAY. If you forget, you will be unpicking your seams.
Then pin the two pillow pieces, right sides together. In the picture above, you can see the stitching line for the zipper. Pull the back of the zipper at the zipper stop out of the seam allowance as shown. Start stitching your pillow, backstitch and use about a 1/2" seam allowance. Start stitching as close to the stitching line for the zipper as you can get. Stitch all around the pillow, ending at the beginning of the other stitching line. Keep in mind your mark at the beginning of the zipper teeth and don't hit that little tab with your needle as it might well break it.

In this photo you can see the end of the stitching line, right at the mark at the start of the zipper. Clip the corners to reduce bulk. Turn the pillows rights side out, being careful not to pull open the stitching at the beginning and end of the zipper and coax your corners as open as you can. Insert your pillow form and then zip up your pillow. I find invisible zippers hard to close because they are curved and such. Take your time, patience and care will get it closed and remember you are only opening it up again to give the pillows a wash.
Admire your beautiful pillows, as before you know it others in your family will be napping on them. Now that you know how easy the invisible zipper is, you might well want to make several more. If you do make some pillows using my tutorial, please share them in my flickr group, Inspired by Leanne, she can quilt here or email me a photo.
You can get invisible zippers in most stores that sell patterns and fabric for dressmaking. I ordered mine from Zipit and I order long ones and then trim them to size. For these pillows I expect an 18" zipper would be about perfect although I have no idea if they come that size.
Have a wonderful day!
Best,
Leanne
18 comments:
I love the random squares with the white, it's beautiful in its simplicity and really shows off the prints!
Sweet coordinating pillows :-)
Oh I love your nails!!!
And the cushions too, obviously; I've pinned your zipper tute, thank you xxx
Two stunning cushions!!!
These are lovely. Especially those improv crosses. How come I got that feeling I need to try it out? :)
Pretty cushions, and love the backs too :o)
Oh, I've been looking for an invisible zipper tutorial... Must try this out. Do you buy your zippers from Zip It? I've yet to buy any zippers online, just from the local craft store. Also, how do you find the IKEA pillow form? I've been looking for something a bit more plush than the craft store inserts which lose their shape pretty quickly.
These are a lovely set! jxo
Oh, Leanne! This is a wonderful post. I love the cusions on the leather couch - they look so inviting. The wonky cross one gets my heart a-flutter every time! They're even more gorgeous now after quilting and washing. Will absolutely be back to use your tute....I have to make a cushion or two in my near future! Wonderful, Leanne.
I'm saving this as next year I may do a pillow a month!
Love the color palette and fabrics of the pillows. I'm also in awe of the matchstick quilting after spending part of my day just trying to some close channel quilting for my 4-in-Art mini. I don't know how you do it.
What sweet pillows! Appreciate all the tutorials and really need to try the invisible zipper one of these days!
Great tut...so soft and pretty!
Great wonky crosses. I've yet to make some : )
Two simple pillow covers that turned out amazing due to your color choices. Thank you so much for the tutorial on the invisible zipper, I use the envelope back method and have been wanting to try the zipper for a less busy finish.
beautiful pillows. I love the little squares one especially :-)
Gorgeous cushions and great tutorial. Thank you!
these are such great pillows, thanks for sharing your process Leanne! Sure was nice to meet you!
Post a Comment