Saturday, May 31, 2014

Friends - a quilt - Ta Da!

Friends - a quilt

In the nick of time, I have finished this quilt - which I have named Friends. My friends in the Modern Stitching Bee made most of the blocks for this quilt and I made the rest. When I was picking a block for my turn in the bee, I saw this photo by Bananaphone Robin on Flickr. She kindly gave  her permission to use her idea when I asked her. You will see that, in the end, I did not follow her idea properly for the edges but I decided not to change them once I noticed.

Friends - a quilt

I have loads of photos for you of this quilt. My friends carefully cut cute fabrics and low volume prints that read as lines to make my idea work. I actually picked this block before the economy/thrift blocks became so popular.

Friends - a quilt

I quilted this quilt a lot on my long arm machine. The quilting was all hand guided free motion. I have a ruler and used it sort of free style to stitch in the ditch. Clearly I need a lot more practice with both the fmq and the ruler work, but still I love how this turned out.

Friends - a quilt - back

I put some of my favourite fabrics on the back.

Friends - a quilt

Here are some detail shots after washing.

Friends - a quilt

If you look carefully you will see my concentric circles in the larger white areas are pretty squarish. My brain is much happier to make squares than swirls.

Friends - a quilt

Around some of the blocks I quilted swirls.

Friends - a quilt

Around other blocks I quilted wavy lines and teardrop shapes. The washing softened it all up without obliterating the quilting, which makes me very happy.

Friends - a quilt

Here are a few before washing shots so you can compare.

Friends - a quilt

Aren't the fussy cuts from my bee mates great.

Friends - a quilt

There is the whole quilt before the wash.

Since I messed up my last binding choice I thought I might consult the internet. Of these three I am leaning to the Jungle Ave dots - far left. Any comments? #quiltbinding

I put this photo on instagram and flickr to get some help picking the binding fabric. You can read all the comments on instagram by clicking here and just click the photo to go to flickr. Another reason I named this quilt Friends is because of all the help from my internet friends in making these choices. In the end I went with the Jungle Ave. dot print on the left for the binding and I made no effort to match the dots exactly - I prefer the modern industrial look.

Friends - a quilt

Friends is 60" x 72" after washing. She pulled in 5" in each direction from the wash, probably due to all that quilting. This quilt is for me, I am hoping she will work well for nice summer naps.

A Lovely Year of Finishes 
Friends was my May goal in A Year Of Lovely Finishes, and I have managed to get her linked up with just seconds to spare.

Finish Along 2014

This quilt was also one of my Q2 FAL goals too, and so now I have 3 finishes off my very long list.

 Best,

Leanne

Friday, May 30, 2014

Thank you!

Reflection

This is a quick and heartfelt thank you to all of you for voting for Reflection. She has won the Scrappy Quilts Category at the Blogger's Quilt Festival. I am so honoured that she was also nominated for the Viewer's Choice award too.

Reflection is in fantastic company, congratulations to all the winners in all the categories and also in the other prizes, including many of my real life and blogging friends - including Krista, Poppyprint (I went shopping with Krista to pick the backing fabric for that wonderful quilt), Janet, What Comes Next (who I met at the VMQG meeting Krista took me to), Lucy, Charmed About You (who I met at the FQR in London), Anne, Spring Leaf Studios (who is in my Four in Art group), and Kati, From the Blue Chair (who I would love to meet and whose blog I have followed from the beginning) and Joanna, Shape Moth (who was my teacher at the FQR in London last summer).

You can read more about Reflection in my festival post here. I learned to make this block from the super talented and generous Linda Rotz Miller and, with Linda's permission, I posted a tutorial for making this block here.

Thank you to Amy, from Amy's Creative Side, for all her work on the festival!

I hope to have a quilt to show you tomorrow, before the end of the month as it is my project for May for A Year of Lovely Finishes - I finished the quilting tonight and now just need to finish the binding. I also want to show off the work of my Canvas pattern testers (the pattern will be on sale until the end of the weekend). Finally I have a binding tutorial almost finished too. Stay tuned.

Best,

Leanne

Thursday, May 29, 2014

Decipher Your Quilt - Oddball blocks


Jess, from Elven Garden Quilts, and I are back today to talk about deciphering some common quilt blocks that don't fit on a grid. It's my job to talk about the math and you can head over to Jess's post to learn how to spot these blocks.

Flying Geese

I am going to start with flying geese. From a math perspective, these are really cool special right angle triangles and you can use the Pythagorean theorem to figure out the length of their sides. 

However,  let me assure you that, as a quilter, you do not need to pay any attention to that math at all to make all sizes of flying geese. All you need to know is that you need the flying goose unit to be twice as long as it is high, plus 1/2" added to each for seam allowances. So quilters tend to make flying geese that finish in the quilt at 1" x 2", 2" x 4", 3" x 6", 4" x 8", etc. as these sizes are easy to calculate and make. (So the geese, unfinished are 1 1/2" x 2 1/2", 2 1/2" x 4 1/2", 3 1/2" x 6 1/2", etc.)


There are many clever ways to make flying geese, and useful rulers too. Flying geese are also often paper pieced. Today I am going to show you the simplest method I know. Start with your rectangle that is twice as long as wide plus 1/2 on both sides. My yellow rectangle, above is 2 1/2" x 4 1/2".

Cut two squares equal to the smaller measurement. My squares are 2 1/2". You can see that if you line the squares up with the rectangle that the two squares side by side are 1/2" longer than the rectangle unit.


Draw a diagonal line corner to corner on the back of the squares. Line up one of the squares with the coloured rectangle as shown.


Sew along the drawn line. Cut off the outer corner 1/4" from the sewn line.


Press the inner triangle of square open. Then line up the other square and sew along the line.


Cut off the other outer corner 1/4" from the sewn line.


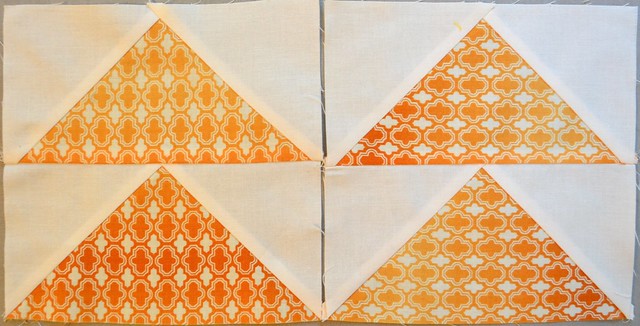
Press the second inner triangle open. You have finished your flying goose unit. If it needs a little trimming to return it to the 2 1/2"  to 4 1/2" size, go ahead and trim it. You can see that when you piece it into your quilt, the top point will be at the seam as it is now 1/4" from the edge.


Another thing to realize is that a flying goose unit is the same size as two HSTs of a similar size sewn together. So if I sew two 2 1/2" HST units together, I will get a flying goose with a line down the middle that is 2 1/2" x 4 1/2". However, to avoid the seam down the middle of the goose, quilters ofter prefer to make flying geese.

The next odd ball block that I am going to tell you about is quarter square triangles. There are more precise approaches, but my approach to making these handy units - which also are two flying geese, nose to nose - is to start with squares 1" larger than the unfinished size you want the units to be. You will have plenty of room to trim the blocks neatly with this approach.


Cut two squares, I used 3 1/2" squares. Place the squares right side together and draw a line corner to corner. Stitch 1/4" along both sides of the line. Cut along the line.


Press open. Do not trim at this stage.


Line the two HSTs right sides together and with opposite fabrics facing. In the photo above I have opened back the top HST so you can see how they meet on the inside.


Draw a line corner to corner, using the corners that are not already sewn, as shown.


Stitch 1/4" away from the line on both sides of the line. Cut along the line.


Press open.


Trim the resulting blocks to your desired size. I trimmed these two blocks to 2 1/2" squares. When you trim make sure you line the diagonal lines with the 45 degree line on your ruler. Do you see now how they are just two flying geese, nose to nose?

Log Cabins for Emily

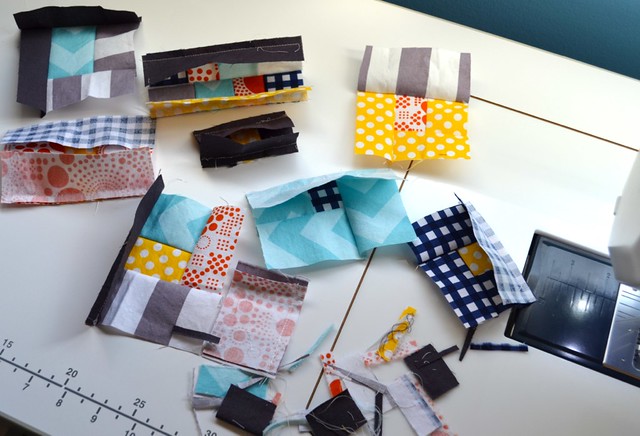
The math for a log cabin block is not hard but it is tricky to reproduce a block without any starting reference point. Usually, log cabin blocks are made with equal size logs and the logs are placed all round the inner square so that there is an equal number of logs on each side of the inner square.

So with those two blocks above, I can see that the inner square is larger than the logs. And I know that the blocks were 12 1/2" when they were done. So I counted the logs on each side of the square and see that there are 5 on each side of the centre, or 10 logs across plus the centre. Given that I know quilters like to keep the math easy, I would immediately assume that the logs are finishing at 1" and the centre is finishing at 2" - 10 x 1 = 10" + 2" = 12".  Since the final logs are sewn on only one side only, that leaves the expected 1/2" around the block for seam allowances.

Then I remember that each log and the centre square also need seam allowances so I know that the fabric used to piece each log will be 1 1/2" wide and the centre square is 2 1/2" wide. If you like to cut your logs all at the start, then you can look at the picture and figure out their length, always adding 1/2" to the finished length. Or you can measure the required length as you make the block and cut your logs as you go, which is more often what I do.

Also, given the number of logs in these particular blocks, I would caution you to use a carefully tested 1/4" seam allowance or before you know it the blocks will not be the correct size. If each log is even 1/16" out of size after it is added, by the time you add 10 logs horizontally and 10 logs vertically you will be out more than 1/2". So I also measure and trim my log cabin blocks with every round to ward against such a huge discrepancy in size from my plan to the end result.

Improv piecing - 2

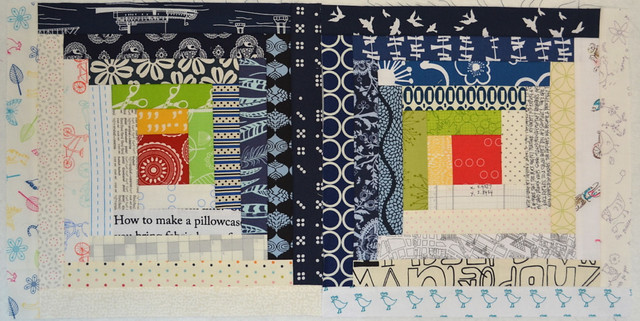
Another type of block that  Jess and I thought we would discuss in the oddball group is improv blocks. Often, there is no math for improv blocks as they are built freestyle and then trimmed to a required size for piecing in the quilt. The mathy thing to keep in mind with improv blocks is their proportions and scale, and you just eyeball those features - all of which are why I love improv blocks.

Remember to head over and read Jess's post on recognizing oddball blocks. And if you have any questions on this or any of the Decipher Your Quilt posts, just let us know. We will be back in two or three weeks with more deciphering.

Best,

Leanne


Friday, May 23, 2014

Such an honour!

Reflection

I am so honoured that Reflection has been nominated to be one of the finalists in the Viewers Choice Award at Amy's Blogger Quilt Festival - having my quilt picked by the people, as opposed to judges, is really the best thing that I could ask for. Thank you.

My festival post about Reflection is here. Reflection is in beautiful company. I have to say that I watched more than half the nominated quilts on blogs of my internet friends as they were made. I have no idea how you will pick which one to vote for, I want to vote for all of them.


AmysCreativeSide.com
There are so many fantastic quilts in the festival, I plan to spend a lot of my free time this weekend checking them all out. Please remember to head over to the festival to vote in all the categories, including the Viewer's Choice. Amy has outdone herself with the festival this year, there are stunning entries and wonderful sponsors and prizes - thank you Amy.

I am hoping to sew tonight, it has been a hard landing getting back to work this week and I am glad of the break this weekend. For all of you who have a long weekend, enjoy!

Best,


Leanne

Thursday, May 22, 2014

Quilt Market, Pittsburgh 2014 - overview


I went to Quilt Market last week. And today I will share a little about that trip to twice yearly trade show for the quilting industry. This is not a public event. It is a market for retailers and industry professionals (designers, authors, long arm quilters, etc.) to see a preview of the upcoming fabrics, patterns, books, quilting tools, etc. and to order them for retail sales.

I roomed with great women, Katy (The Littlest Thistle), Rachael (imagine gnats) and Allegory (a thousand needles). Spending time with them was, without a doubt, one of the best parts of Quilt Market. 

I met up with Becca (Sew Me a Song) and she graciously allowed Katy and I to tag along with her as she evaluated and ordered fabric for her shop. Becca is fantastic and I felt like she was an instant friend. I can assure you she is going to have some amazing fabrics arriving in her shop.

I met and talked with many talented fabric designers, bloggers, pattern designers, fabric manufacturers, sales reps, publishers, thread manufacturers, quilty tool manufacturers, etc. The folks at quilt market were all happy to share information and welcome me - the people of quilt market are really quite lovely.


I took a lot of photos on Sunday morning when it was quieter on the floor. There were too many photos to sort and edit for the blog so I just threw them all into a 9 or so minute slide show which I hope will give you a taste of the feeling of quilt market. It is viewed best in the smaller size and no need to click to youtube as it is not there yet (I might add that later). 


I will share more about the massive pile of fabric I bought at sample spree in the coming days and weeks. The sample spree allows you to buy fabric pre-cuts and some other items at wholesale or reduced prices and in advance of their release into the retail market. I will share more about these fabrics as I have time to really look at them and work with them - there are a lot of beautiful new fabrics coming out, its too bad that more would not fit into my suitcases (yes, I had two).

I am going to have to share other parts of Quilt Market with you over the next week or so. It was an overwhelming source of information and inspiration but I need some time to sort it all out first and to break it into smaller pieces for sharing.

And thank you to everyone who has purchased my new pattern, Canvas. I am going to extend the 50% off sale until the end of the month and show off some of the work of my testers this weekend. You can get a copy by following the links under the My patterns tab at the top of the blog.

Best,


Leanne

Friday, May 16, 2014

News - a pattern, a winner

I am so excited to let you know that the pattern for Canvas is now available for sale. For the first week, it is available for half price. You can buy it at my Esty shop here and use the coupon code CANVAS50 to get the discounted price. Or you can buy it here on Craftsy where it is listed at half price for now and I will put the price up to the normal level in a week (regular price will be $10.00 Canadian on Etsy, and $9.00 US on Craftsy, mostly because each has a view of whether I can use US or Canadian dollars for the prices).

My pattern testers, editors and technical assistants have done a fantastic job - thank you to them all again. Any remaining problems are my own. Should you see one, or have any questions, please let me know and I will do my best to help you out.


I drew the winner of the beautiful Oakshott Lakes bundle tonight from the Sew Mama Sew Giveaway Day. The winner is Donna W. I have emailed Donna and will be getting that bundle off to her as soon as I get home from Pittsburg.

Quilt market has been very fun so far but also totally overwhelming. I will share my thoughts and experiences with you but not until I get home, debrief and get some more sleep.

Best,

Leanne

Reflection, a Scrappy Quilt entry into the Blogger's Quilt Festival

Reflection

Welcome. I'm entering my quilt, Reflection, in the Scrappy Quilts category of Amy's Blogger's Quilt Festival. If you visit here often, I hope you don't mind seeing her again. She seemed like the perfect entry for the festival.

AmysCreativeSide.com

 Let me tell you about Reflection. She is about 53" square after a good wash and dry. Reflection was made from many different fabrics, so she is definitely scrappy.

Reflection - detail after washing

I quilted Reflection on my long arm machine using hand guided free motion quilting in an industrial modern quilting style.

Reflection - detail

The pattern for this quilt came from my friend, Linda Rotz Miller (you can visit her website here or her flickr pages here). Linda was making these blocks, which she said were inspired by Maaike Bakker's book Strip Pieced Quilts, and I was inspired to make some too. Linda is a fantastic quilt top maker, ongoing inspiration and a wonderful teacher, and when I asked she showed me how.

With Linda's permission I posted a tutorial for this quilt block here.

Reflection - back

For the back, I used some strips and lovely black print whose designer I have forgotten. The binding was made from some more of some of the prints used in the front.

Reflection - detail

This is another detail shot after washing. I have to say, that for me, the quilt and the quilting are just not finished until the texture has been added by the wash. Also, we use the quilts, and thus they need regular washing.

Reflection - detail before washing

That photo above is before the wash and in slightly different light. I so love the colours and fabrics in this quilt, some from the new True Colors lines, some from Botanics, some from my stash, many low volumes from a number of sources. I am not sure if anyone would call this design - which is, in essence, just a bunch of HSTs (can you see them) - modern, but this quilt feels very modern to me anyway.

Reflection - back before washing

The back before washing and turned the other way.

Reflection - before washing

And there she is before the wash and probably in better light. I use this cheerful quilt as the extra quilt on my bed most nights, although maybe as summer finally arrives she will be more needed for naps instead.

I hope you are enjoying the Bloggers Quilt Festival, it is always full of inspiration.

Best,

Leanne

Monday, May 12, 2014

Oakshotts for Giveaway Day


It's Giveaway Day at Sew Mama Sew. I have a beautiful bundle of Fat 1/8s to give away, courtesy of Michael Oakshott at Oakshott Fabrics. I have used Oakshott fabrics often in my quilts - if you are new here, you can check out the my quilts tab to see them, or look here, here, here and here.


This bundle of 12 fat 1/8s is called Lakes. Each of the 100% cotton fabrics is woven on a blue warp with different colours shot through as the weft. The challenge with these shot cottons is to capture in a photograph the shimmer that the different coloured weft threads creates. I went about looking for shining sun rays to help me out.


To win the giveaway, leave me just one comment per person and I will draw the winner randomly. Tell me about your favourite lake/ocean spot and why you like it or tell me about a lake/ocean location you are hoping to visit one day.


Please leave your email in your comment if you are not sure if you are a no-reply blogger (you can write it as yourname [at] emailservice [dot] com or whatever so that the email strippers won't recognize it if you are worried). If I cannot find you, you cannot win.


I'll close the giveaway on Friday May 16, 2014 at 5:00 p.m. PST and I will be drawing and contacting the winner by Sunday night. This giveaway is open to anyone in the world - I will send these fantastic fabrics to you wherever you might be.


I wish you all good luck now, as there are too many comments to answer during giveaways. Oh, and if you have not yet been, head over to Sew Mama Sew to enter all the other giveaways that will be linked there this week.

Best,

Leanne