Thursday, September 24, 2015

Pink - Ta Da! - Machine Quilting With Style Blog Hop

Pink

Here is a new quilt finish, Pink. The pattern is called Lightning and it is from my friend Christa Watson's new book, Machine Quilting With Style. Today is my stop on the blog hop for this great new book. You can read the story behind this pattern over at Christa Quilts today - go here.


I was very excited to be included in Christa's blog hop. Christa and I have become internet friends and we even got to meet in person at Quilt Market and at QuiltCon. She loves machine quilting, and you know I love machine quilting, she wants to encourage more people to show modern quilts at quilt shows, and so do I, well, you get the picture, she is a kindred quilty spirit.

Pink

Christa asked many of the participants in the blog hop to make one of the quilt patterns in the book and I chose the pattern called Lightning. I have never made a rail fence quilt, and Christa's modern twist on this traditional pattern caught my eye. My version is about 60" square, the pattern in the book includes instructions for a full bed size version.

Pink

Although the book has a number of lovely modern quilt patterns, I especially loved the parts that focus on the quilting. For my quilt, I used two colours of thread, a light pink for the stipple/meander quilting on the pink parts and a soft grey for the lightning bolts. Both my choices were Superior Threads King Tut 50wt cotton threads. I love how the colours add just a little extra to the quilt.

As you can see, I used a stipple/meander quilting pattern for all the pink areas, just as Christa suggests in the book. Originally I thought I would change the quilting for each stepped diagonal part of pink but I was having such a great time stippling that I decided to stick with it.

Pink

I took some photos in harsher light to purposely show off the quilting more. You can see that I decided to try a number of the other quilting patterns Christa features in Machine Quilting With Style in the grey lighting bolts. I used switchbacks - a design that I use often and love.

Pink

Pebbles, a design I love but seldom use as they are time consuming. But I love they way pebbles look and realize I want to use them more.

Pink

I used boxes - a square meander - which is another favourite quilting motif of mine.

Pink

Of course I used parallel lines, perhaps my very favourite quilting motif of all.

Pink

I did my best to give the quilt an overall balance of quilting density. The lightning bolt areas are a bit denser but not extremely so.

Christa shares a number of excellent tips for walking foot and free motion quilting in the book. A reader could easily work through the patterns and the quilting motif and become a proficient quilter by the end.

I wanted to mention that I quilted Pink on my long arm quilting machine, not my domestic machine. I was able to easily use all the quilting motifs and I think my quilting is much like that done on the home machine for these patterns. My only challenge on the long arm was working diagonally down the quilt - there was a fair bit of advancing and then returning the quilt to the earlier position to begin again. I had not done that before and I learned that it was no big deal to do so. All in all, Christa's book is, in my view, useful for most every quilter.

Pink - back

I pieced my back with some of my favourite Laura Gunn prints. I have been saving her painterly prints and was happy to see how well they worked with this quilt top. As I used the same pink and grey thread in the bobbin, you can see how the lightning bolts stand out on the back of the quilt too.

Pink - back

All of the photos in this post are before the quilt was washed. I have since washed her and may add a photo of it washed later. But since the book is about quilting, the better photos of quilting are before the wash induced crinkle happens.

Pink binding detail

I bound this quilt with this lovely Maker print. I was originally thinking of a scrappy pink binding but I am glad I went with this one print instead. It seems to gently hold all the scrappy riot in the quilt.

Pink

I have to say that I am likely to make more quilts using Christa's pattern and her quilting tips as a starting point. You can get a copy of Machine Quilting With Style on Amazon here.

I have an electronic copy of this fantastic book to give away as part of the blog hop too. To enter, leave me just one comment. Let me know if you are a confident quilter - as opposed to piecer - and if you like the quilting part. I will randomly draw the winner at 6 am MST (first thing) on Saturday morning.

Pink

Christa is going to host a quilt along and you can help her chose which pattern from the book to use by competing the survey here.

And here is the full blog hop schedule - there are many inspiring posts along the way for you to check out.


Plus, there will be additional stops on the hop from the awesome people listed below. They will be sharing their insights including book reviews, interviews, sample blocks, and other interesting content you won’t want to miss.
I have truly enjoyed Machine Quilting With Style and I expect you would too. And Pink, well she is just so pretty, I am loving her too.

Besides entering my giveaway for an electronic copy of Christa's book by commenting on today's post, head over to Christa Quilts for links to a couple of other giveaways too. And several of the blog hop stops also include giveaways too, in addition to inspiration.

Edited: My giveaway is now closed.


2015 FAL at On the Windy Side

Pink was also on my Q4 Finish Along list!

Best,

Leanne

Tuesday, September 15, 2015

September Scraptastic Tuesday Winners


All I have for you today is the winners of the September link. I have nothing new to share as I did not manage time to use my scraps or organize my scraps since last Tuesday, and since long before that. I am easing into my new routines with this house move and I'm gathering a list of scrappy projects, including those inspired by the fantastic links, but actual sewing using the scraps is on the to do list.

So instead, let's get on to the winners. First, thank you to our fantastic sponsors:


Here are the prizes and the randomly awarded winners (I use random.org) from those of you who linked up:
I'll be sending out emails this morning between errands and day job work to get our lucky winners connected with their prizes.

Thank you to everyone who joined Nicky from Mrs. Sew and Sow and I for the September Scraptastic Tuesday link. As I said, I am enjoying checking out the links and the inspiration you are all providing. Our next link will open the second Tuesday of October which is October 13, the day after Canadian Thanksgiving this year. 

Best,

Leanne

    Monday, September 14, 2015

    Monday, Monday, this and that

    Scraptastic Tuesday

    First, please don't forget to link up a scrap project in progress or completed or your scrap management tips to the September Scraptastic Tuesday link up - only one per person. The link closes tonight (Monday) at 10:00 p.m. MST and I will post the winners on Tuesday morning. (go here to link up)


    Next, I am participating in a blog hop for Christa Watson's new book, Machine Piecing With Style. It is truly a lovely book filled with great instruction in quilting on your regular sewing machine and also lovely projects.

    The hop starts today and here is the schedule so you can check out the stops:
    Plus, there will be additional stops on the hop from the awesome people listed below. They will be sharing their insights including book reviews, interviews, sample blocks, and other interesting content you won’t want to miss.
    Quilted

    My quilt for the hop - my pattern is Lightning - is almost ready for photographs and its big reveal on the 24th. I finished the quilting this past weekend. It was so wonderful to be actually quilting again, I have missed it so much.


    Last, I signed up to go to Sew Pro, which is a conference next September. It is not a sewing retreat, it is all about taking your blogging, writing, pattern designing and fabric designing to the next step. The instructors are fantastic too. I don't suppose any of you want to come to Chicago next fall too?

    I've a lot of day job work this week and then I have a quick work trip at the weekend. But I have lots more to share to catch you up, so watch for more here on that.

    Best,

    Leanne

    Tuesday, September 8, 2015

    September Scraptastic Tuesday Link up is open!


    Scraptastic Tuesday

    Surprise, it's the second Tuesday of the month, and time for the Scraptastic Tuesday link up hosted by Nicky - Mrs. Sew and Sow and me. We are a bit late out of the gate today as the second Tuesday of September snuck up on us a bit, this being just September 8 and all.


    I have to admit to no scrap project to share and no tips this week. I have that space in the photo, beside that brown shelf where some things have been piled up. It is supposed to have my scrap bins at the bottom and batting on the wall to be a design wall, but that has not happened yet.

    My only "tip" this week is finish your unpacking when you move and place your scraps in a handy location. I have many scrap projects that I want to work on and start and I am hoping for more inspiration from your links. Hopefully I will have something good to share next Tuesday.

    Now, its time for you to link up and share your scrappy projects to inspire us all.


    A huge thank you to our generous sponsors for providing the following prizes which will be awarded randomly among those of you who link up:
    • Massdrop - a 100 pack of Wonder Clips
    Please join Nicky from Mrs. Sew and Sow and I by linking up a blog post or flickr or instagram photo sharing a scrappy project, in progress or finished, or your thoughts on dealing with your scrap mountain:
    • You don't have to have joined us before, everyone is welcome.
    • One link per person, and it will be your entry into the random draw for the prizes. It is the same link up here and at Nicky's blog - Mrs. Sew and Sow - so you only need to link up on one of our blogs.
    • Please visit at least a few of the links, they are very inspiring, and leave comments too as everyone loves to connect. 
    • Use the Scraptastic Tuesday button if you like (code is on the sidebar) and invite your friends to join us too. 
    • The link is open until next Monday night at 10:00 pm MST. We will announce the winners next Tuesday. 
    • If you have trouble linking up, let me or Nicky know and we will get you sorted.

    Best,

    Leanne

    Sunday, August 30, 2015

    Paper piecing - a mini tutorial

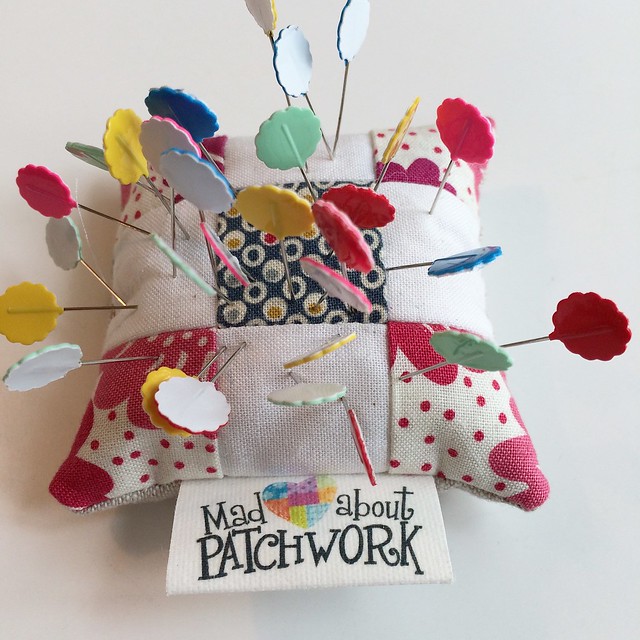
    Pincushion

    I don't have all my usual pincushions unpacked, but I did unpack this tiny one from Mad About Patchwork. They sent it to me for shopping at their sidewalk sale (I think it was a sidewalk sale, but I shopped on line) last summer. It is nice as it is filled with some kind of heavy sand item and stays put. So I loaded it with flat topped pins. I use these pins to position and hold the first piece of fabric when I paper piece, as one can fold over these pins and iron over them. Of course the ironing seems to contribute to the flowers falling off the pins so try to avoid that part.

    paper piecing

    My styles of paper piecing is messy and wasteful. I have had several great paper piecing teachers, who are mostly more careful than I am, so my style is an amalgamation of what they have shared and what works for me. Too much fuss and bother does not work for me.

    So here is a mini tutorial of how I approach paper piecing.

    Paper piecing mini tutorial

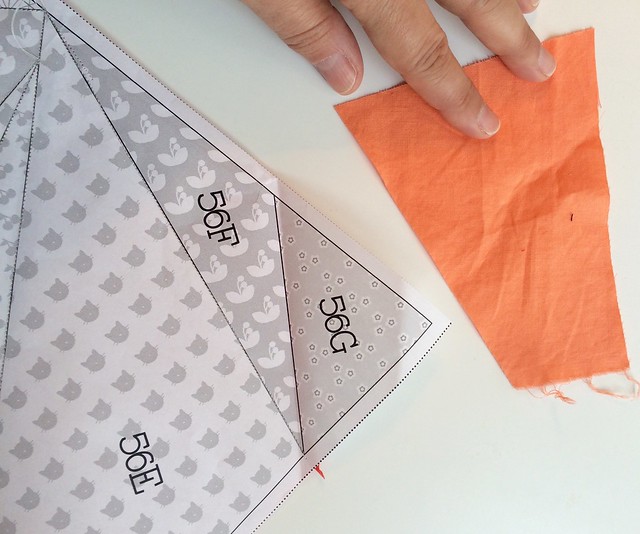
    I look at the piece to be added - here 56G - and I look for a scrap that is about the right size. If I have none, I then cut a new strip off the yardage. I generally cut the new strip the width I need or about 3 - 6" wide. Then I would likely bring the whole strip, or cut a chunk off of it. In the end most of the scrappy bits fit somewhere, at least that is how it is working so far.

    Paper piecing mini tutorial

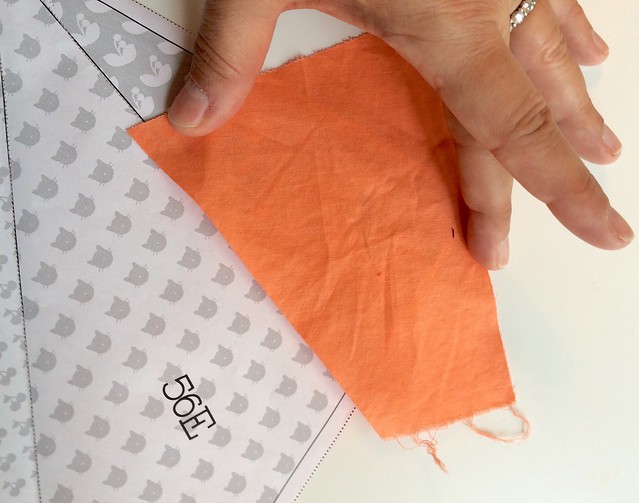
    When the fabric piece is close to the size I need, I do check to make sure there is extra.

    Paper piecing mini tutorial

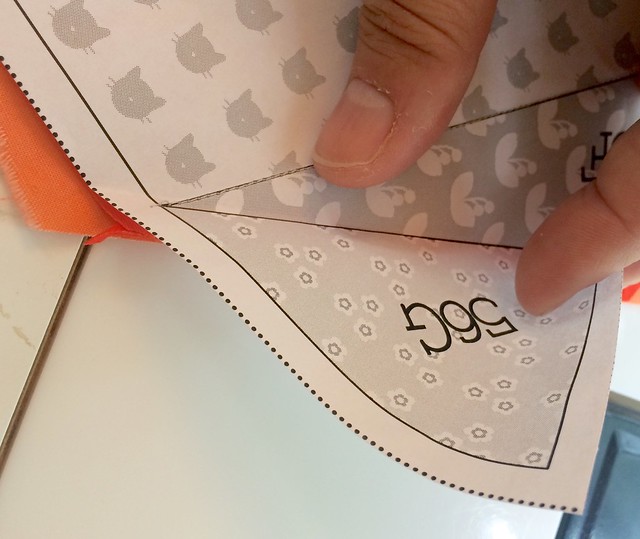
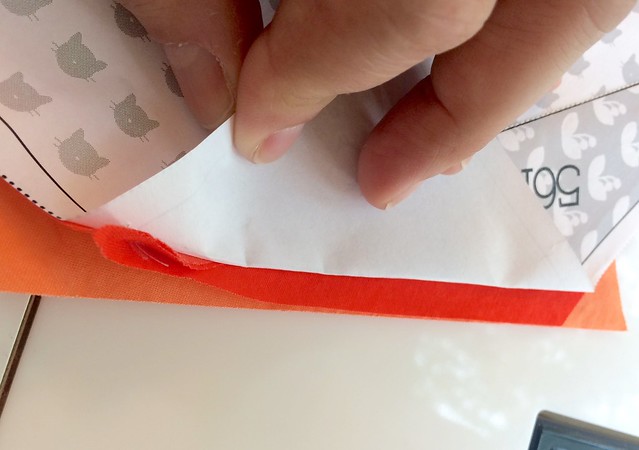
    To sew it on, I first fold the paper back on the sewing line and trim the last piece attached so that it has a 1/4" extra over the stitching line. Here that would be piece 56F.

    Paper piecing mini tutorial

    You can see piece 56F has been trimmed (the darker orange) and then I line a straight edge of the new fabric piece up with the edge of the earlier fabric piece. This gives that stitching line a 1/4" seam allowance for both fabrics. If my new fabric piece does not have a straight edge I cut one on it.

    Note, if you are not working with solids (which are the same on both sides) you need to place the new fabric right side facing up to meet the right side of the previously sewn fabric. And for the very first piece, it is right side facing down, away from the paper.

    Paper piecing mini tutorial

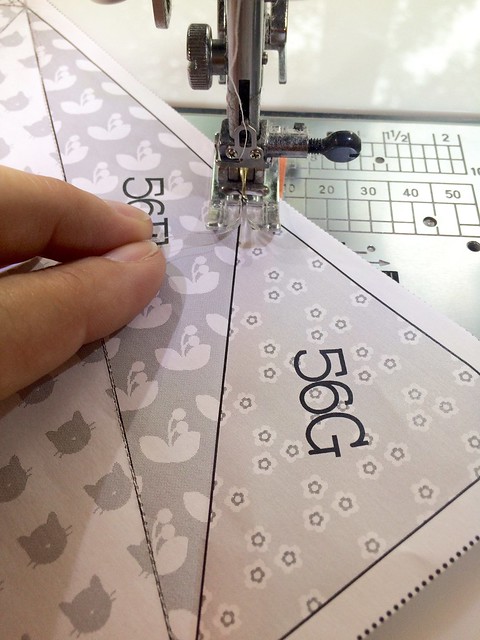
    I bring the fabrics and paper to the sewing machine and stitch the marked line. I have set my stitch length to short (I move to 1.7 from my usual 2.2 on my Janome Horizon) so that the stitches unravel less. I do not back stitch or lock stitch and I try to start at the start of the actual line and end on it too.

    Paper piecing mini tutorial

    Once I stitch I check to make sure that the fabric, when opened, will cover the entire area. If not, I rip it out and do it over.

    Paper piecing mini tutorial

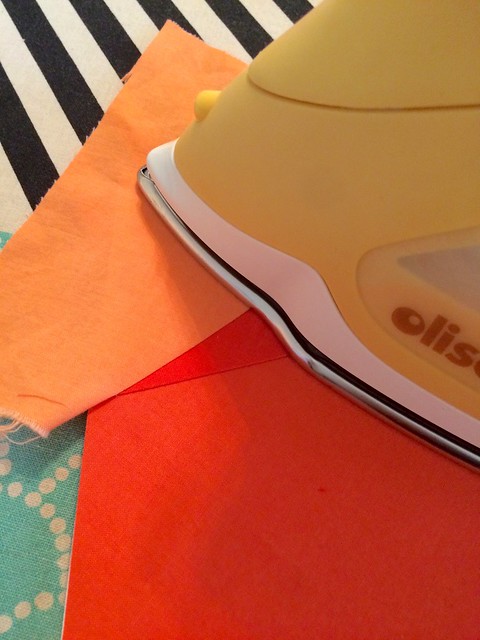
    I press every single addition. It is worth the time as then the finished piece has all the fabric the right size with no small bubbles and bumps that can be added if the fabric is not pressed flat.

    Paper piecing mini tutorial

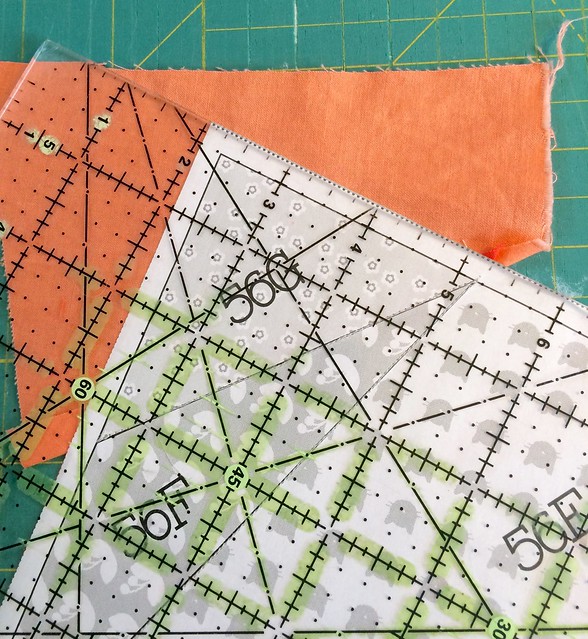
    Then I trim the piece. In this case it was the last one on the paper so I trim the outside edges. I use a ruler, every time, to do this. The point of paper piecing is accuracy, so I use the tools that make that happen.

    Paper piecing mini tutorial

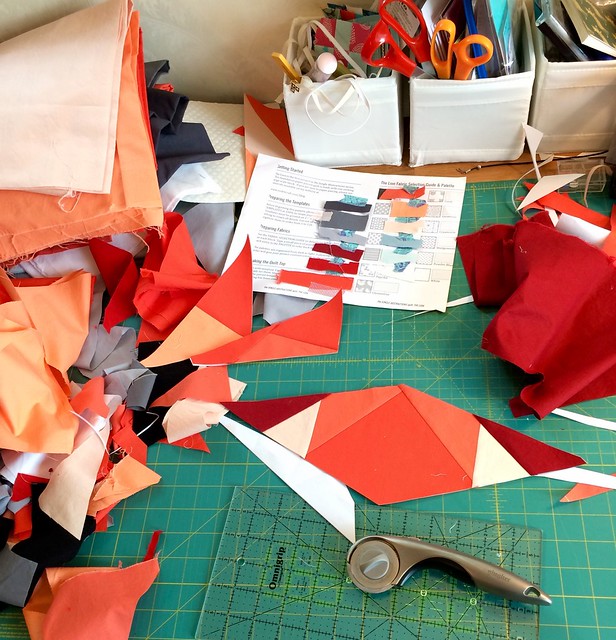
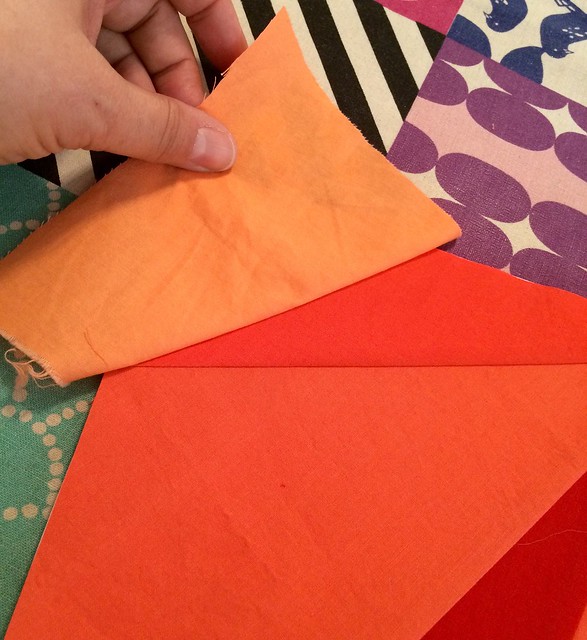
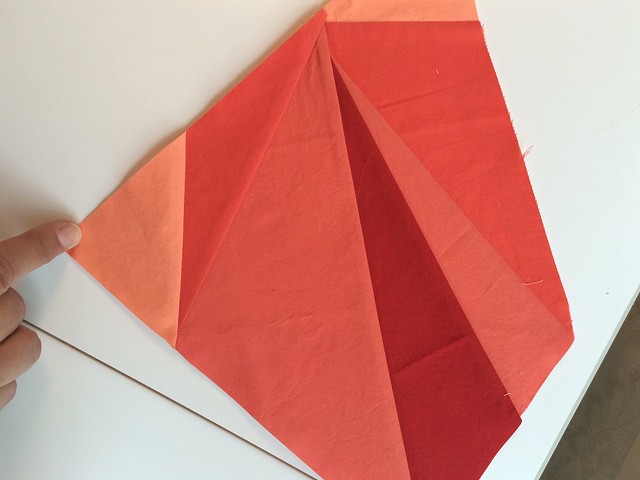
    Here is the whole piece, including the one I just added. You can also see the different reds and oranges - the contrast is hard to photograph well, especially with my iphone, which is how I took all these photos.

    I know that this mini tutorial does not answer all the questions, so if you have more leave them in the comments and I can do an update or if you are a commenter I can reply to I can discuss it with you by email too.

    Jungle Abstraction - the Lion

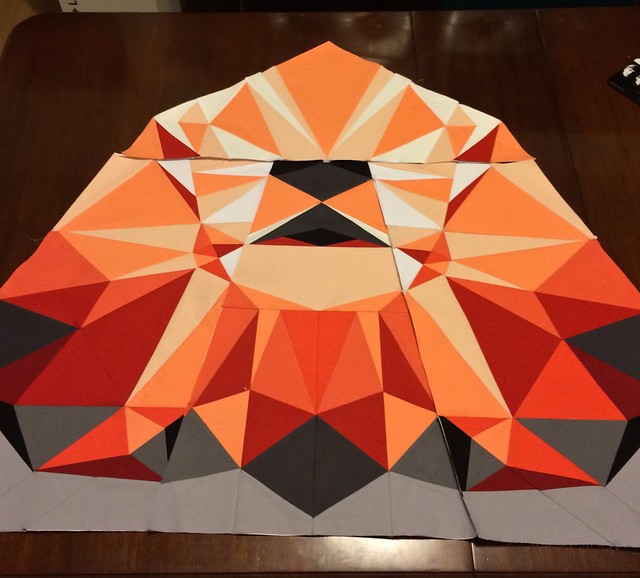
    That is the photo of my progress on this pattern as of Friday night. I thought I would share it again as it was added to Flickr Explore.

    The pattern is Jungle Abstractions, the Lion, by Violet Craft. I have not yet joined the bits I pieced on Saturday so I don't have a new photo of my whole progress so far yet, but I can tell you I am half way through the pieces. In the end, the paper piecing will join together to make a 60" square - a very big paper pieced lion.

    I am off to unpack and sew and maybe do some getting ready for University shopping for my boys today.

    Best,

    Leanne