Sunday, March 23, 2014

This and that and a winner

Decipher Your Quilt - blocks

Good morning, as I write this post I am still drinking my morning coffee. Yesterday I made some more blocks for Decipher Your Quilt - you can see a few nine patches for next week's post. If you decipher some blocks while you follow along the DYQ series, please share them with us in the flickr group.

By the way, I have found that a greater focus on careful cutting and an accurate 1/4" seam (not scant either) sure makes the points and seams line up nicer and keeps the points from getting lost in the seam allowance.

Blended Scraps Blocks - tutorial 7

Yesterday I shared a tutorial for making the Blended Scraps Blocks, and this morning I saw that the picture above was in flickr's explore. So far 3,152 people have viewed it - do you think that they all, deep down, want to make quilts?

Hobo blocks for Hettie

On Friday, I sent these cute 6.5" hobo quilt blocks to Hettie for Always Bee Learning. These simple blocks were relaxing to make and she will have a wonderful quilt full of hobo history in the end.

The winner of that fantastic bundle from Sew Me a Song is #87, Jackie. Congratulations Jackie, I will email you shortly. Thank you Becca and Sew Me a Song, for the wonderful giveaway and thank you to everyone who entered, I have been enjoying your comments.

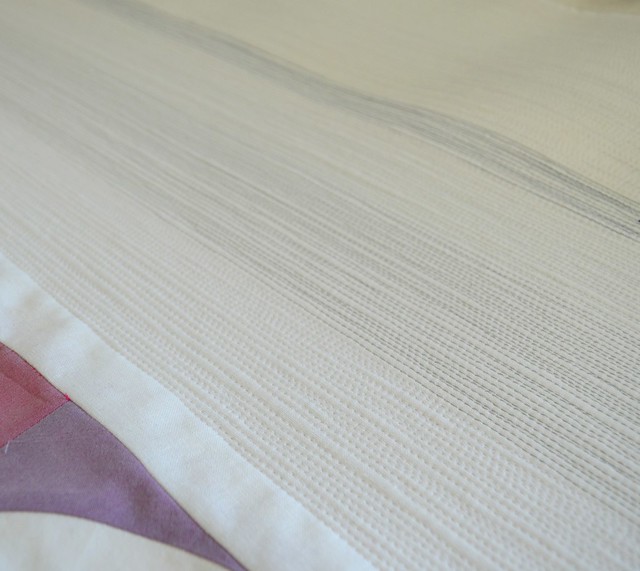
My Millennium long arm has a black light so I can see white thread on white fabrics, and it makes a huge difference. #apqs #millennium  #matchstickquilting

I have been matchstick quilting Snowfall. I am learning about how different kinds of thread work on my Millennium long arm machine, how to move with the machine and not wobble it, the importance of good posture and such. Last night I was using white thread which was hard to see on the white background. I remembered that this machine has a black light and it works. The white thread glows blue. As one of my instagram friends suggested, all I need now is a disco ball and to crank up the music.


Finish Along 2014


By the way, it's time to pull out your Q1 Finish A Long list and see where you stand. I have another finish to share, hopefully tomorrow.

Enjoy your Sunday, I have some more matchstick quilting to do.

Best,

Leanne

Saturday, March 22, 2014

Blended Scraps Tutorial - or how I made Reflection

Blended Scraps Blocks - tutorial 7

Today I am going to show you how to make the Blended Scraps Blocks that I used to make Reflection. These blocks are easy and fun to make.

The Blended Scraps Block came from my friend, Linda Rotz Miller (you can visit her website here or her flickr pages here). Linda was making these blocks, which she said were inspired by Maaike Bakker's book Strip Pieced Quilts, and I was inspired to make some too. Linda is a fantastic quilt top maker, ongoing inspiration and a wonderful teacher, and when I asked she showed me how. Thank you to Linda for letting me share this tutorial with you.

Blended Scraps Block - Tutorial 1

Cut 5 strips that are 2" long by about 17.5". A strip off a fat quarter works nicely or half of a strip off of yardage. Arrange the strips in a colour gradation.

Blended Scraps Block - Tutorial 2

Sew the strips together and press. You want to make sure you are achieving 1/4" seams so that the strips end up 8" wide. I press the seams open because I find that easier for later matching of the seams when I sew the triangles together.

Blended Scraps Block - Tutorial 3

Cut two 8" squares from the strip set. To keep the resulting triangles consistent, I always put the darkest strip at the top as I cut.

Blended Scraps Block Tutorial 4

Cut the first of the 8" squares into a HST triangle along the diagonal, corner to corner.

Blended Scraps Block - Tutorial, 5

Cut the second 8" square corner to corner along the diagonal, but on the opposite diagonal. For consistency, I cut a V.

Blended Scraps Block - tutorial 6

You could use strip sets that were just long enough to make one 8" square at a time. Just remember then to cut half of them on one diagonal and half on another. It would probably be easier to make them and then cut them in pairs.

Smaller length strip sets could use up more scraps and just add more variety to the quilt. Also, I want to try a version with wider strips, maybe 2.5" to start and then you need a larger square - one using the width of the strip set as its measurement. A wider strip set means that you can only get one square from a strip set made using a strip off of a fat quarter.

Reflection

To get the effect of Reflection, arrange the triangles as you see below. Then I sewed them together in rows after I had laid out the whole quilt. But it would be just as easy to sew them together in the diamond shapes as you go.

These blocks can be arranged in any way an HST can be arranged, so the possibilities are endless. If you visit Linda's flickr or website, you can see some of the different arrangements she has used.

Blended Scraps Blocks - tutorial 7

Just be careful with the triangles once they are cut. Strip sets are by nature easy to stretch and given that the diagonal cut is on the bias, these triangles are very easy to pull out of size. If you handle them with care (and don't press them much after they are cut) you will be fine.

I am going to be making another Blended Scraps quilt laid out like Reflection. I am not sure what colours I will use yet, except for sure I am using those blue blocks above. Maybe you will join me in making a quilt too and if enough people want to do so I can make us a proper quilt along with a button and maybe a couple of prizes for finished quilts in reasonably leisurely time down the road. Let me know.

If you make some Blended Scraps Blocks or a quilt with them, please share them with me in my new Flickr group, Inspired by Leanne, she can quilt. Also feel free to post any other projects inspired by my work or made from a tutorial on my blog. And do consider joining the group too just to see what people might share, it's a little lonely over there right now.

By the way, you have until tomorrow morning at my house to enter the fantastic giveaway sponsored by Sew Me a Song - go here, you don't want to miss out on the chance to win those beautiful Japanese fabrics.

Best,

Leanne

Thursday, March 20, 2014

Decipher Your Quilt - the calculations behind the 4 patch block


Today it's my job to explain the math behind the 4 patch - you might have noticed that I have been avoiding that word math in this series, but I guess we all need to face up to the fact that quilts involve a bit of geometry and arithmetic. I hope you will not close the page, and instead stick around to see how easy quilt math actually  is.

Jess, from Elven Garden Quilts, will be explaining how to recognize 4 patch blocks in quilts and showing you a nice variety of 4 patch blocks - this week we have divided up the deciphering work.

As I tell you about 4 patches, I am also going to just tell you a bit about quilt blocks in general. And before that I must say that these are my thoughts and approach, I have no idea how the quilt police would view them. But I am hoping that you will find them helpful and interesting. And I am going to just randomly insert pictures of quilts and projects I have made with 4 patches. I hope you can recognize them, remember to check out Jess's post on how to do so.

Earth, a colour study in green

Quilt blocks are often squares

I can think of several reasons for this:
  • Squares have the sides of all the same length, so I can turn my square block any which way and it will fit into the grid. That means I don't have to decide which way is up when I make the block, instead I have options for its placement
  • Squares are easy to divide up - and squares fit easily inside of bigger squares. 
  • Squares are easy to decipher.

DSC_0354

Let's look at those 4 patches. Since we know that quilt blocks are usually square, we can look at those and even if they are turned or slightly off centre, we can see enough to confirm that they are square. The simplest 4 patch is made up of 4 equal parts  - and when you divide a square into 4 equal parts you get 4 squares.

Reflection

But how do I figure out how big the 4 patch is?

There are some more things we know about squares:

  • Since we know that all the sides of a square are the same length, and we can see that the 4 squares in the 4 patch block are all the same size, geometry tells us that the length of the side of the inside squares is half the length of the side of the resulting 4 patch.
  • So, if the inside squares were 1" squares, then we know that the resulting 4 patch unit must have sides that are 2" (2 times the inside square's 1" side). Or if we knew the resulting 4 patch was 12" then we would know that the 4 inside squares have sides that are 6" - half of the 12" length of the entire block.
  • Often there is a clue to the size of either the four patch block or the inside squares that you can use to figure out the rest. For example, if I told you that my quilt was 36" across and you saw there were three blocks on that side you would be able to divide 36 by 3 and then know that each block was 12" square. If those blocks are 4 patches, then you will also know that the four square units in the 4 patch are 6" on a side.
  • By the way, we will have a post about how to figure out the sizes for blocks set on point, like Reflection appears to be but actually is not (do you see how she is both HSTs and uses a 4 patch block made up of 4 HSTs set in a diamond shape? And yes, I will show you how to make Reflection, just as soon as I have time to take some photos and write the tutorial, I promise.)

What about those 12" blocks  - why do quilters use them so often?

You might have noticed that in most quilt patterns you see 12", 10", or 6" blocks the most, and sometimes 20" or 24" blocks, and of these the most frequent is 12" blocks. The reason for that is again about math - 12 has a lot of factors. That is 12 can be divided by 1, 2, 3, 4, 6 and 12. The more numbers that easily divide into a number the easier it is to do the quilt math. Those other common blocks are also sizes with numbers that have more than two factors.

Quilters are smart, so they pick easy math, I think mainly because easy math makes for easy cutting and easy cutting makes for accurate cutting and accurate cutting makes for nicely shaped blocks with pretty points and seam joins. As a result, it is very often safe to assume the blocks you are seeing in a quilt are 12".

Pillow Back #13

WAIT - don't forget the seam allowances!

Here is the big trick about quilt math, at least in my view. First figure out the block and do the math. Only after that is done do you add the seam allowances. You can, of course, do all the math with the 1/4" seam allowances added in but that makes for math with fractions - not easy math. Don't make it hard. But then, it is critical to make sure you don't forget the seam allowances before you start cutting your fabrics.

Quilter's use a 1/4" seam - I believe that is because all the seam allowances add weight to the quilt and since you are quilting it, the thinner seam allowances are not likely to lead to the quilt falling apart if they unravel a bit because the quilting on the quilt holds everything together well.

Mouthy Stitches zipper pouch - all done

How do the seam allowances get added to the calculations of the block?

The simple rule, for quilts which use a square or rectangular grid - is - add 1/2" for every seam  and 1/2" for the seam that will be on the edge of the block when you sew it into the quilt. 

You add 1/2" for each seam because when you sew together two pieces using a 1/4" seam allowance, the seam allowance now has two 1/4" from your units folded under the block. However, I find it easier to think of it differently, rather than worrying about the 1/4" from two different fabric pieces, I think of it as each fabric piece have 1/4" on both sides of it used up for the seam allowances when it is sewn in for each direction. So for each piece of fabric sewn into a block you need to add 1/2" onto its width and its length.


Low volume triangles
(This quilt top was actually pieced as pinwheels with the darker of the low volume fabrics making up the pinwheels - it is a bit hard to see them and I really need to finish this one, don't you think? By the way, when you look at this quilt and then look at Reflection, maybe now you see how Reflection's blocks are put together once the strips are pieced and cut into HSTs)

The deciphering process is:

  • Figure out the size of the block - often it will be a 12" finished block. 
  • Figure out the size of the units - a 4 patch made of four squares will have sides that are half the size of the finished block. Each of the 4 patch squares will be one quarter the entire size of the block.
  • Add 1/2 for each seam that will be sewn. So for the 4 patches made of 4 squares - if the finished block is 12", each square will be 6.5" square and the unfinished block will be 12.5" square.

Butterflies - done


What about 4 patch blocks that are not made of squares?
  • If the units are squares when they are done - for example, the unit is a HST, then you can calculate the size of the finished unit and use that to decipher the inside unit. If the HST is trimmed to 6.5", you will want to start with fabric squares that are 7.5" - have a look at last week's post on this.
  • If the units are rectangles, that finish as a square, such as rail fence blocks, count how many rails there are. If the block finishes at 12" and there are 4 equally wide rails, then each rail will be 3" wide finished so you need to use four 3.5" wide strips to make each block. (12 divided by 4 = 3, 3+1/2"= 3.5" wide strips).

DSC_0359

A four patch project

I made a set of napkins from those pretty four patches I showed you earlier. I used four squares that were cut out to be 4". Did you quickly realize that the 4 patch block in my napkins is 7" square (4 - 1/2" seam allowance = 3.5" x 2 = 7"). Because I was adding the 4 patch by itself to a 14" napkin, I just used squares a size I liked, but you can see why this is not a standard size - no one really wants to have to be multiplying by something and a half to do their quilty calculations.

Napkins

The napkins are cottons from my Fluffy Sheep Quilting blogger bundle and Essex Linen on the front and a plain Essex Linen back. They are a bit heavy, my next set - I still have all those other 4 patches from the picture earlier - will use linen only on the front or the back but not both. If you want to make some napkins decorated by a 4 patch, you can always use my napkin tutorial which is here and then adapt it by deciphering your own 4 patches to add to the napkin. You might want to add a bit of quilting over the 4 patch to keep it from fraying from frequent napkin washing - I sewed up and down the seams of the 4 patch.

DSC_0362

If you have not yet read Jess's post about how to identify 4 patch blocks, head over to Elven Garden Quilts now to do that. And if you make some napkins or one of Jess's blocks or project, please share it with us in the flickr group or on instagram using the hashtag #decipheryourquilt.

If you have questions, include them in your comments and I will do my best to answer them. Next week for Decipher Your Quilt we have 9 patch blocks - my favourite blocks of all.

And don't forget to enter the wonderful giveaway sponsored by Sew Me a Song, its here.

Best,

Leanne

Tuesday, March 18, 2014

Featuring Sew Me a Song and a give away


Today I have a wonderful give away from my sponsor Becca at Sew Me a Song. Look at the beautiful bundle of Japanese fabrics by Yuwa, Lecien and Diawabo - they are just perfect for a spring quilt.

For those of you who don't know Becca's shop, I encourage you to go and have a look around - you can go now, but come back to enter the giveaway. She curates the most amazing collection of unusual Japanese and other fabrics, most of which I don't see at the other shops.

I asked Becca a bit about herself. She began in the online fabric business with Peg as part of Sew Fresh Fabrics, but then her family moved to Maine. Becca's response was to start a new fabric shop and Sew Me a Song was born. Becca made a clear decision with Sew Me a Song to stock unusual and quirky fabrics not found in other shops. I sure think she has done that.

Becca connects with the online community through instagram and twitter (she is @sewmeasong) and she is a quilt guild member. She is excited to be expanding her shop space and is hoping to set up some in person sewing time there in the near future. I sure wish I lived closer to her so I could drop in.


To win that fantastic bundle - thank you Becca - all you need to do is leave me a comment - please stick to one comment per person. Tell me something that you would love to see on my blog or what you like to shop for online or what is making you smile today.

I will draw the winner randomly on Sunday morning when I wake up, get your comments in by then. And please make sure I can contact you. A number of you leave no-reply blogger comments on my blog all the time, and it is too bad because if you connected an email to your profile I would send you an email (probably late, but eventually it would come) in reply to your comments (except for giveaways as there are just too many for me to keep up) and we could get to know each other a bit better over time. But for a giveaway, if you are no-reply make sure you leave an email in your comment. If I cannot reach you I will just draw again.

DSC_0367

I'm pattern writing and matchstick quilting this week, and I have some bee blocks that must be finished tonight. The unquilted bit in that photo is about 1.5" to give you some scale and you can catch my progress on instagram too.

Do come back on Thursday for Decipher Your Quilt - I will share the calculations behind 4 patch blocks, Jess will be sharing all about how to identify 4 patch blocks and many different varieties of them. We both have a practice project or block for you too.

Best,

Leanne

Monday, March 17, 2014

Earth - Ta Da!

Earth, a colour study in green

This is Earth. I truly am delighted with this quilt, and she is for my youngest niece so that makes her even more special. She is about 65" square after washing and was made with various Kona greens and Kona snow. The binding is snow too, and she has a nice flannel back which I forgot to photograph.

Earth, a colour study in green - detail after washing

Earth was hand guided free motion quilted on my Millennium long arm. I am learning to mention that hand guided thing, because long arms can be computer guided - I did not buy the computer so that is not going to happen - or one can use a pantograph and follow the design on it with a laser, which again is not really my interest.

Earth, a colour study in green - after washing

These first three photos are after she was washed and dried. One of my worries was that the detailed quilting on a long arm might disappear into mush when the quilt was washed and I am so happy to see that does not happen. You have seen me try most of these quilting designs before but the bottom two - lightning and ocean waves (those are my names) - are new to me.

Earth, a colour study in green - detail before washing

These next photos are before the wash and you can see the difference that washing makes in terms of the texture of the quilting. The biggest difference is on the stipple, which I used for all of the white edges, but it crinkles in the same way it does when I use my regular sewing machine. I have to tell you that stippling is really easy and fast on the long arm.

Earth, a colour study in green - detail before washing

I wanted to show off this quilt for St. Patrick's day. I put a photo of her up on Instagram on Saturday and everyone liked her there.

Earth, a colour study in green - detail before washing

I am going to write the colour study quilts as a pattern with several different sizes. You can see my first one, Radiant Orchid Colour Study here. I hope to get that done by the end of the week. I know this is a very simple pattern but several folks have suggested that it still would be of interest, and I will do all the math for you.

Earth, a colour study in green - detail before washing

I would love to have a couple of pattern testers - all I can give you is a free pattern and my never ending thanks - so if you are interested let me know.

Earth, a colour study in green - before washing

This last photo is before she was washed and before I figured out how to hang her higher the photos. My favourite quilt holder was away on the weekend so the fabric cupboards had to do.

Happy St. Patrick's Day! Oh, and tomorrow I have a sponsor give away from Becca at Sew Me a Song, so do come back for that.

Best,


Leanne